
Introduction
The Beast is a high-power aerial photography multirotor, built when my first Drone was considered completed. As me and my friend had a need for a large payload drone, we decided to make two large drones with few specialized commercial operations in mind. Special thanks go for my friend, Heikki, who provided me all the electronics required, for two of these aircraft. (Thanks! 😉 ) This blog post is about the difficult task of building a huge octocopter and later revising it to make it more easy to transport and use.

Design goals
- Simple construction that is easy to repair using hand tools
- Made using easily available cheap materials
- Capability of payload up to 3-5 kg
- Rugged construction
- Mechanical steadycam-like camera stabilizer on-board as a default payload
- Different payloads such as a brushless camera gimbal, extra batteries, thermal cameras and like must be easy to attach
- Unobstructed view for the camera
- Camera free of vibrations
- Stability
- Waypoint and mission capability
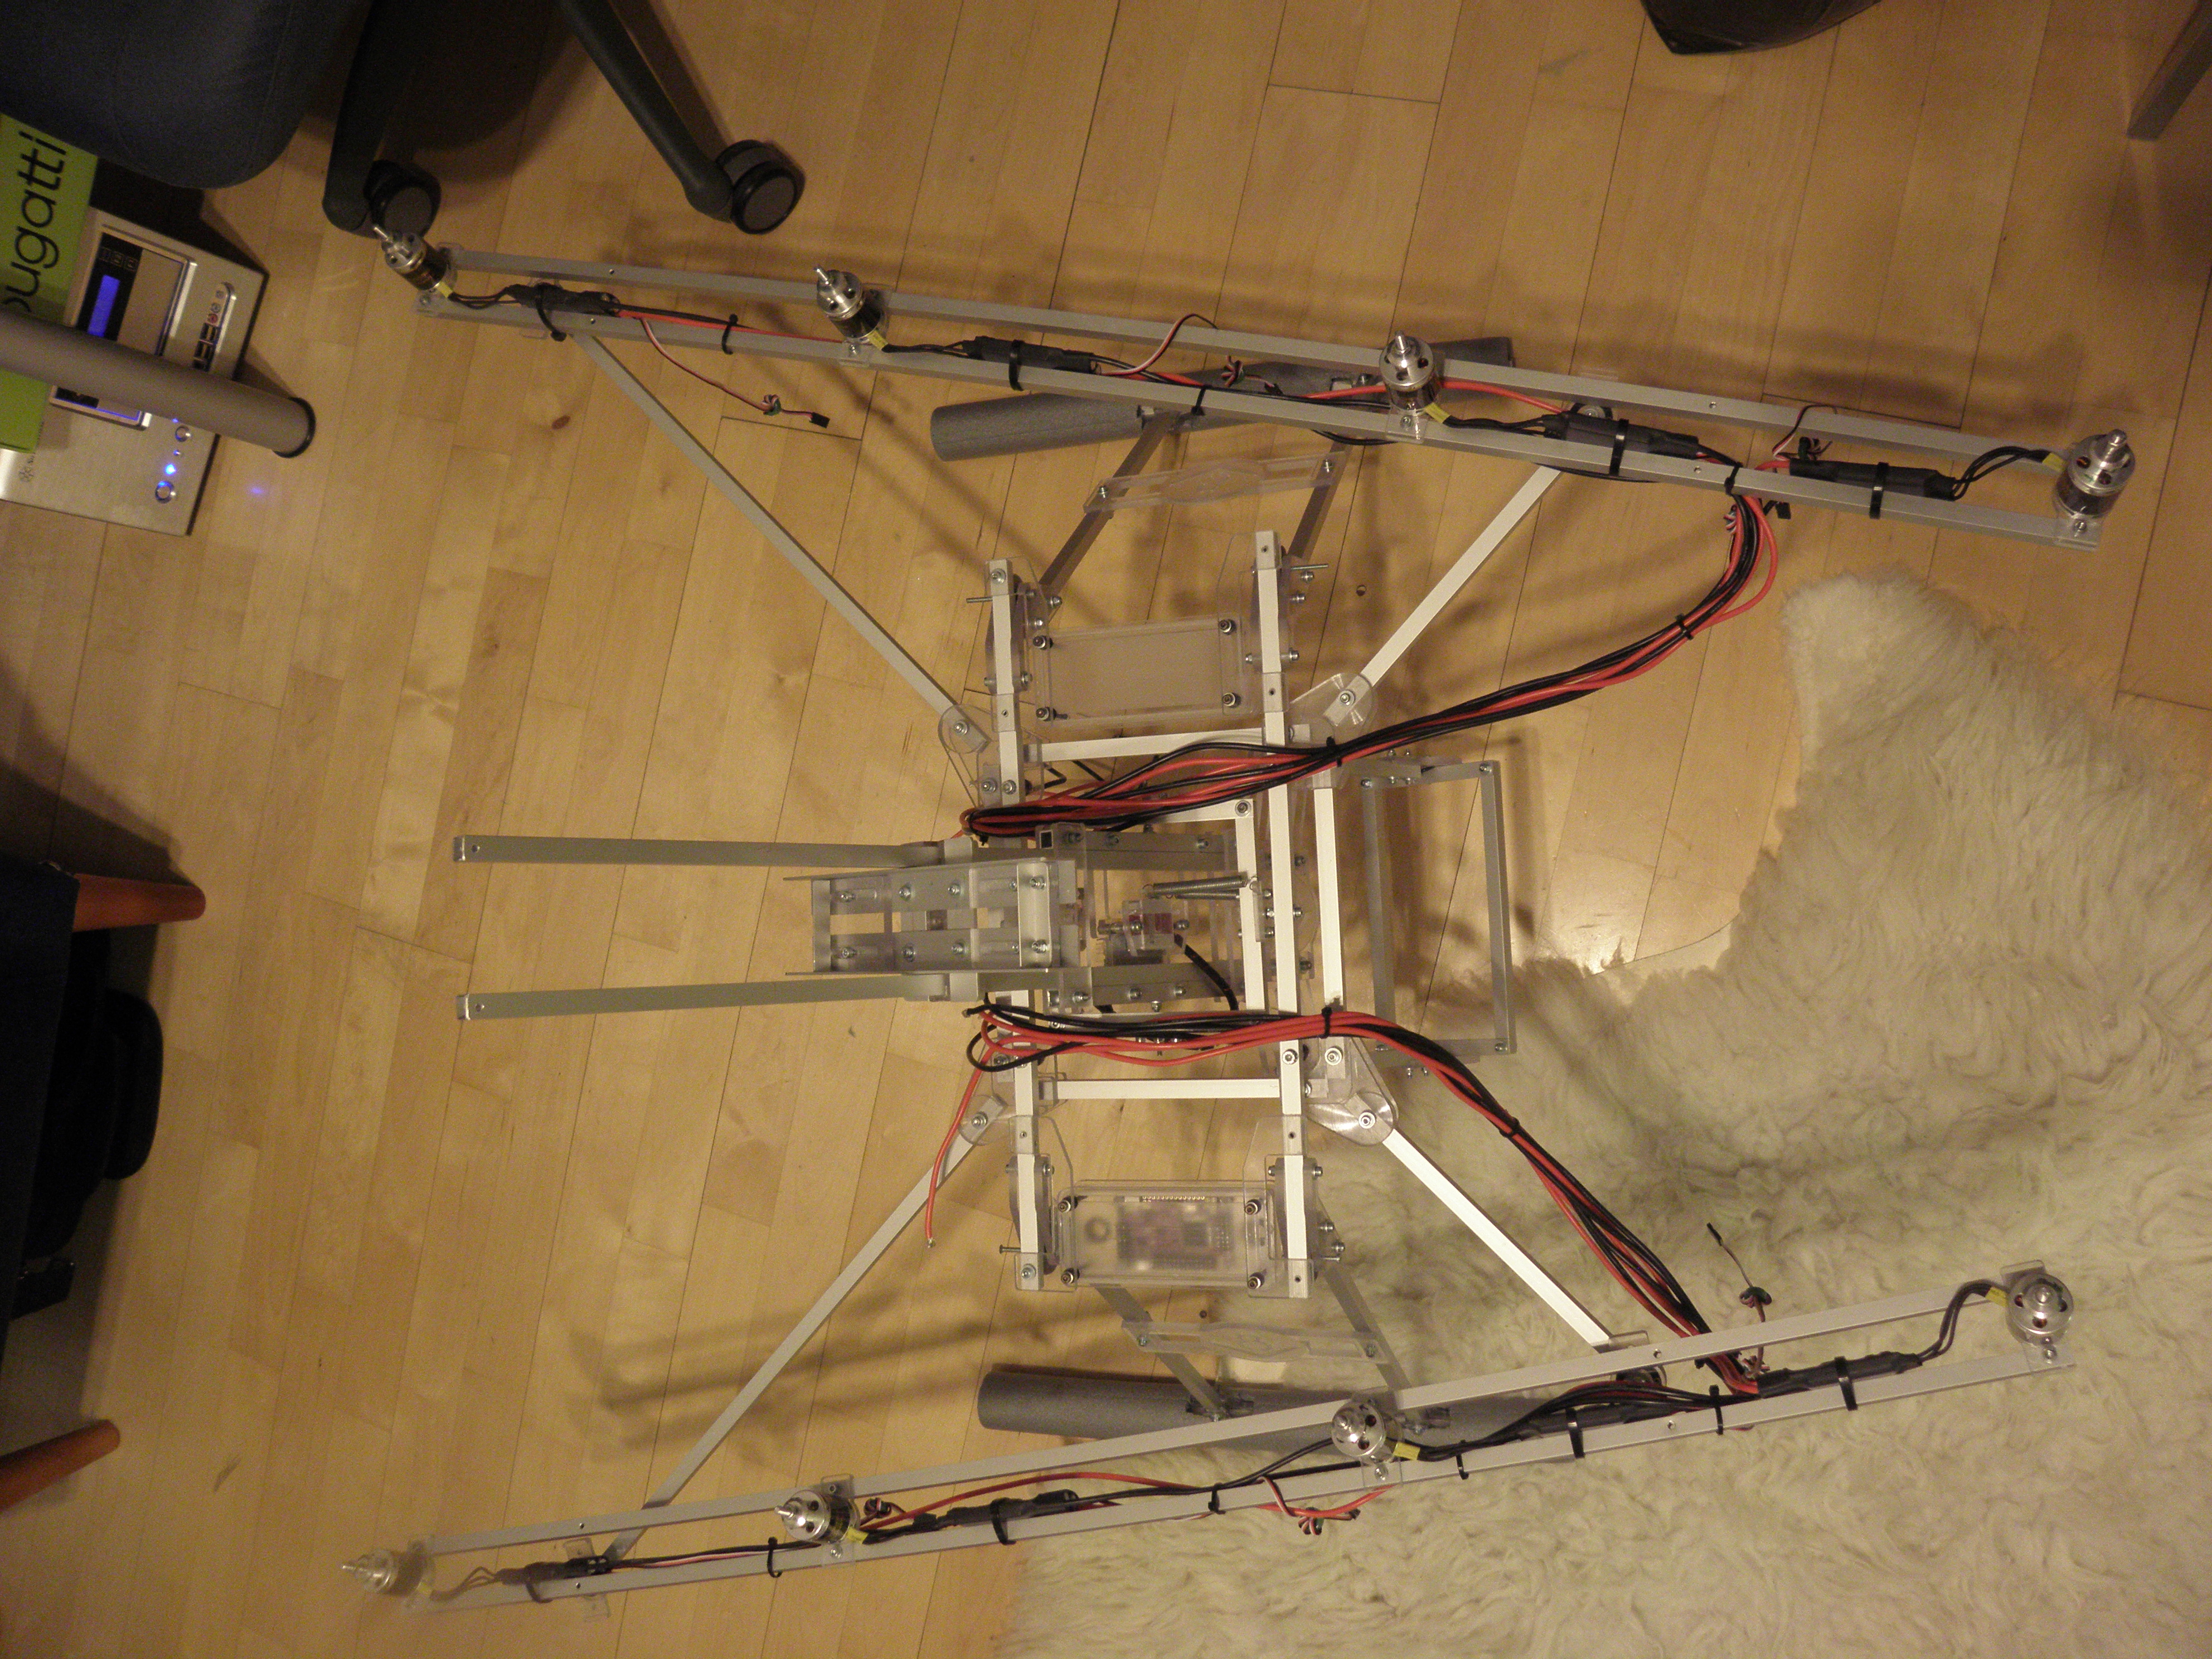
With these design goals in mind, I decided to go with an V-shaped octocopter. Octa-V, or V8, has eight motors, four on each side in a row, in V formation. The camera looks in the open direction of the V, so there are no spinning propellers in its view.
V-shaped octocopters are rare and only few commercial devices are available. In Germany, this topology is patented by Ascension Technologies. Not only commercially, these machines are rare even among the hobbyists, probably because of their size, weight and complexity of construction. However, the V-shaped copters are very stable and fault-tolerant. While testing the copter, I found out that you can’t even notice one failed motor.
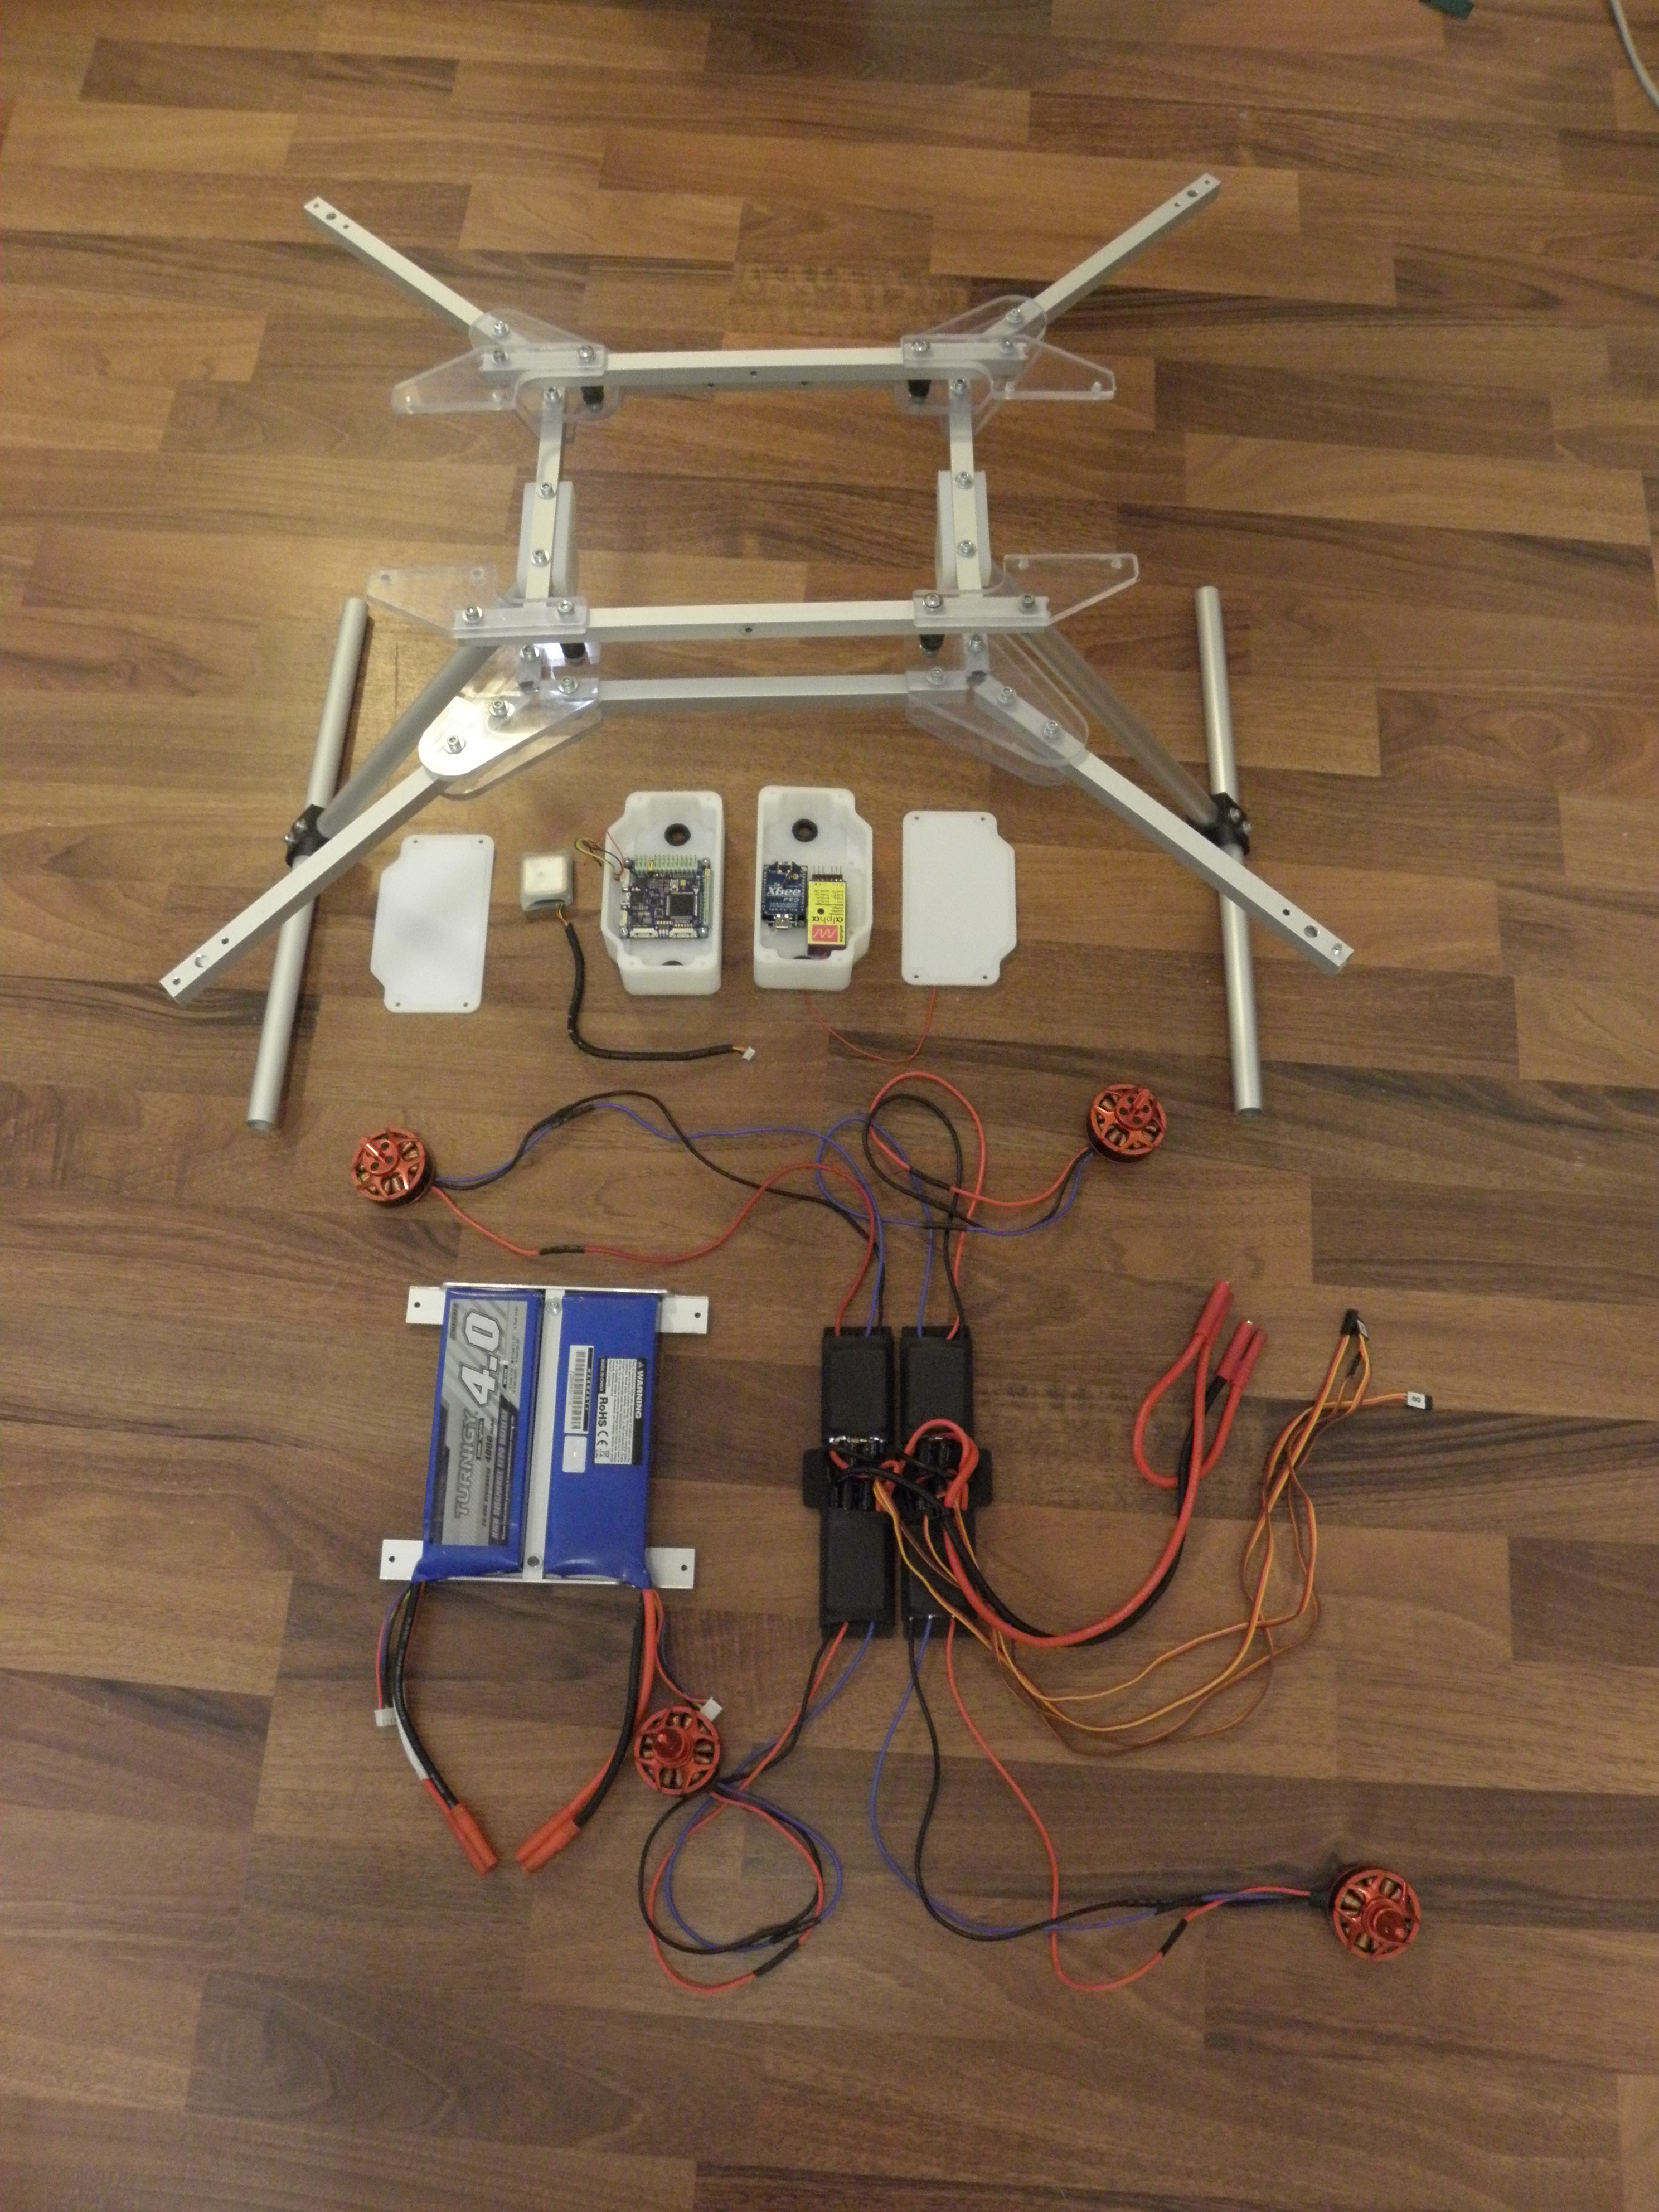
Frame
With the V-shaped design selected, I started drawing parts in CAD and building the frame from scratch. As I made two of these machines, I had to keep the construction as simple as possible. I needed also to keep the parts relatively simple, so that a friend of mine could repair the damages himself if needed.
The frame consists of standard 10 x 10 mm aluminum tubing that is widely available here in Finland. The construction features two individual frames, the one for motors and external structure and another one for electronics and payload. The frames are mounted in each other using rubber mounts that isolate the vibration of the motors and propellers from the electronics and cameras. Due to this twin-frame construction, the copters produce completely vibration-free photos and videos.
The aluminum tubes are attached into each another with parts made of polycarbonate plastic. The polycarbonate is transparent, durable material that is easy to machine and easy to get. It is not as cheap as acrylic, but it is not as brittle – as long as it is not exposed to chemical substances as thread lock… Polycarbonate is used in making of bullet-proof glass, protective eyewear and other items where durability is required.
The polycarbonate is not as good in terms of weight and strength as composites, such as glass fiber and carbon fiber, but it is easier to machine. It can be milled and cut using tools with slow speed and it does not produce harmful dust when done so. Carbon fiber and glass fiber both require high-speed tools and produce dust that is harmful for health. The carbon dust, due to its conductivity, is also harmful for the machinery if not special precautions to avoid dust are followed, such as constant coolant feed or machining under water.
Flight controller
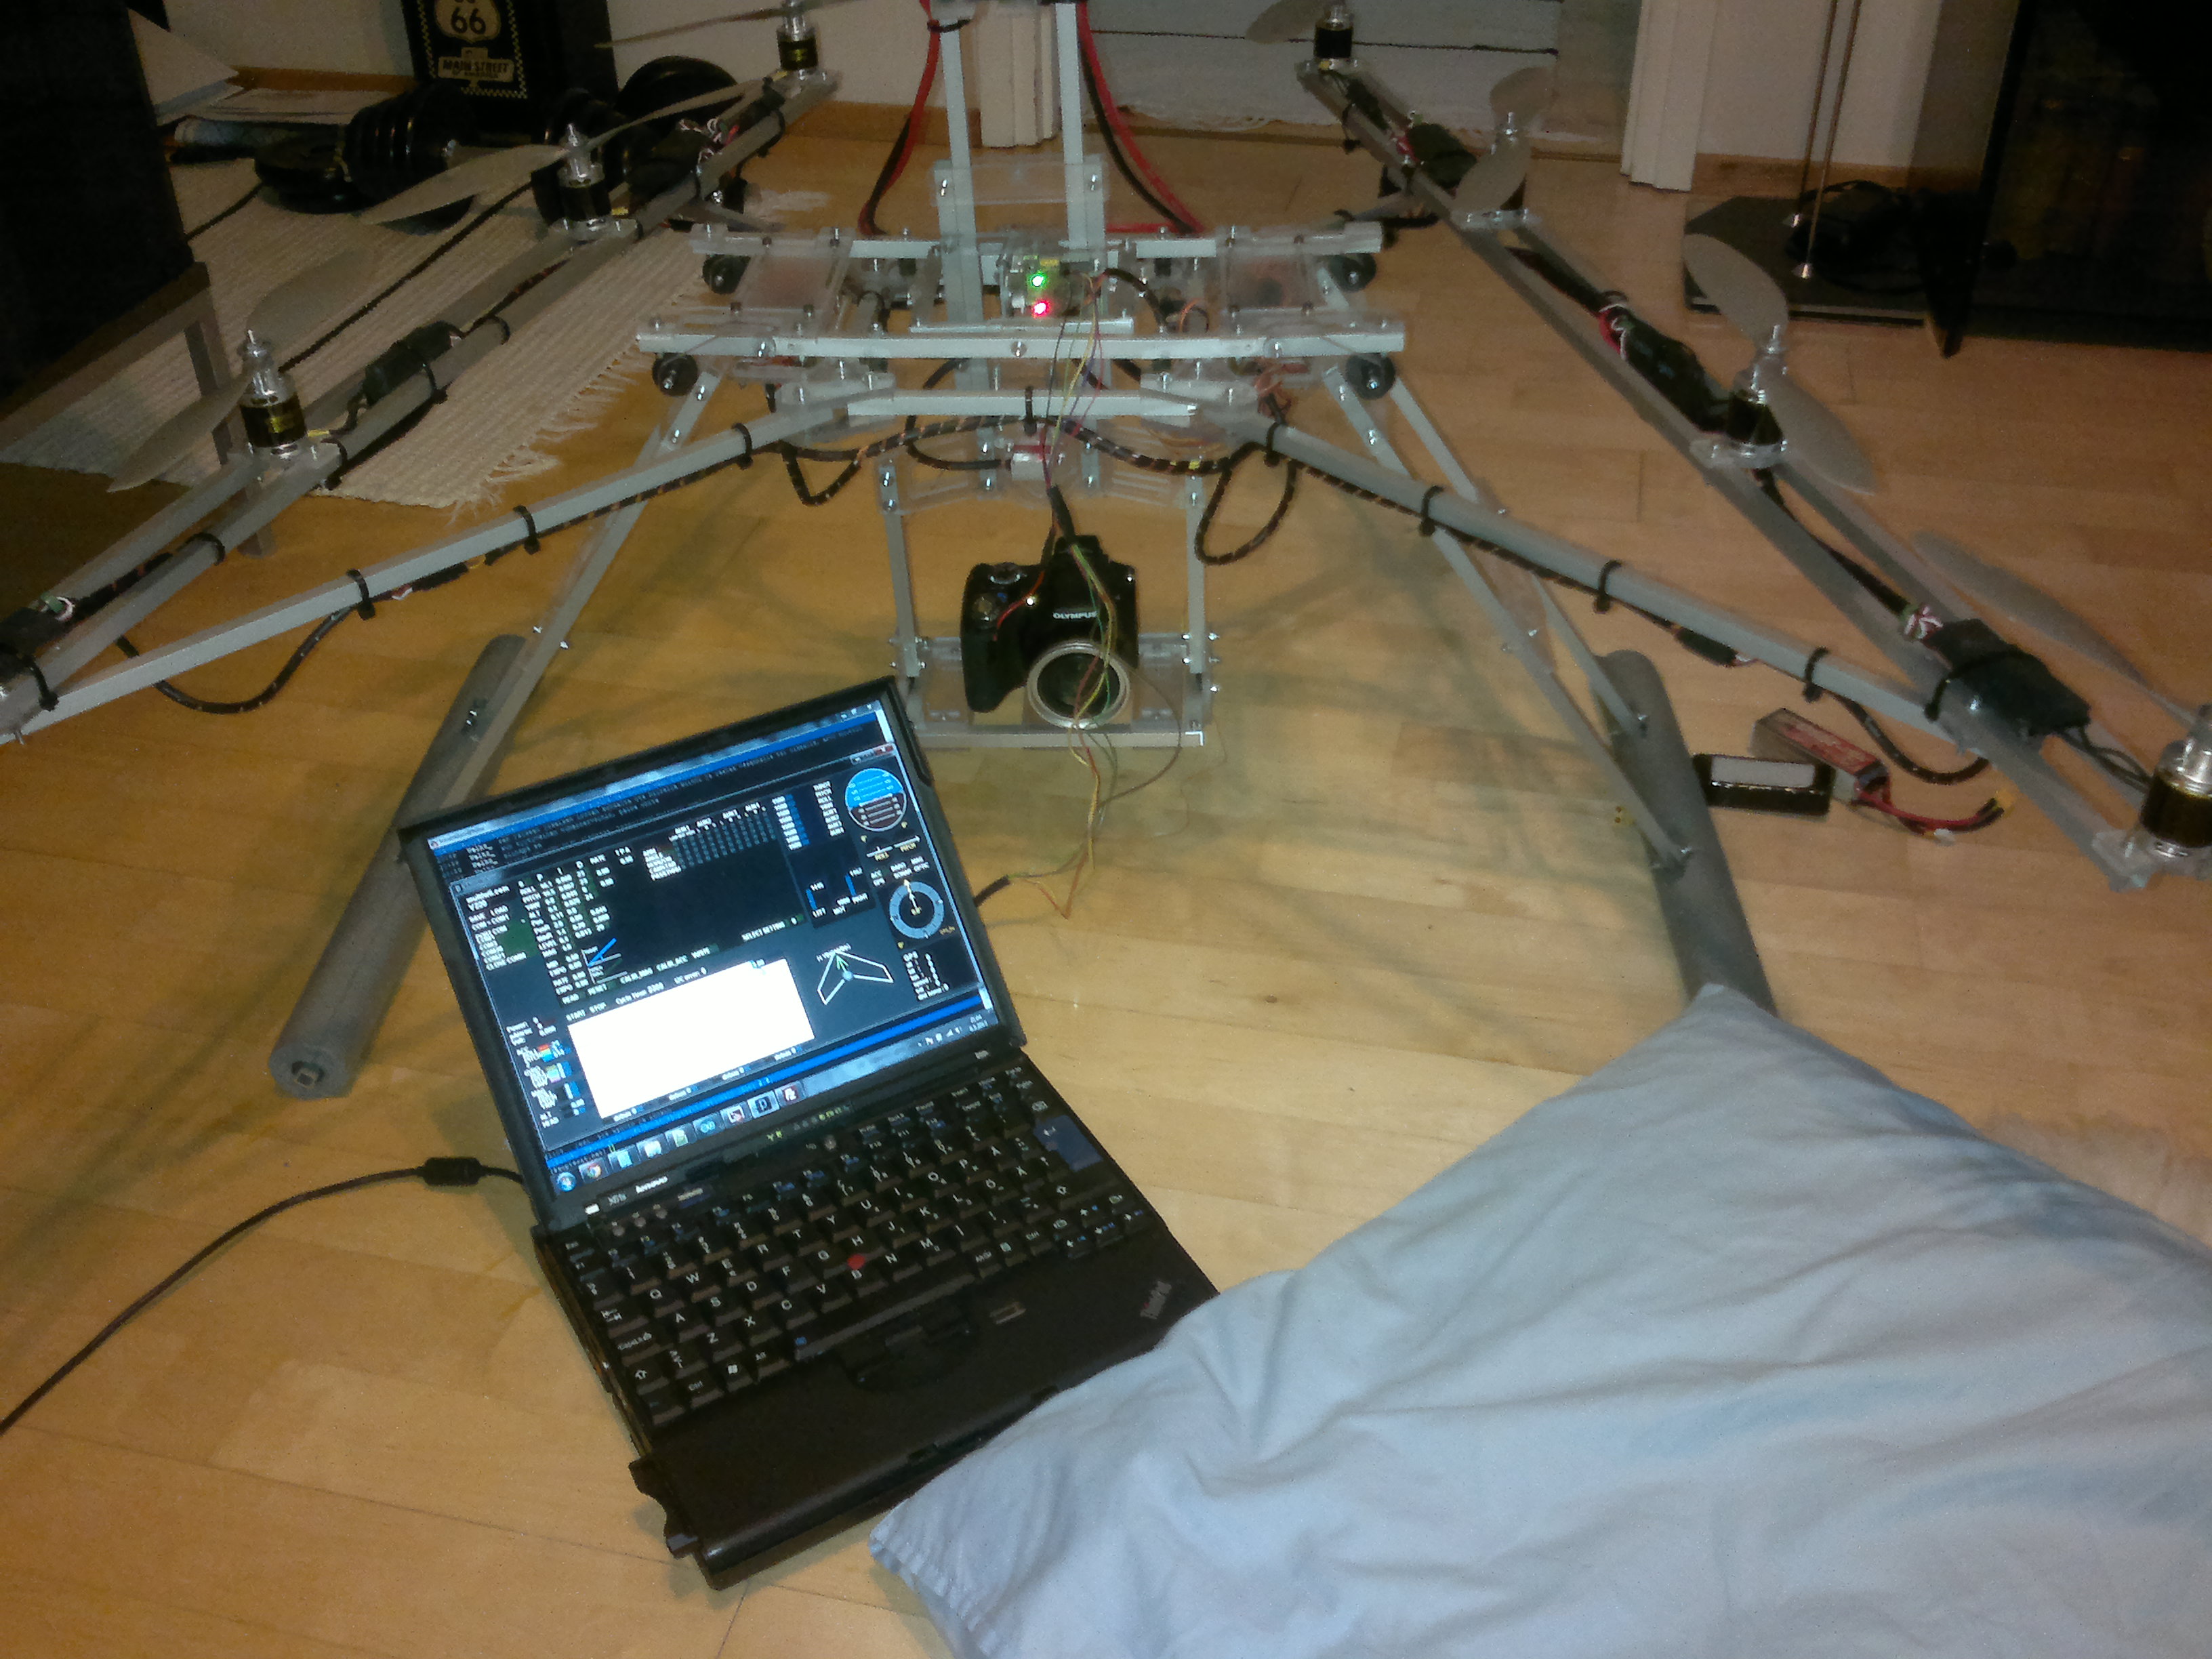
As we wanted to use GPS-based features like precise, automatic position hold and we needed support for autonomous flying through waypoints, the selection of the capable flight controllers was narrowed to two possible alternatives. The V-shaped frame was supported only by two of the remaining navigation-capable ones, the OpenPilot and Arducopter. The Arducopter was selected, as the OpenPilot hardware has never been readily available.
The selection of the Arducopter proved to be a horrible mistake. The software looked exceptionally feature-loaded and promising on the paper, but it was full of bugs and very serious issues. The first glitch I had with the Arducopter, was nothing less than a surprise full-throttle command to all the eight motors, resulting in an spectacular flip. This was made possible by a bug in PPM encoder processor firmware. In addition to this, many other little bugs were present that ended up being dangerous with the drones this big. More than once we had a full throttle in the motors without being commanded.
I had a possible radio glitch once, which caused the Arducopter to enter failsafe land mode which crashed and turned the drone upside down. While being upside down in the ground, the Arducopter did not realize that it was “landed”, so it commanded full throttle when the propellers were spinning against the ground. As I was not keen to approach the huge copter roaring at full power upside down, one of the motors eventually caught fire as the software refused to accept any commands.
More serious mishap that ended with an ambulance ride to local hospital, happened when my friends copter went to full throttle while he attached a flight batteries and then the separate power supply for the Arducopter board. While starting up, the Arducopter commanded full power for all of the motors. The reason for this remained unknown but it could be reproduced. The high-powered copter jumped violently in the air and sliced my friends hand very badly with its 12″ propellers. This accident ended our development of the octocopter with Arducopter software. It was deemed a way too dangerous for any purpose, let alone flying things this big. The other users of the software were informed of this possibility for an accident on 3DRobotics’ ArduCopter forum from which I got a rude response and naturally got blamed for everything, the software being faultless. Lesson learned.
After few months, the Arducopter was developed into a version 3 and later 3.1 which were also full of bugs. These versions addressed some the aforementioned issues and created new ones. For a short period of time, I flew the quadcopter version of the Beast using MegaPirate NG, a fork of the Arducopter, which performed flawlessly. The developer of the MPNG took a least unreliable version of the Arducopter code base and created his own refined version of it for the MultiWii hardware, which was pretty good back then. It was eventually replaced by iNav, as I was afraid to fly any arducopter-related software due to the previous issues we had with it.
Motors and controllers
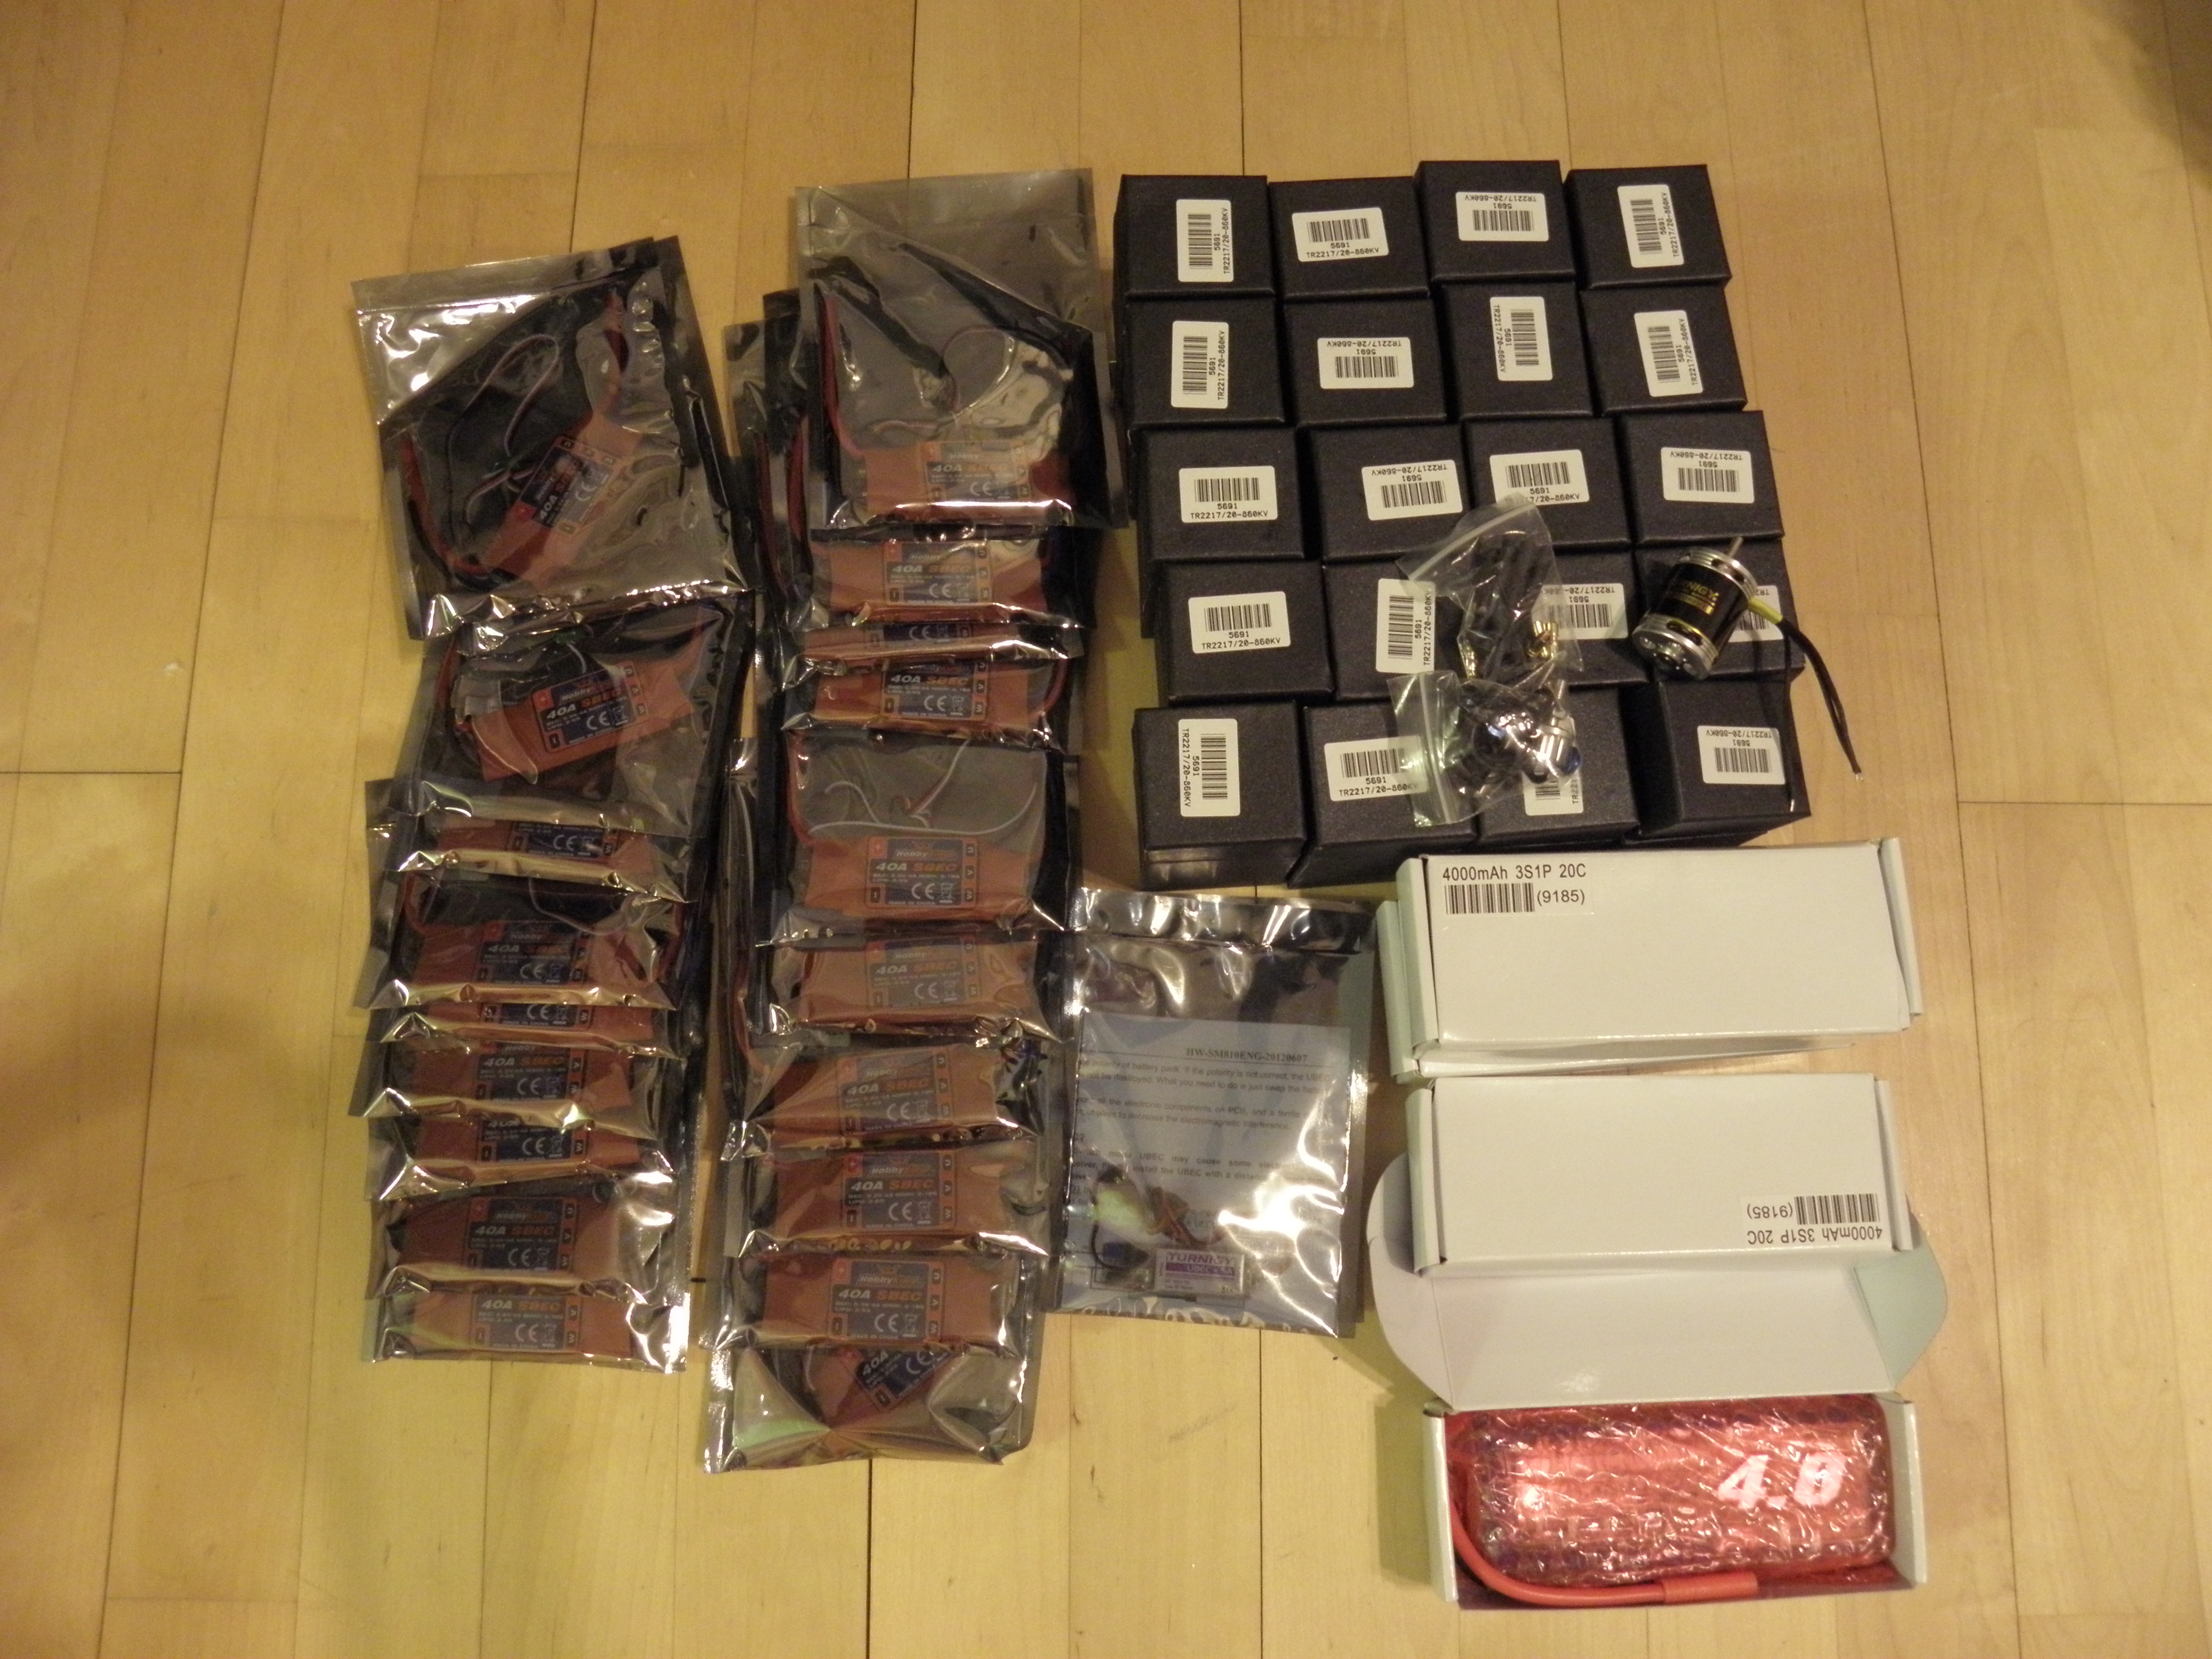
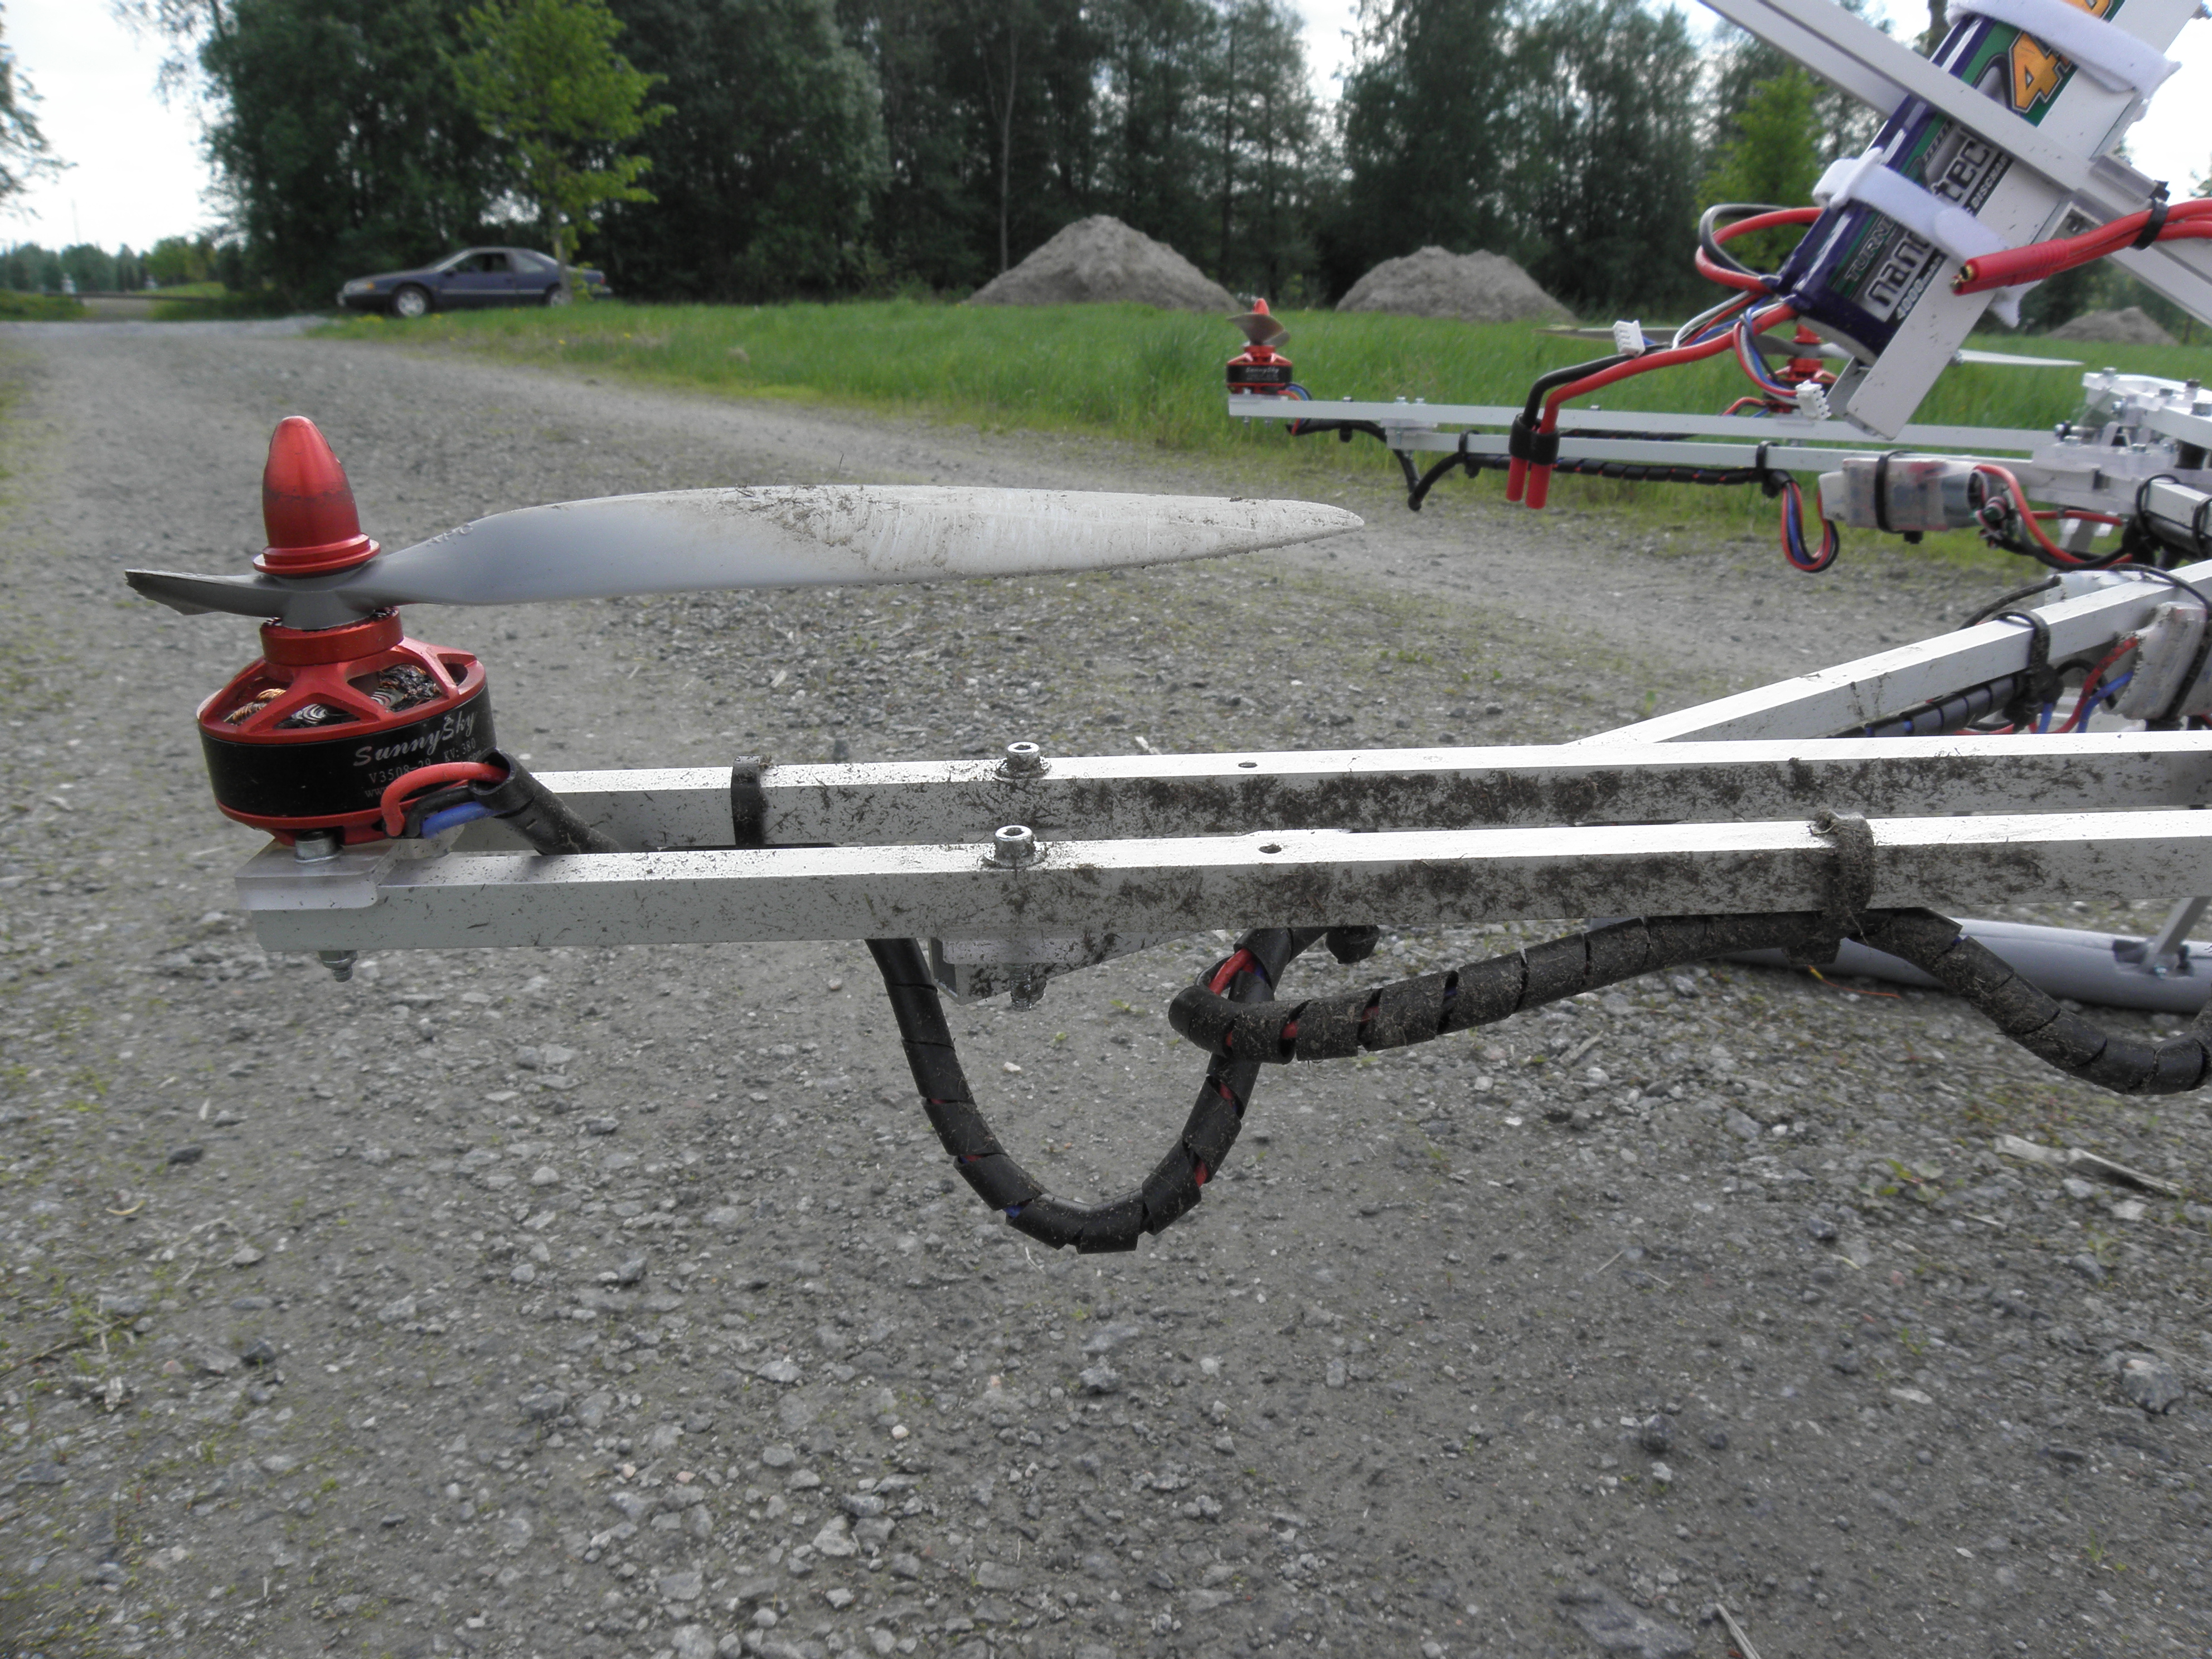
The motor controllers for the project were Turnigy F-40A’s, capable of supplying 40 amperes. They were modified using the SimonK Firmware that provides faster throttle response for enhanced stability.
Both of these drones had initially eight 12-volt Turnigy 2217 860 KV motors and 3S batteries. According to the specifications, these motors should have provided ~1 kg of thrust each. The drones both flew with these motors, two 4000 mAh batteries wired in parallel, but only few minutes, leaving flight times a way too short. After flight the motors were hot. The already over-rated wiring was beefed up but still the battery consumption was a way too high.
The 12-volt setup and the Turnigys were not powerful enough for the drones. They were changed to big Sunnysky V3508 motors from Foxtech FPV. The flight characteristics of the Beast changed completely with these. With two 12-volt batteries wired in series, the 24 volt motors provided plenty of thrust which made the drones very agile. The battery life was improved, too. Even the roar what these machines made with eight large propellers and even a little over powered motors, was very convincing to hear.
Due to the high power requirements, the wiring of the drones was made using rather heavy-gauge silicone-insulated wiring. A custom power-distribution board was also made. Initially the wiring was made for 12-volt system and for its higher current requirements, but after changing to 24-volt system, the wiring was made a little lighter in weight.
Camera/sensor stabilizer
In the beginning of the 2013, when I started building the Beast, brushless gimbals that have now become popular, were rare and expensive. Majority of the models then available, were designed for small action cameras. As we wanted to fly DSLR’s or smaller mirrorless ones, the gimbals available did not quite were ready for it.
A while ago I found the Ecilop quadcopter, http://ecilop.com/, an steadicam implementation for a flying platform, made by Aleksey Zaitsevsky and I became interested in it. Everything that is made using some original approach, gets my attention as I like when people “think outside the box” when searching for a solution for some problem. As I like to use that principle too, I decided to give it a try.
Instead of precise positioning which the brushless gimbals are capable of, the steadicam-like one produces a video, which is not completely stable, but fluid in its motion. I find a little swinging motion in aerial video acceptable, as long the transitions are smooth without jerky movements.
The principle of a steadicam is simple. There is camera on the other end of a boom and a counterweight on another. It has a pivot on its neutral point, and it is balanced. The heavy structure resists movements due to its inertia, making it stable. The flying version uses flight batteries as a counterweight and adds gyroscope-driven servos. The servos are connected to the frame via springs and they dampen the movements of the stabilizer.
The Beast was partially built around the idea of having a steadicam boom in the middle of the copter, although the payload compartment could carry other payloads and camera gimbals too. My version of the stabilizer is based loosely around the Ecilop, with some of my own modifications.
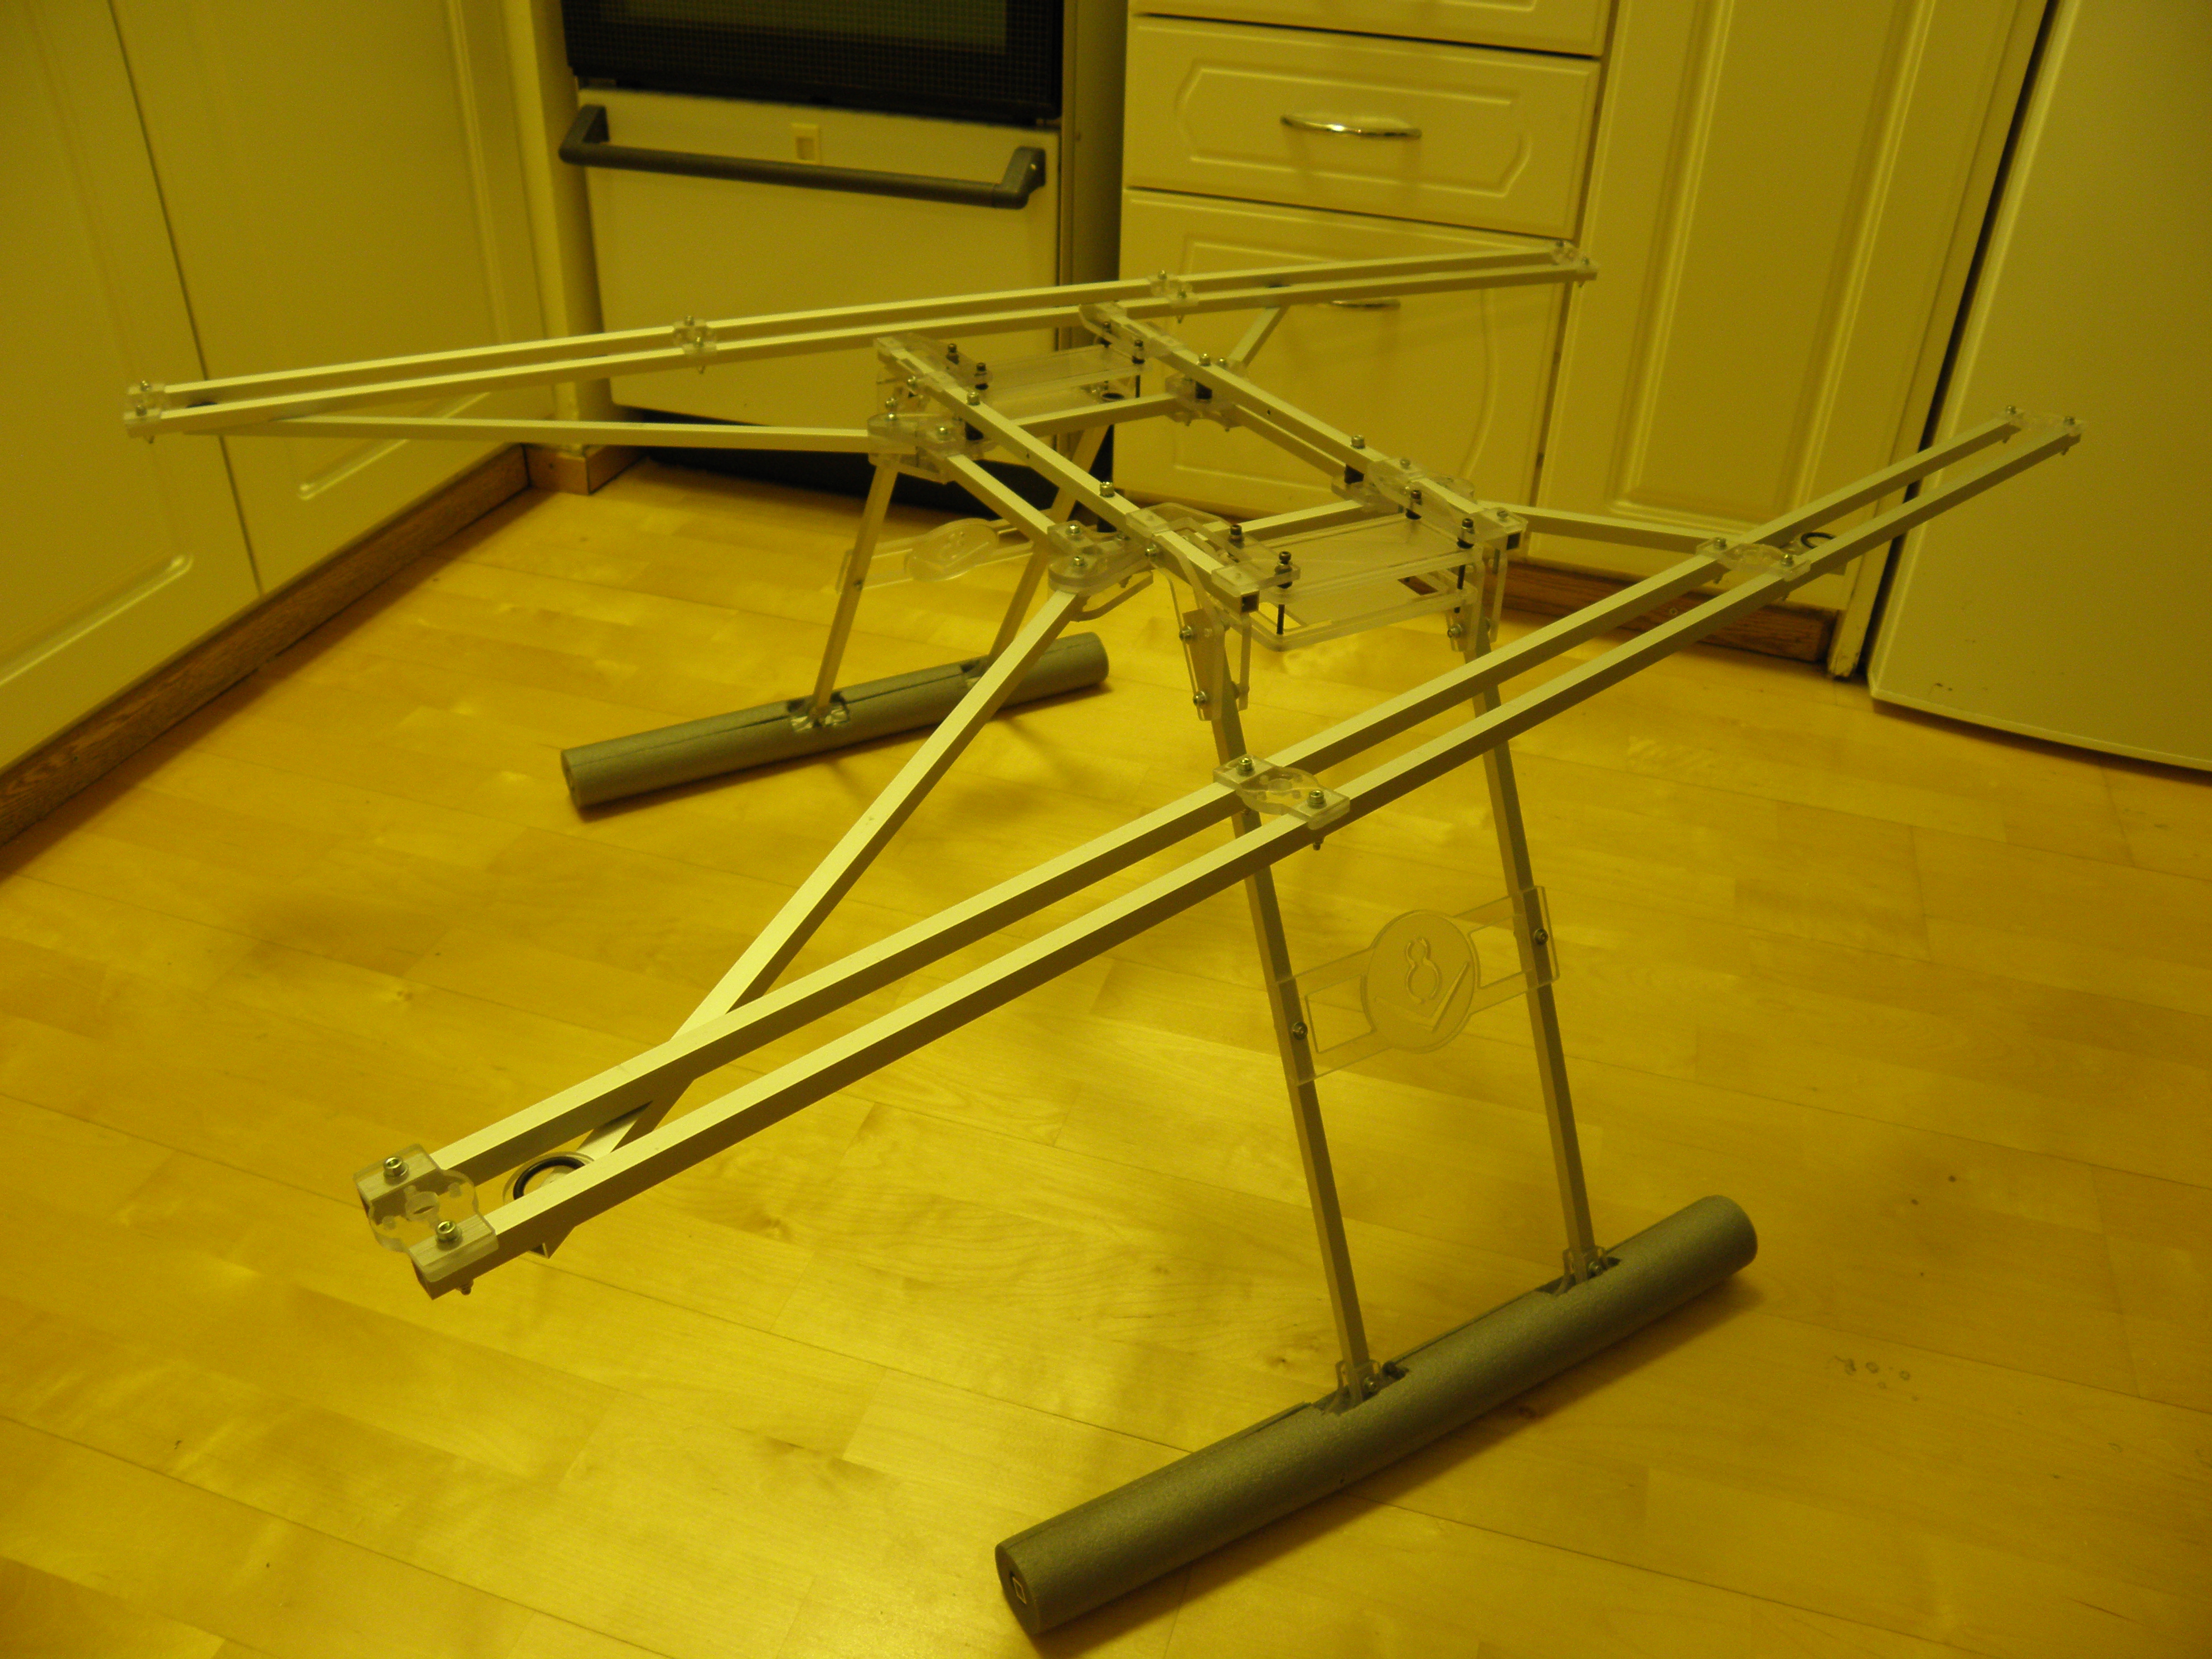
Hardware
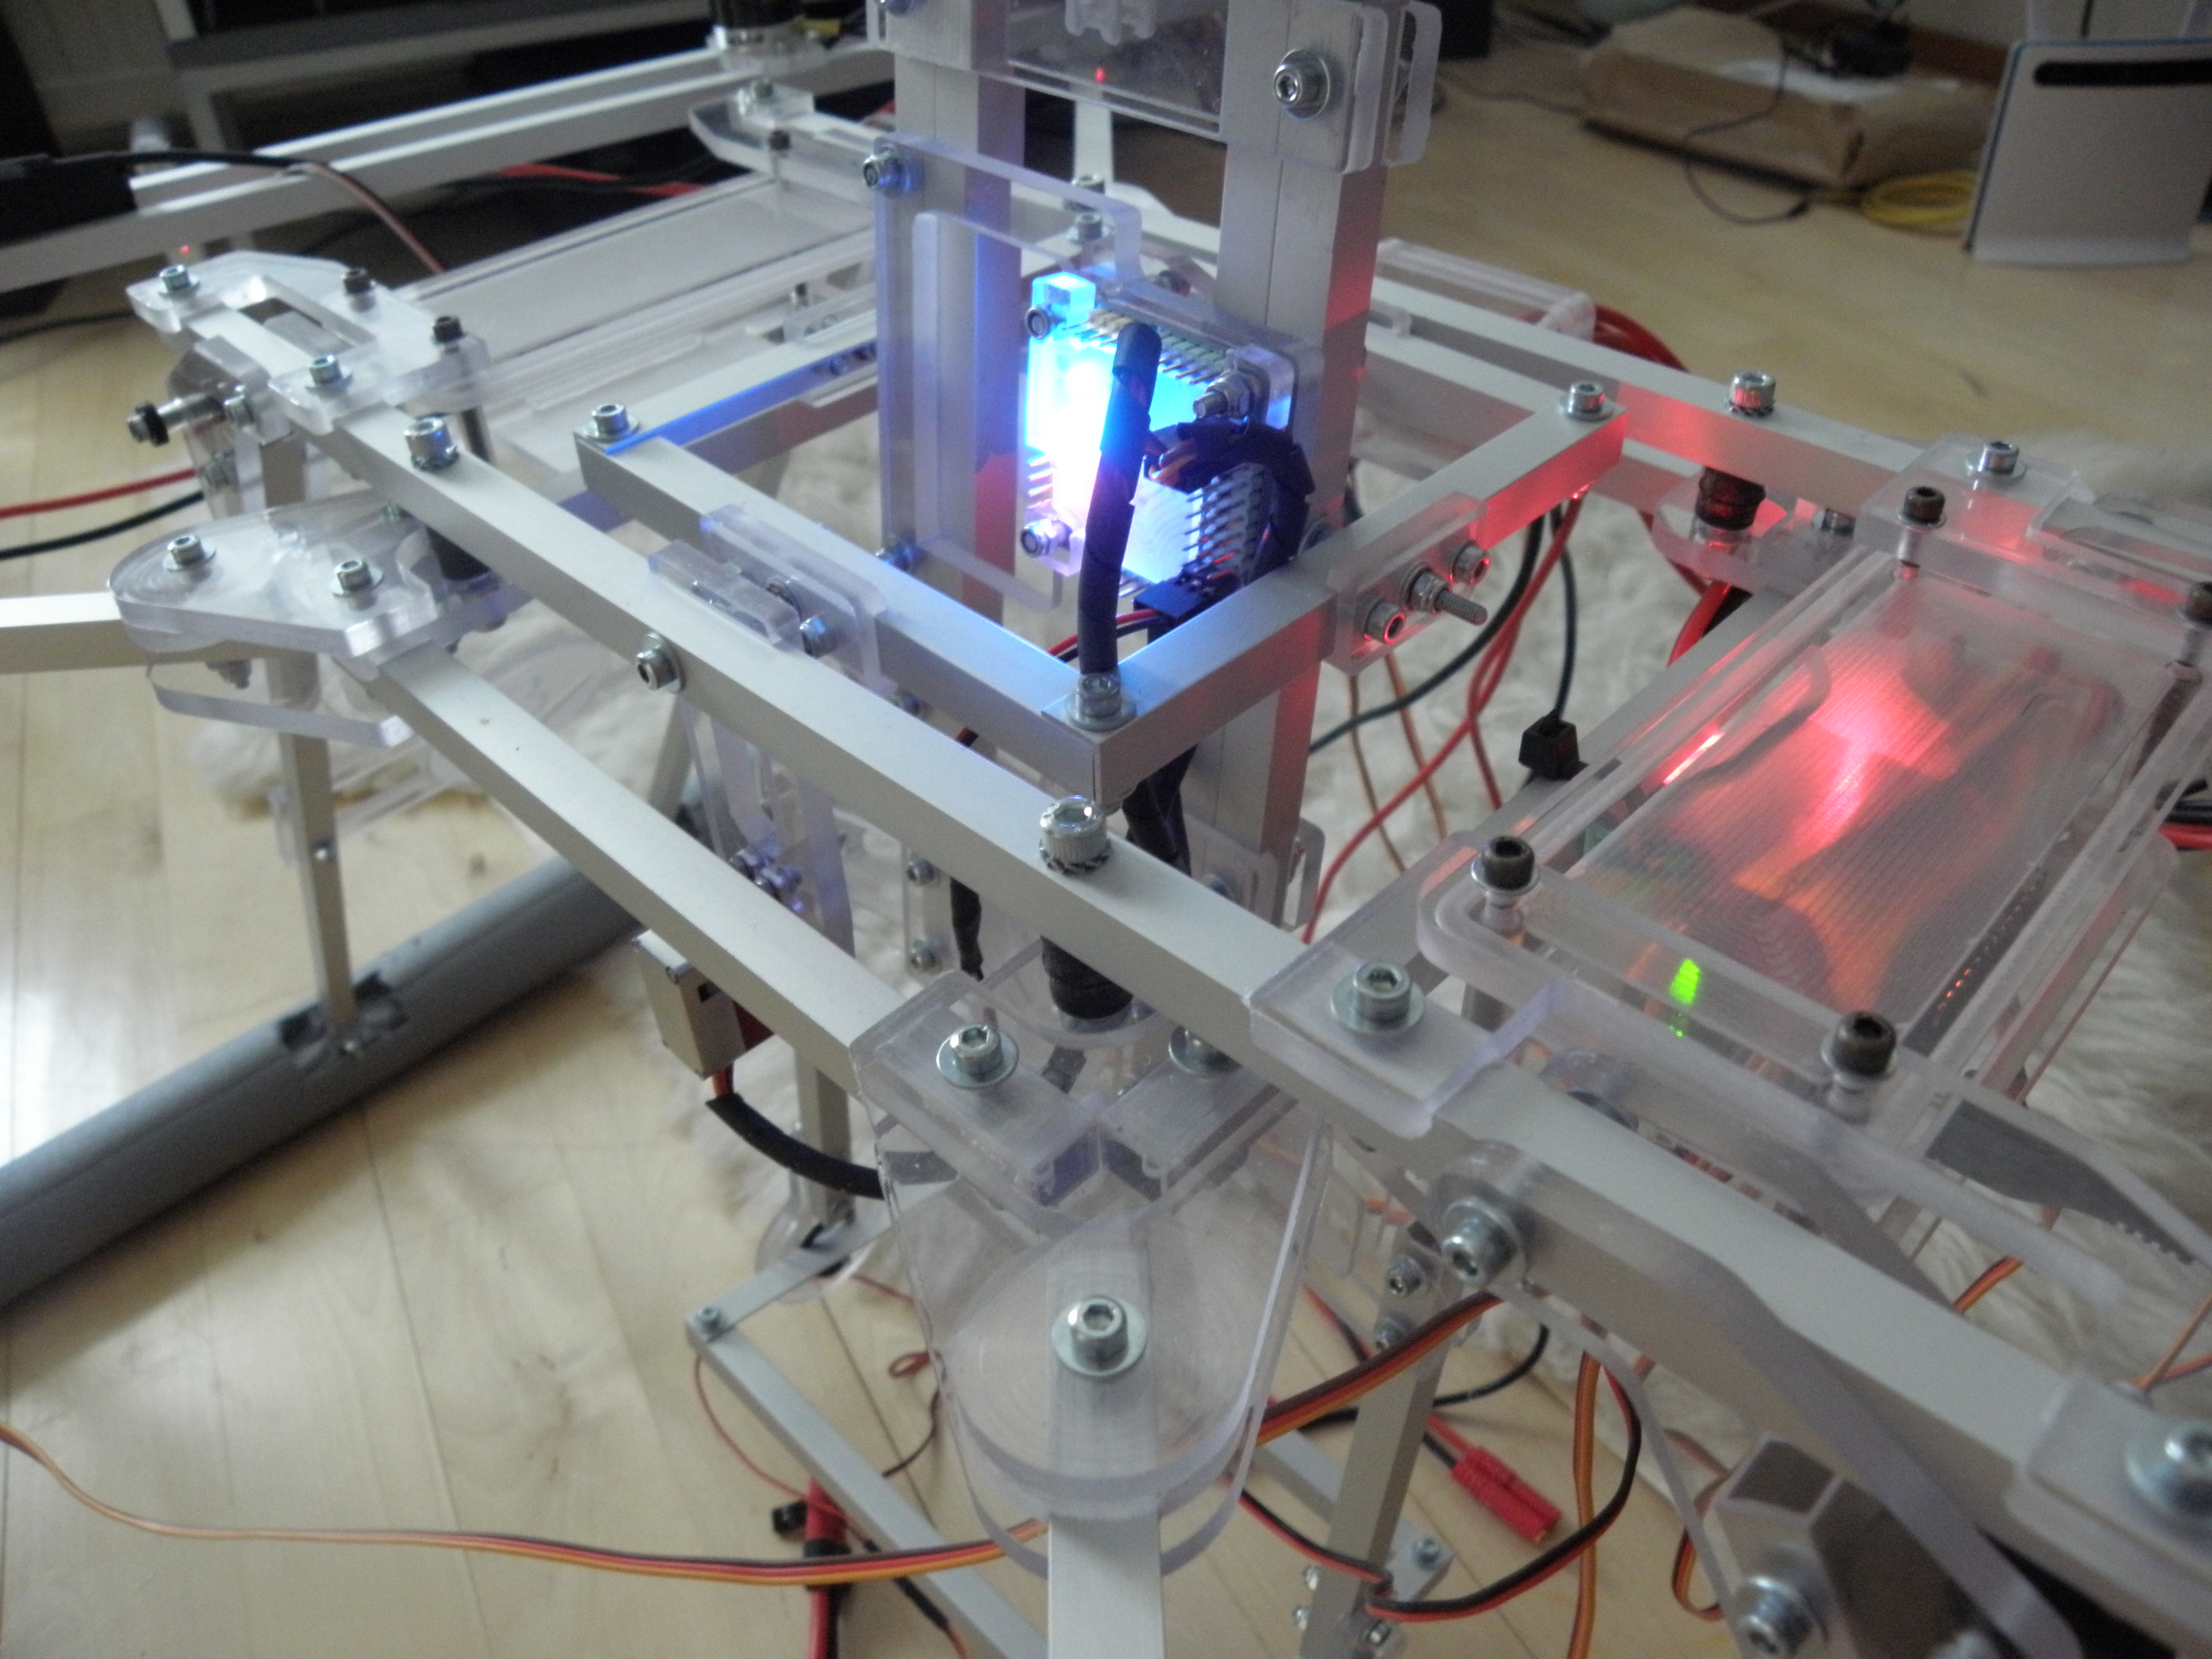
The stabilizer was built from the same materials as the frame of the multirotor itself; aluminum tubing and polycarbonate plastic. The camera and battery mounts, as well as the stabilizer frame itself, had to be made adjustable, to make it possible balance it when different cameras and batteries are used.
The gimbal is made of L-profiled aluminum. Polycarbonate blocks are used to house small bearings that make the gimbal rotation very smooth. Polycarbonate is also used in servo mounts and controller board housing. The construction is made as simple as possible, to make also the stabilizer as rugged and easy to repair as possible.
The battery case that acted as a counterbalance for the gimbal, was made of thick L-shaped aluminum profile. The battery position is adjustable, as well as its mounting height on the stabilizer. The heavy construction of the battery case also protects the batteries in an event of crash.
Electronics
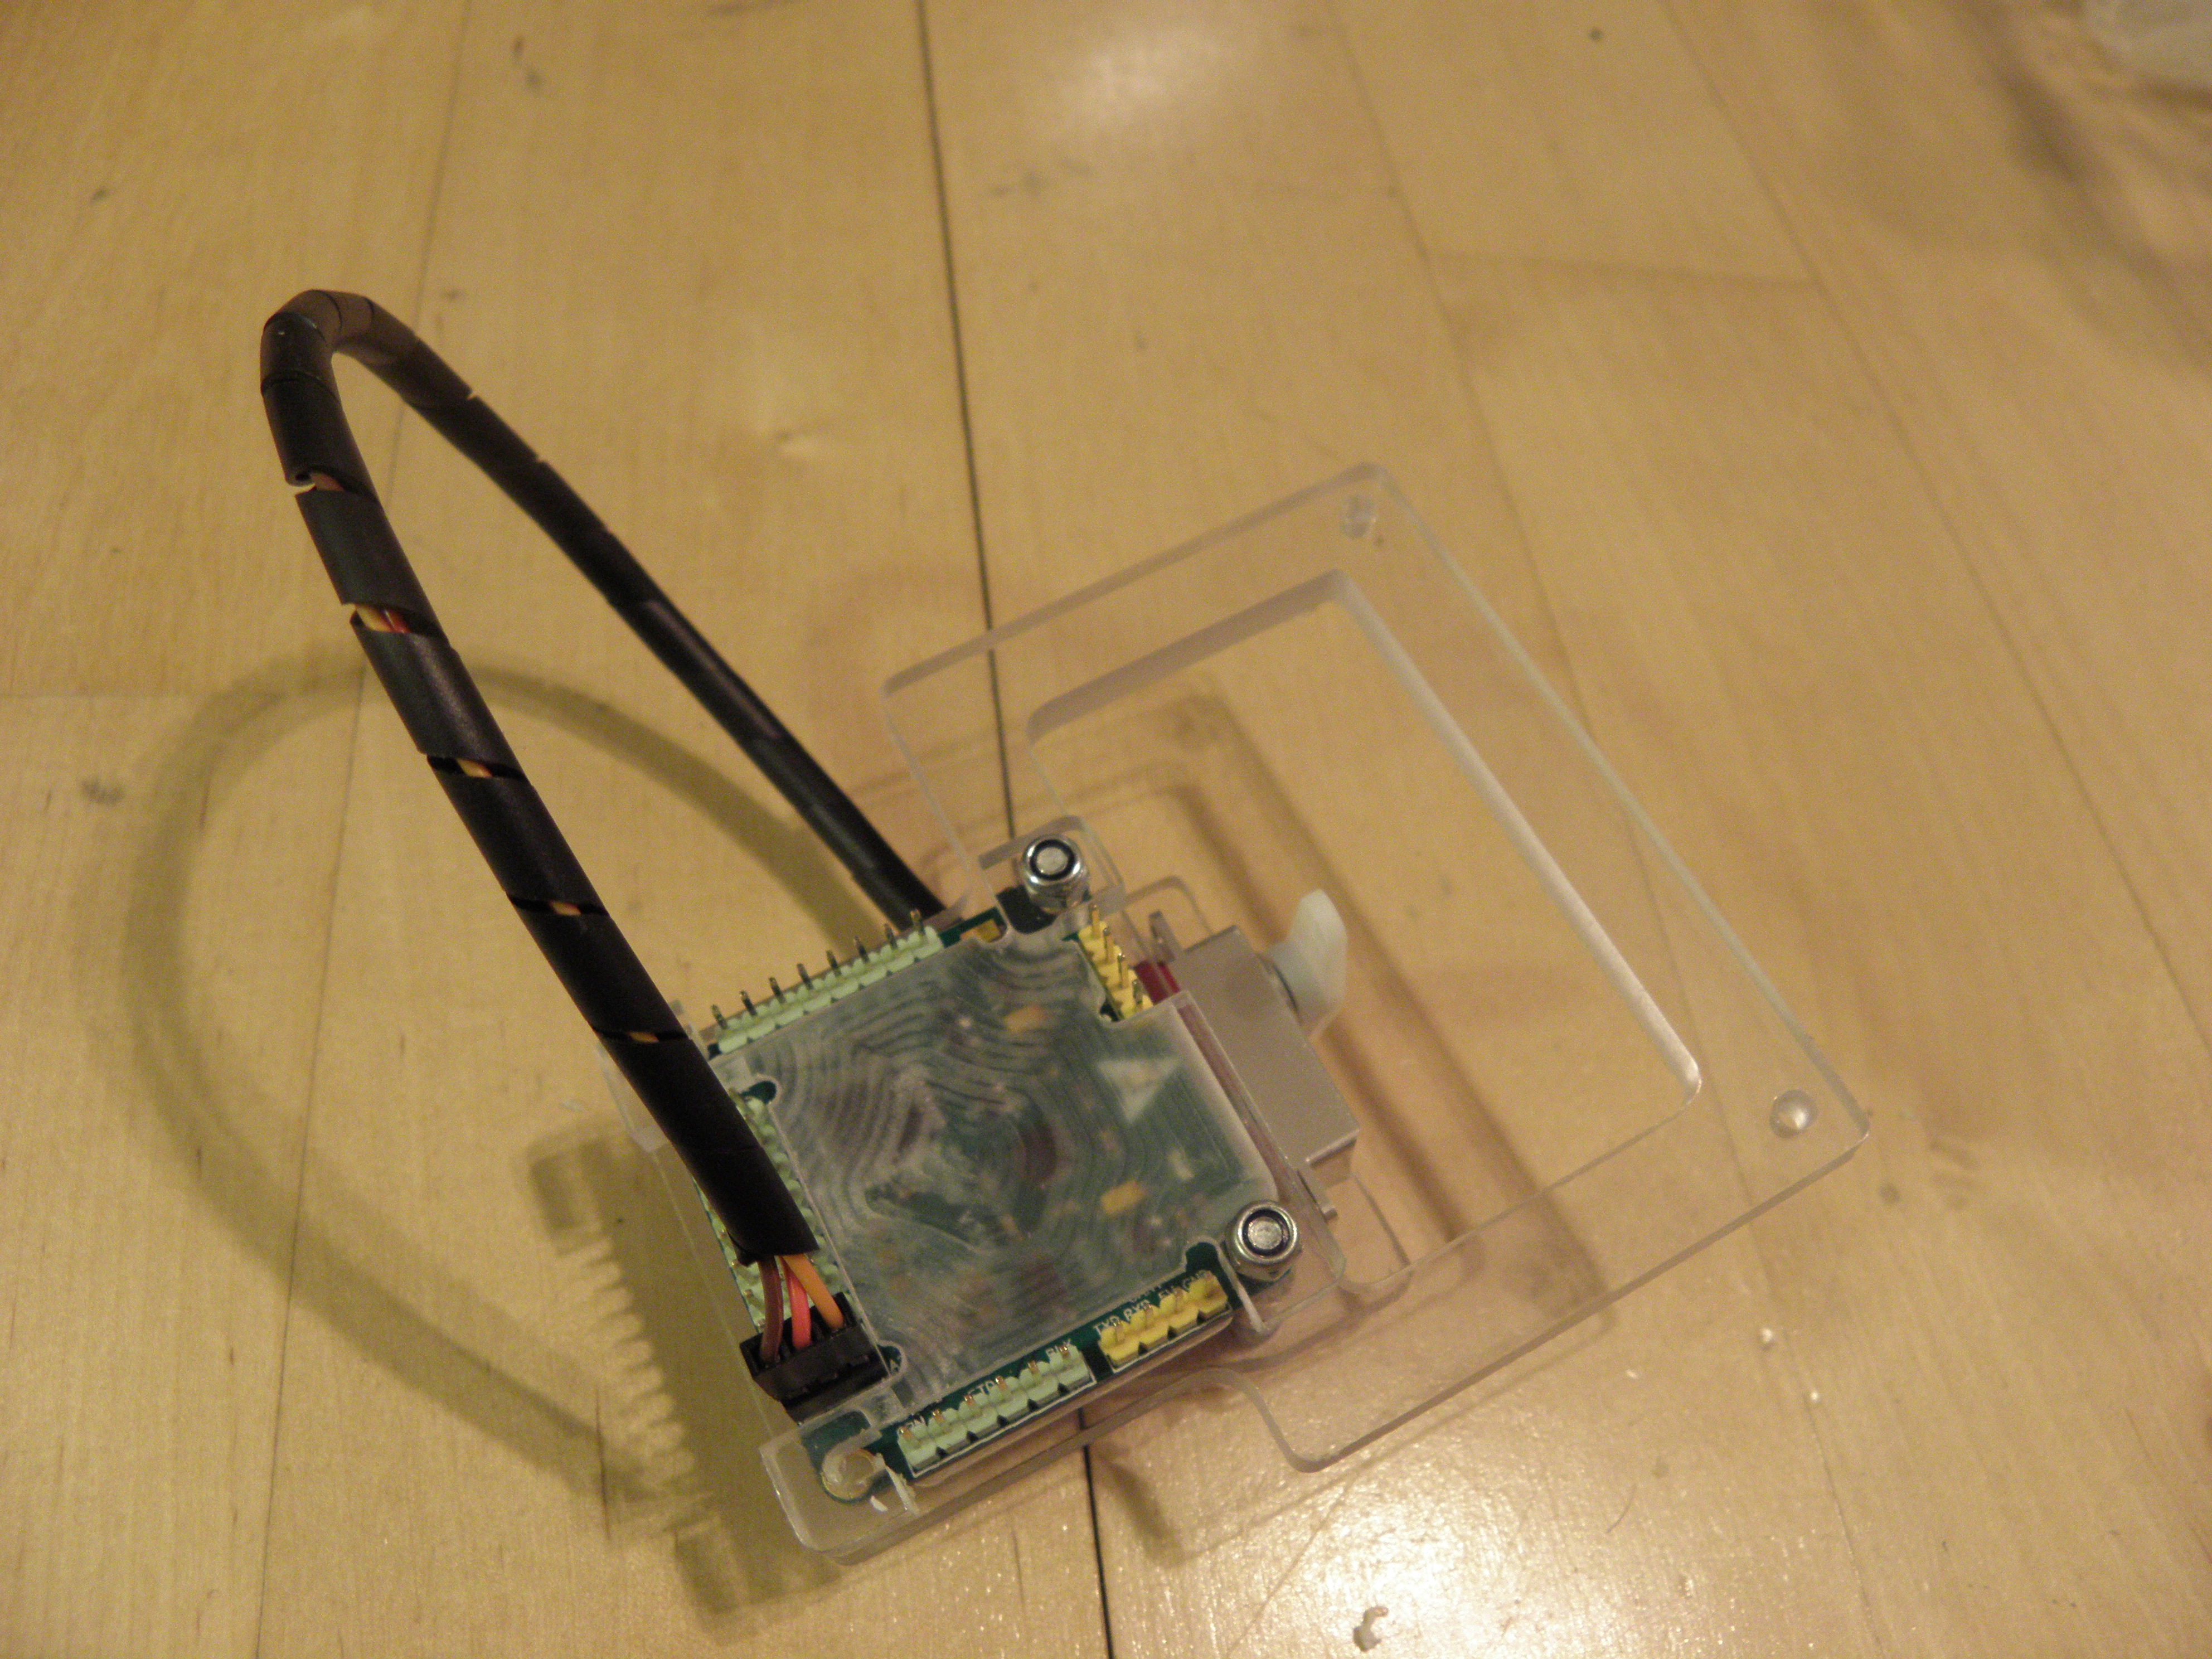
The electronics are the major difference between my version of the stabilizer and the Ecilop. Instead of using individual gyroscopes, I used a cheap MultiWii-based flight controller board with an Invensense MPU 6050 gyro and accelerometer. The board runs my modified MultiWii software that stabilizes the camera. As the servos are connected via springs for smoother operation, the MultiWii had to be used with such high values in its PID, that caused overshoot. This overshooting when the servos were coupled with the springs, caused the stabilizer provide very smooth leveling in case of disturbances.
We used Turnigy TGY-306G servos with the stabilizer. They are fast metal geared servos that are clones of the several times more expensive ones found at the Ecilop. Normally these are used in model helicopters built for aerobatic flying. However, they have one issue that should be taken care of: in some occasions hobbyists have had these servos shorted out as their circuit board may come in contact with the aluminum bottom of the servo. Solution for the problem is simple: add some electrical tape between the bottom of the servo and the circuit board before use. The servos have provided smooth and reliable operation on the stabilizers of both of the drones.
Tuning and using
Like any camera stabilizers, it is essential to balance the rig for the best results. Contrary to my beliefs, the stabilizer proved to be quite easy to get balanced. However, more tinkering was needed on the software side.
Due to the nature of that spring-loaded stabilizer, I had to make the MultiWii overshoot when correcting the stabilizer position. It is contrary to what it is made for; stabilizing flying devices with as little overshoot as possible in a manner that is desirable for any controller. Luckily, the stabilizer is much easier to tune without a fear of crash, unlike some flying platform that requires more careful approach in selecting controller settings. After some serious hacking and testing, I got the stabilizer working.
The stabilizer does not offer that same precise positioning like the brushless ones do. The video that is captured using camera mounted this one, does swing a little, but in smooth, fluid manner. But in return, it is very robust and although it has suffered some very hard landings, I have not got any need to repair it. Unlike the brushless ones, it readily accepts almost any size of a camera and there are no special parts that I could not repair, if I manage to break it.
The Mini-Beast
After having the Beast in its octocopter form for few months, I eventually realized that it was simply too big for everyday use. It was good to fly, but transporting it was difficult. Its weight and high power made it also too dangerous.
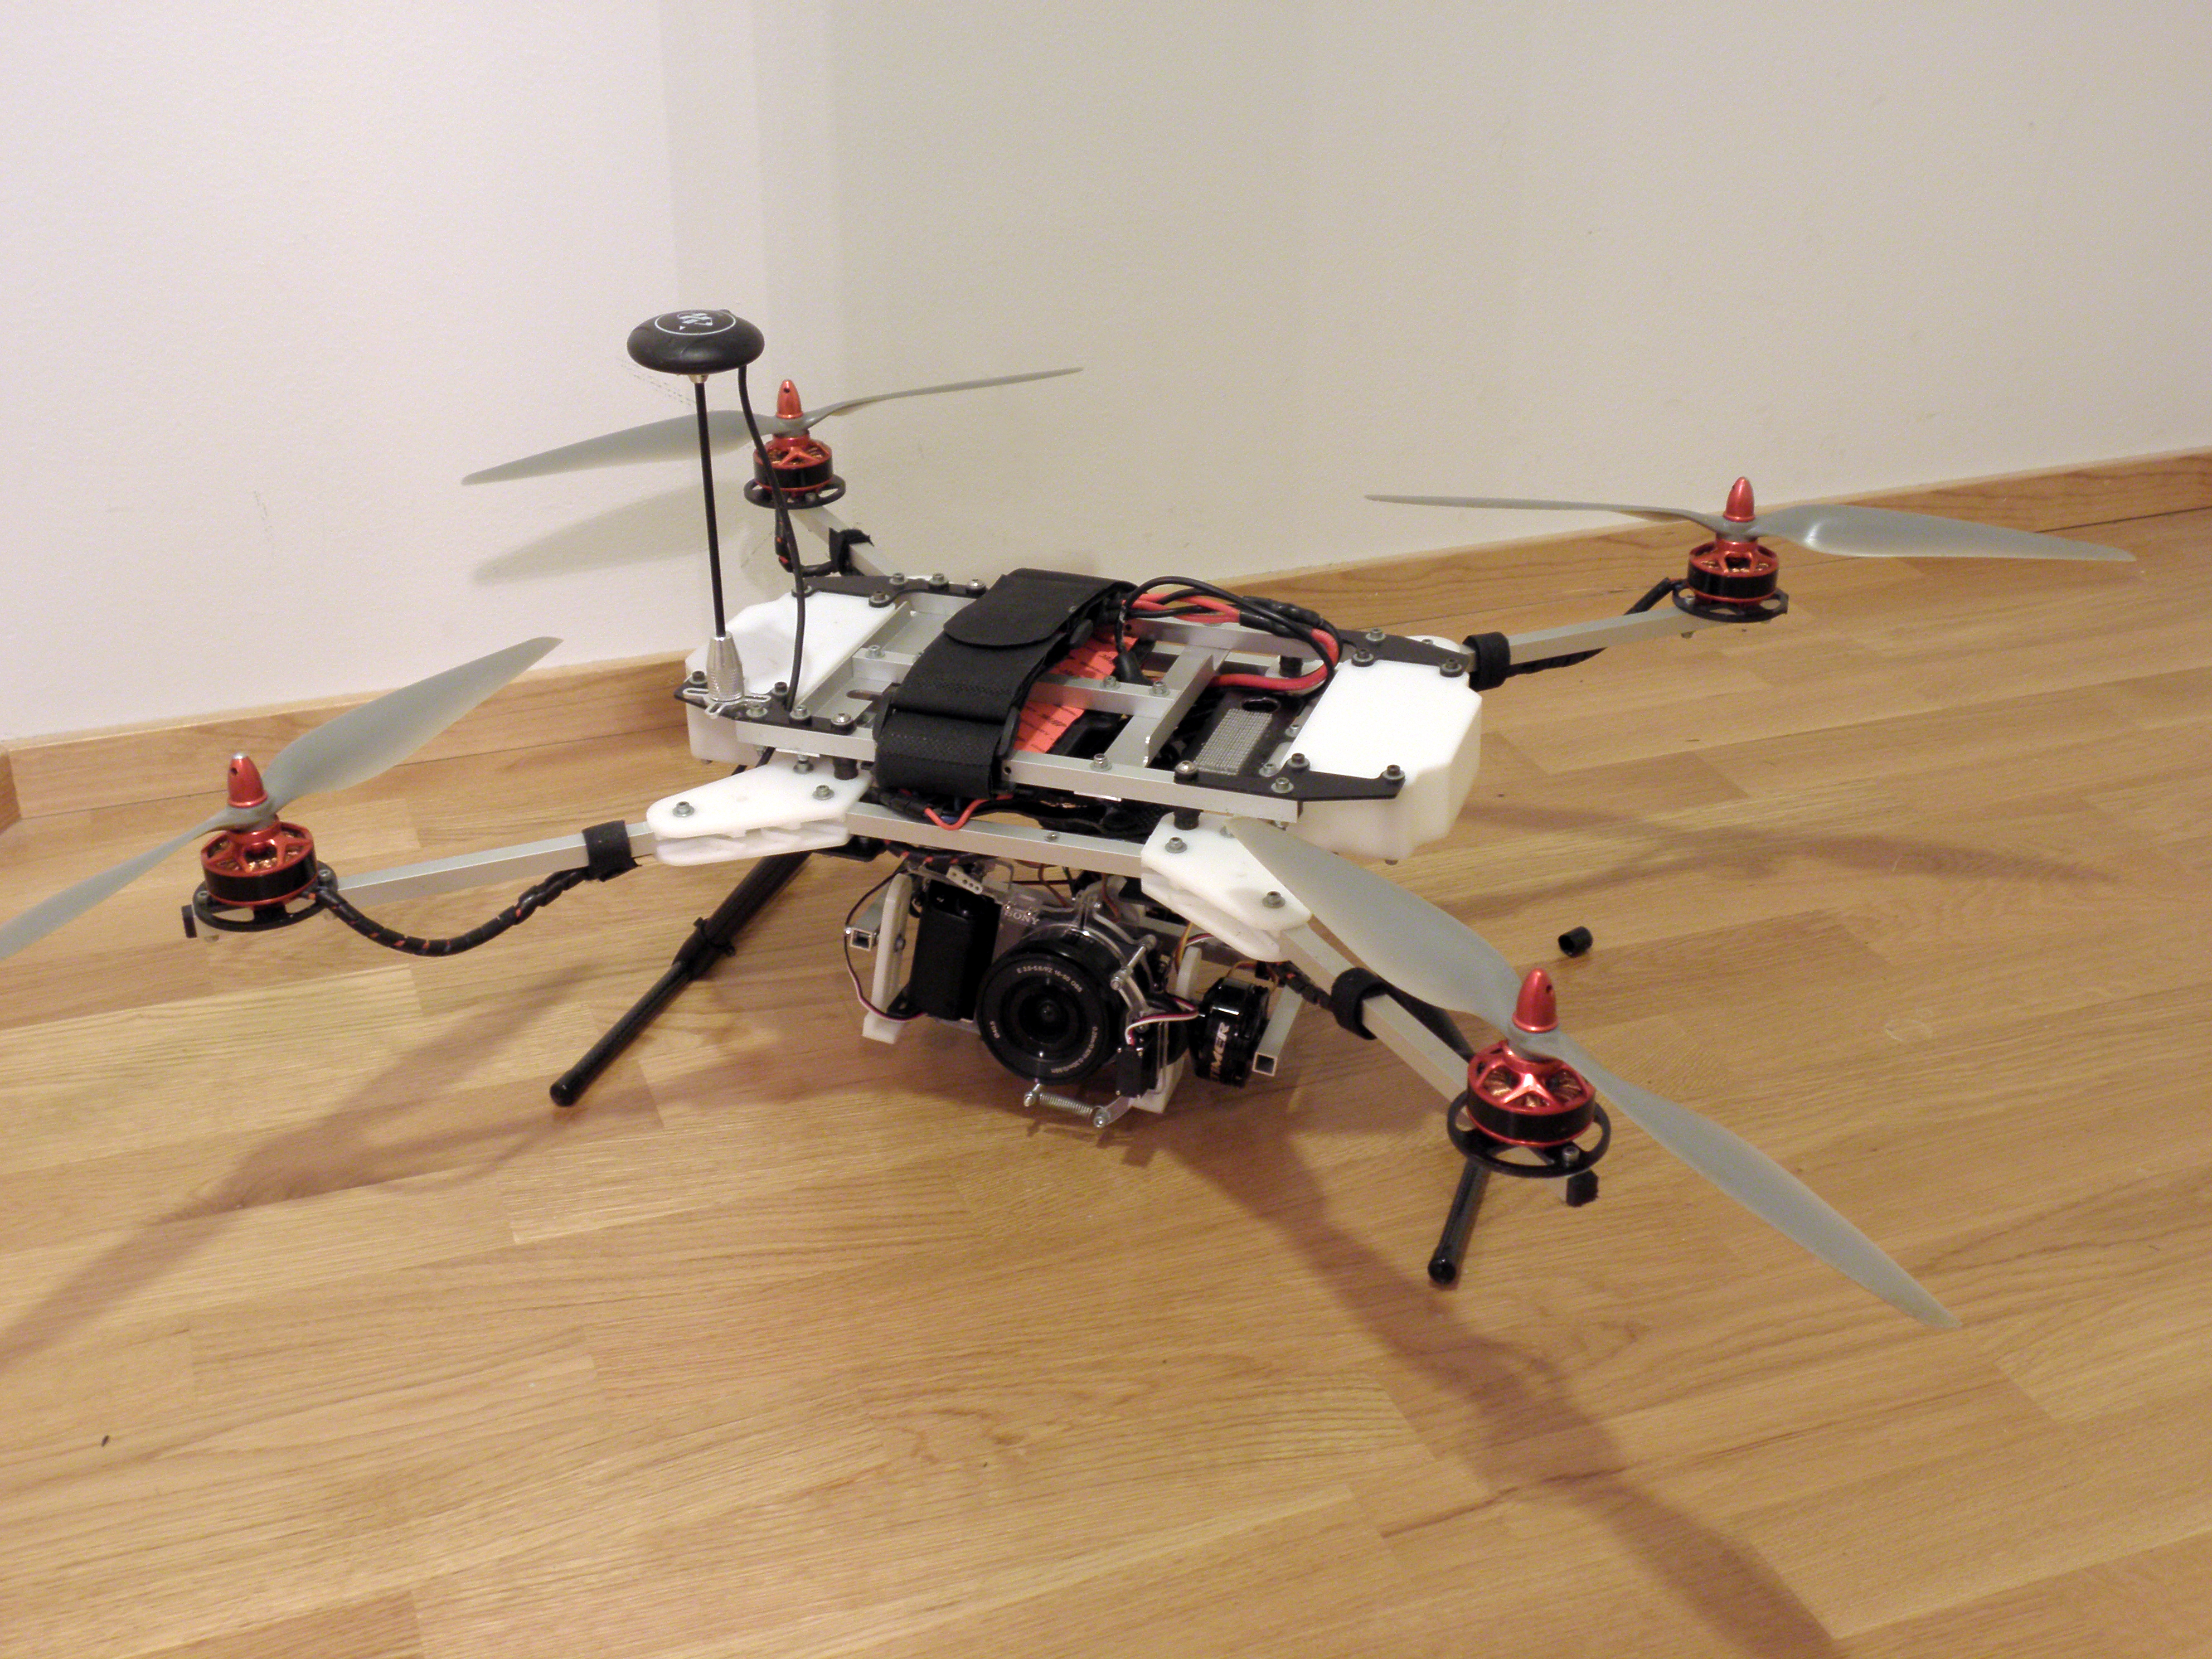
I decided to make it smaller. I was first thinking to transform it to a coaxial octocopter, or X8, with four pairs of contra-rotating propellers, but as that configuration offers only little more power over a quadcopter, with increased battery consumption, I made the Beast into a quad. As more flight time was needed, I got rid of every unnecessary parts and made the remaining ones lighter if it was possible. Although the decorative V8 emblems around the copter were nice, they added too much in weight so they had to go too. The landing gear configuration was revised with a simpler and lighter carbon fiber construction.
Over the next few years, the airframe was refined and it ended up being a robust heavy-lifting platform for various experimental purposes. The polycarbonate plastic parts were replaced by glass fiber and polyacetal parts which fully enclosed all the electronics making the drone capable of almost all-weather operation. The airframe was also made foldable. The steadicam stabilizer was replaced with a high-power brushless gimbal which unfortunately never produced video good enough for my taste. Although the still pictures captured using the Sony Nex5T were usually quite good.
In its final form, the Beast was built like a tank, made of high-quality parts. The flight controller was the Japanese Naze 32, running slightly modified version of the iNav 1.2 autopilot code. The drone performed quite well for its age but can not match the latest commercial ones in stability or navigation capabilities.
Conclusion

The Beast drone was something that lived up to its name. The project had plenty of setbacks which eventually made me think different about many things in the developing drone industry, being a good lesson about many things involved. In my photography and video use, it got replaced by the Yuneec Typhoon H I purchased recently. The Typhoon H outperforms the Beast in every imaginable way, being also way easier and safer to operate. The current state of rapidly evolving drone market has made huge special-made drones almost obsolete. The commercially available drones are nowadays so sophisticated, small, light and safe, that they are favored over their larger predecessors in almost every purpose. That, however, did not stop me, as I ended up building one more wicked flying thing after this…