I had three multirotors. The Drone which made its first flight in 2010, the V8 (2013) and the Little Devil, a miniature hexacopter, which I made as my flying portfolio in 2013 when I was seeking for a job after graduation. Why in the Earth I needed one more?
I consider my four-year old Drone as complete project and I will not upgrade it any more. It is a product of its time and a showcase of my skills back then. My other copter, the V8 was a heavy machine, built solely for aerial photography. Hauling a heavy, power-hungry, expensive and somewhat dangerous device around just for fun is sometimes not that fun. And that miniature hexacopter is only good for short indoor flights.
So there was clearly room for one small aerobatic machine that is easy to transport. But there was also one more big thing why I wanted this machine. For a long time, since I started this hobby, I have been searching for a multirotor frame, that is made the right way in my opinion. Of carbon fiber. Featuring a monocoque structure where the shell of the machine is the load-carrying part, hiding all the electronics and wiring inside. When every single high-performance vehicle, ranging from Formula One cars to modern general aviation aircraft and fighter jets are built this way, why multirotors are not?
By a chance, I found Dex Frames, http://www.dexmodels.com/ and a thread about them at RCGroups.com. The Dex Frames are made of full fiberglass or carbon fiber, to the order, by a very skilled Croatian guy called Denis. When I saw pictures of his products, I knew I wanted one. I was however concerned about the durability of them, so I asked him how durable the Mini Quad, in which I was interested, is. This is Denis’ answer:
“Mini is very durable: https://vimeo.com/51951048 :)”
I was sold. I ordered one immediately. And my expectations were very high. Especially when kept in mind that these things are completely hand-made, Denis delivered the frame very quickly. In two weeks from the order I had the Mini Quad in my hands, made according to my wishes. The Mini Quad which is seen on the video is made of glass fiber. But as my piloting is sometimes quite rough, my frame was made of carbon fiber with extra layers of cloth, making it extra strong and durable. Denis named the thing as the Hammer, because when not flown, it can also be used for that very purpose. He was very helpful in motor and propeller selection and assembly. I usually do not recommend any products on my non-commercial blogs, but Denis and his frames are really exceptional. And this is not an paid ad! 😉
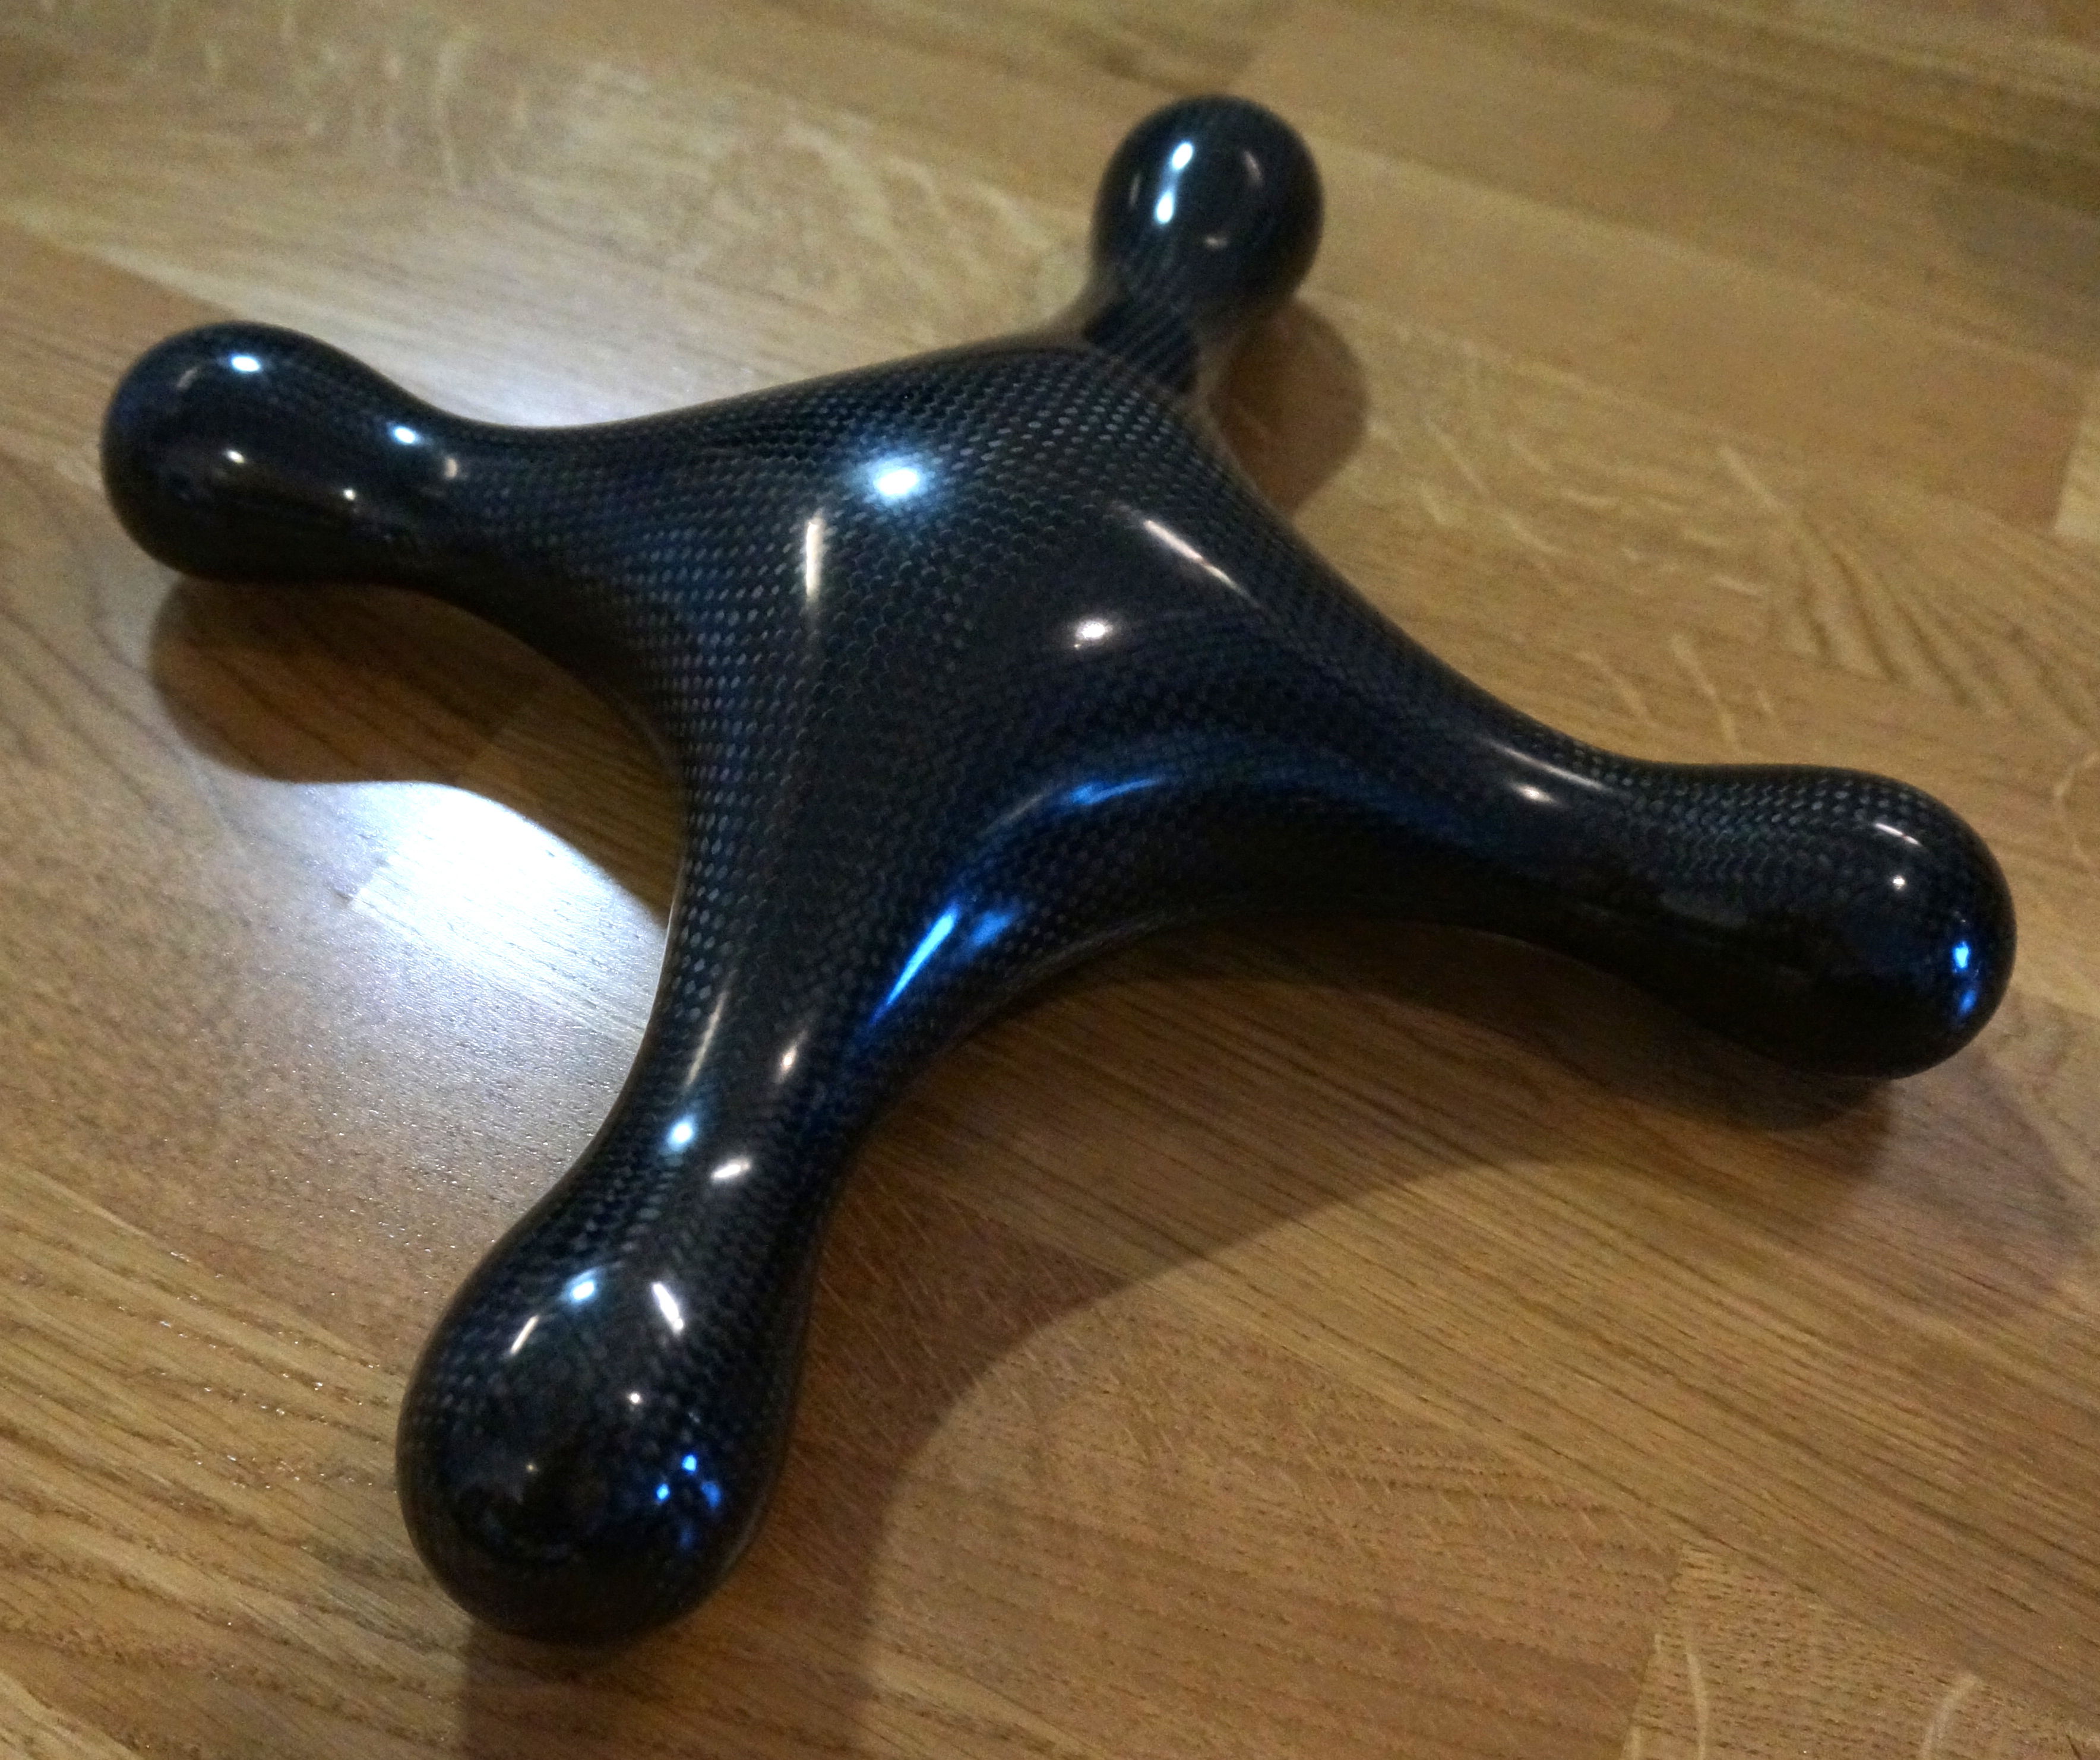
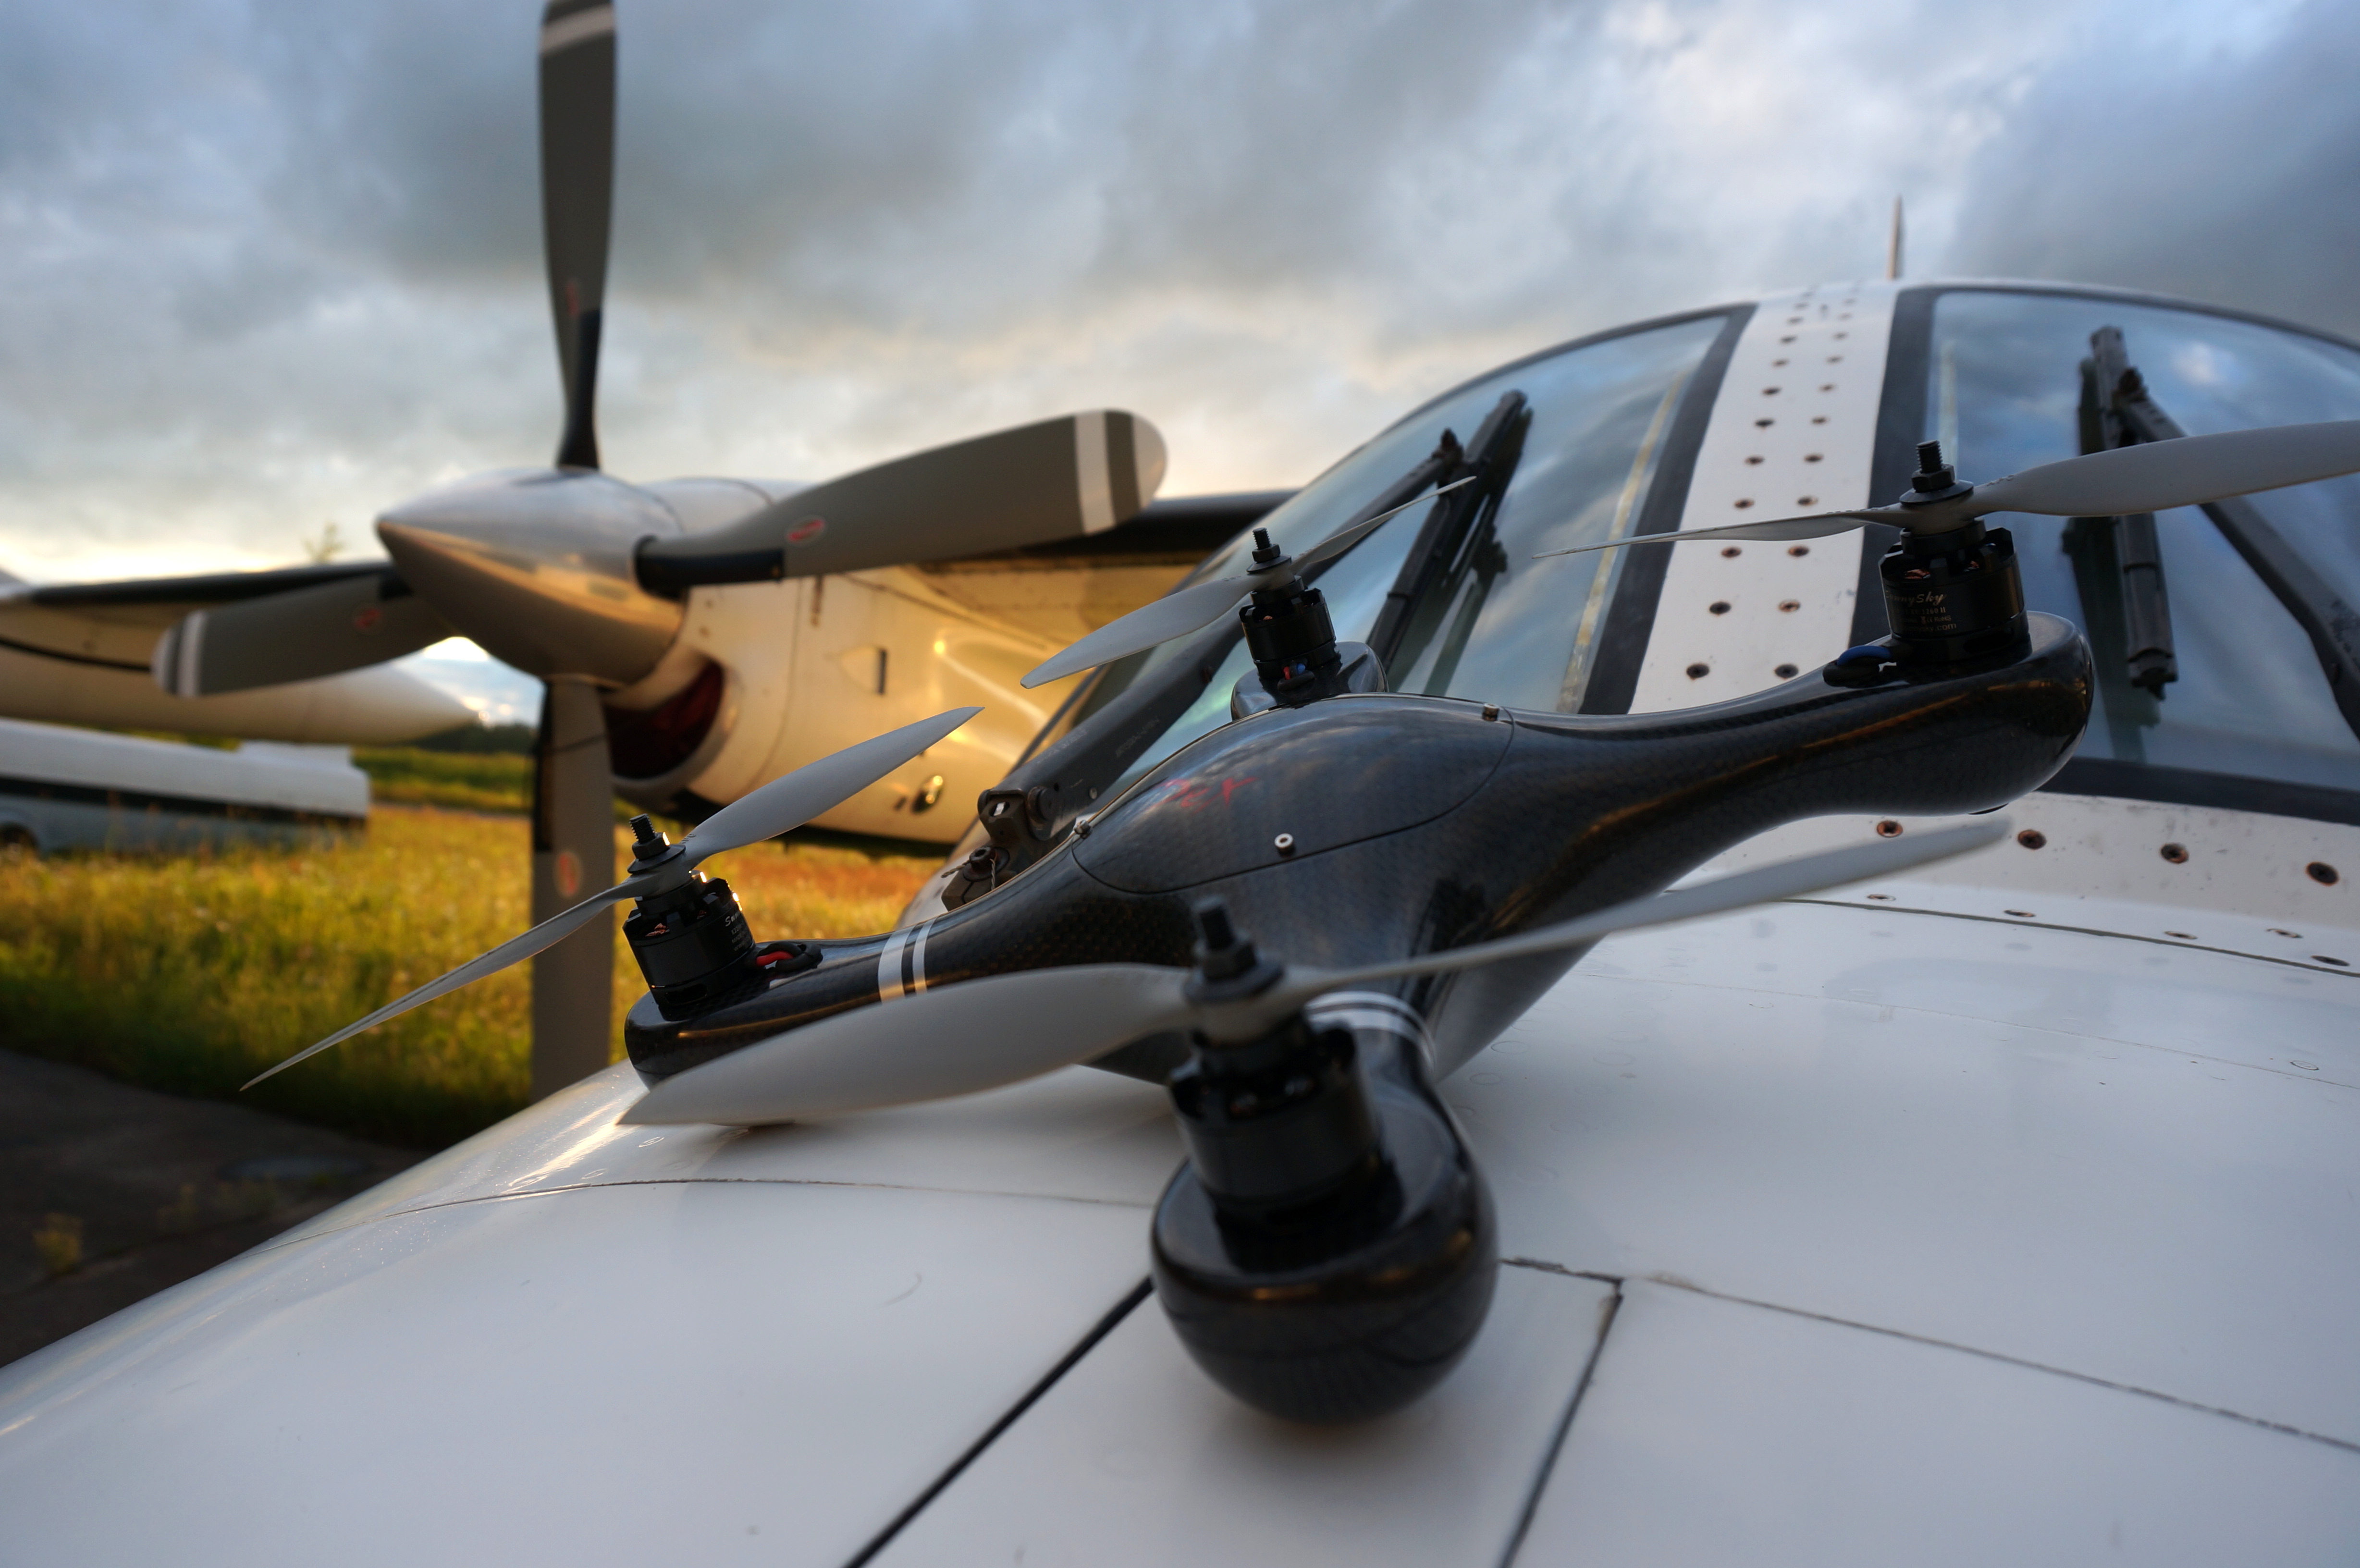
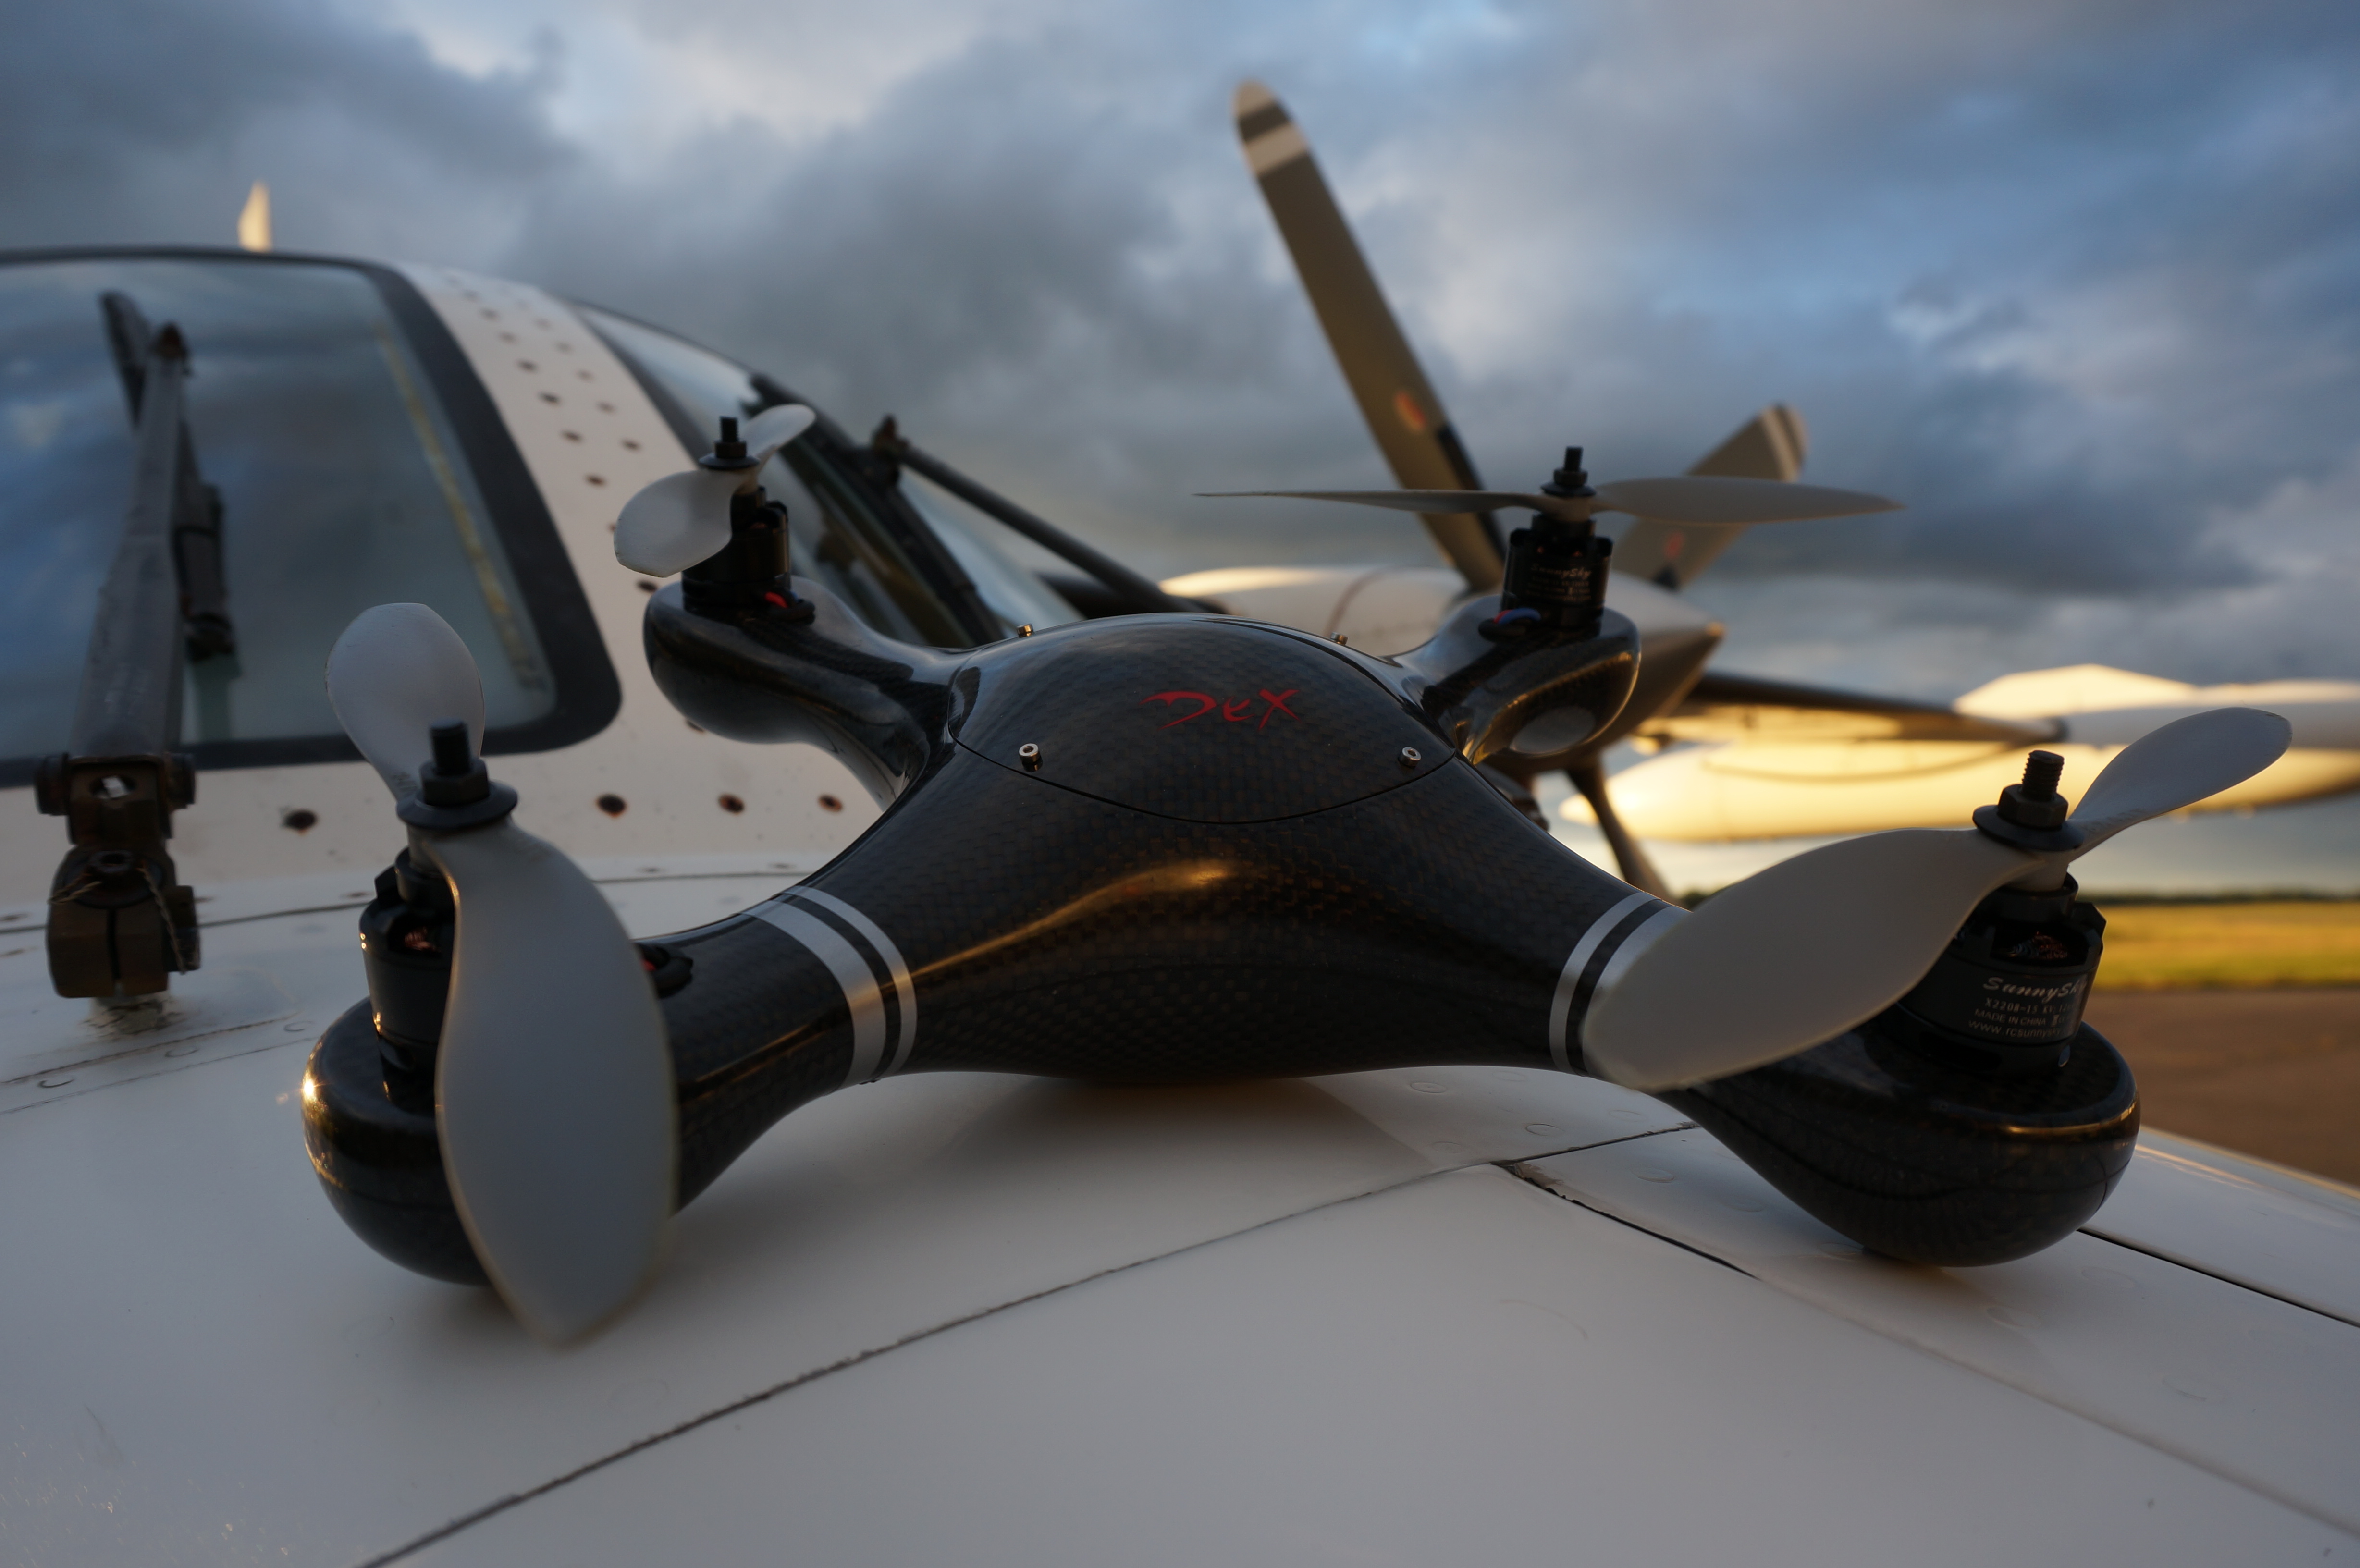
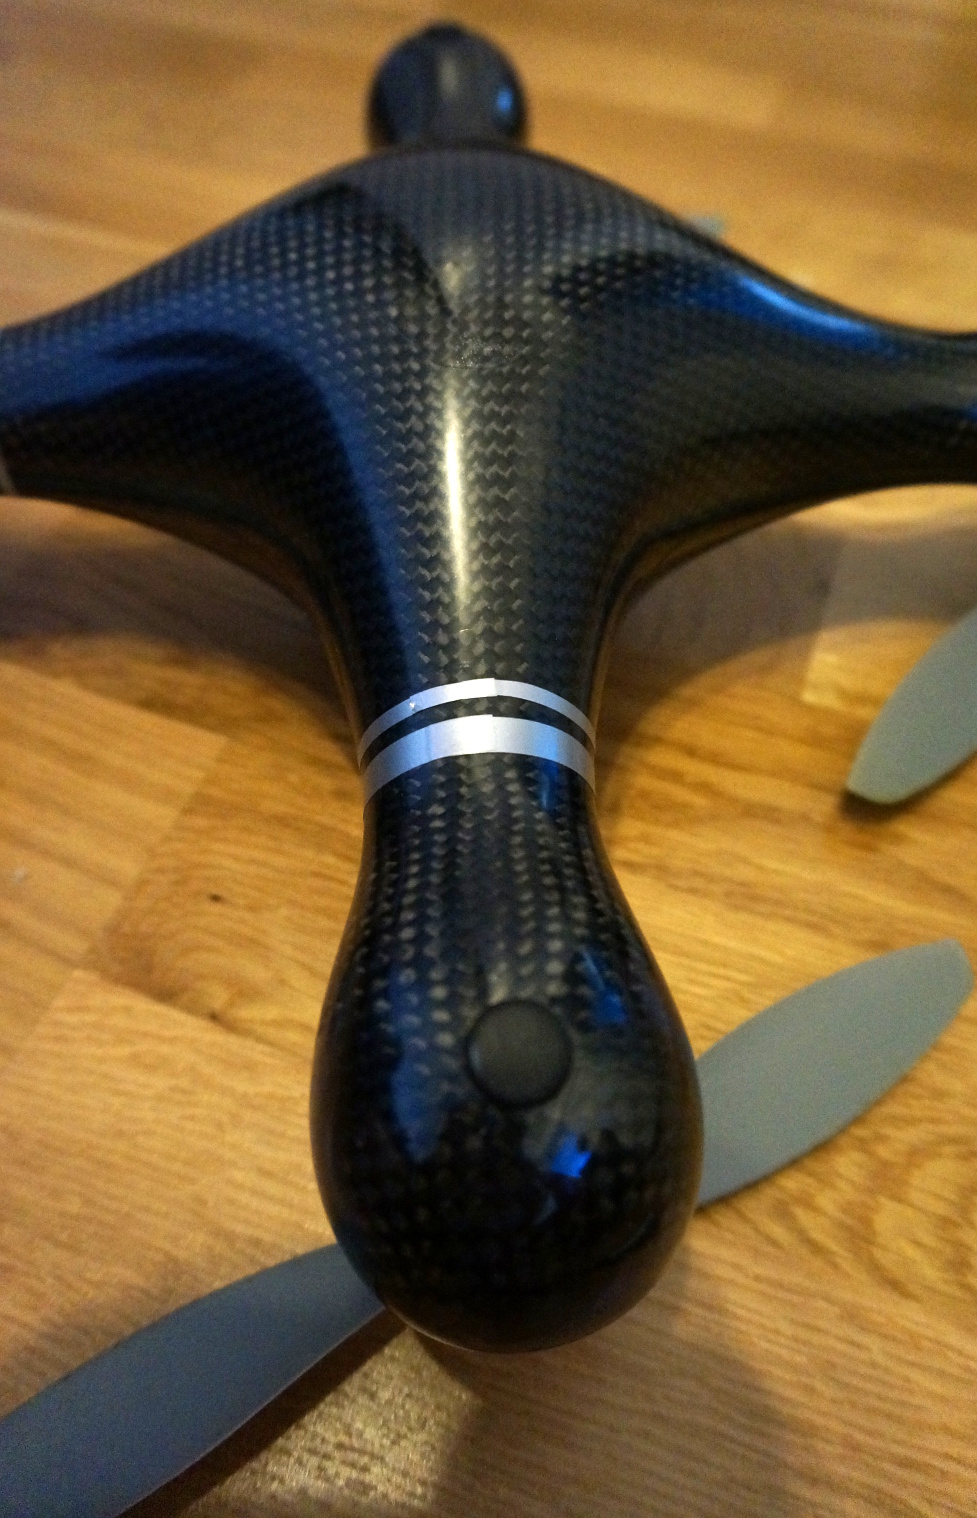
After two weeks the Dex Mini Quad arrived. It was well packed, to protect the surroundings and post office from damages. According to the video above, the frame itself will survive pretty much everything. It exceeded all of my already high expectations . It was a completely flawless, very nicely finished piece of art, hand-made of 100% CF. Now this is the way to build these things! And now it was my turn to make this work of art to fly! The frame had no pre-made holes which allowed me to choose how to mount motors and other hardware which I liked. It had small notches on its arms to help drilling centered holes for motors. The frame can be made waterproof, but although I live near the very large lake, Saimaa, I did not consider that important for me. So my installation differs from those who made it waterproof.
Working with carbon fiber
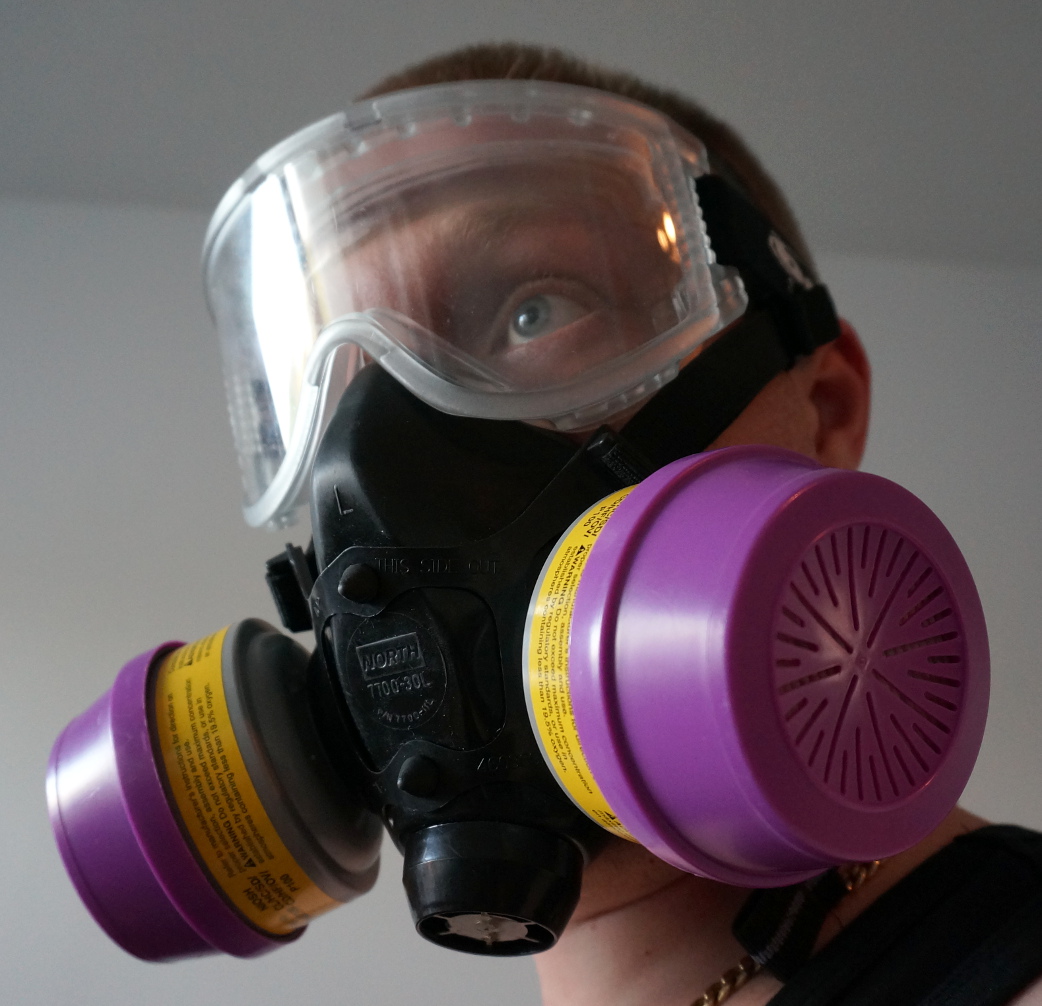
I hate it. Although carbon fiber is an exceptionally good material for building high-performance machines, there are few drawbacks with it, which is why I normally avoid using it. It is easy to work with, but it is hard for your tools which wear out very quickly. But the more important thing to consider is the dust. It is composed of very small fibers and resin dust which make it being far from healthy. To avoid dust, the work can be done either by wetting the surface or using a vacuum to clean off the dust as it is produced while wearing a proper personal protective equipment. A good pair of goggles and a good respirator are essential if you ask me as I find the carbon dust irritating. The gear I used are probably a little overkill, but they do the task and I do not want to risk my health with my hobbies. The protective gear are not expensive and they can also be used with other projects like I do, featuring dust, paint- and soldering fumes which are often present in DIY projects.
Construction
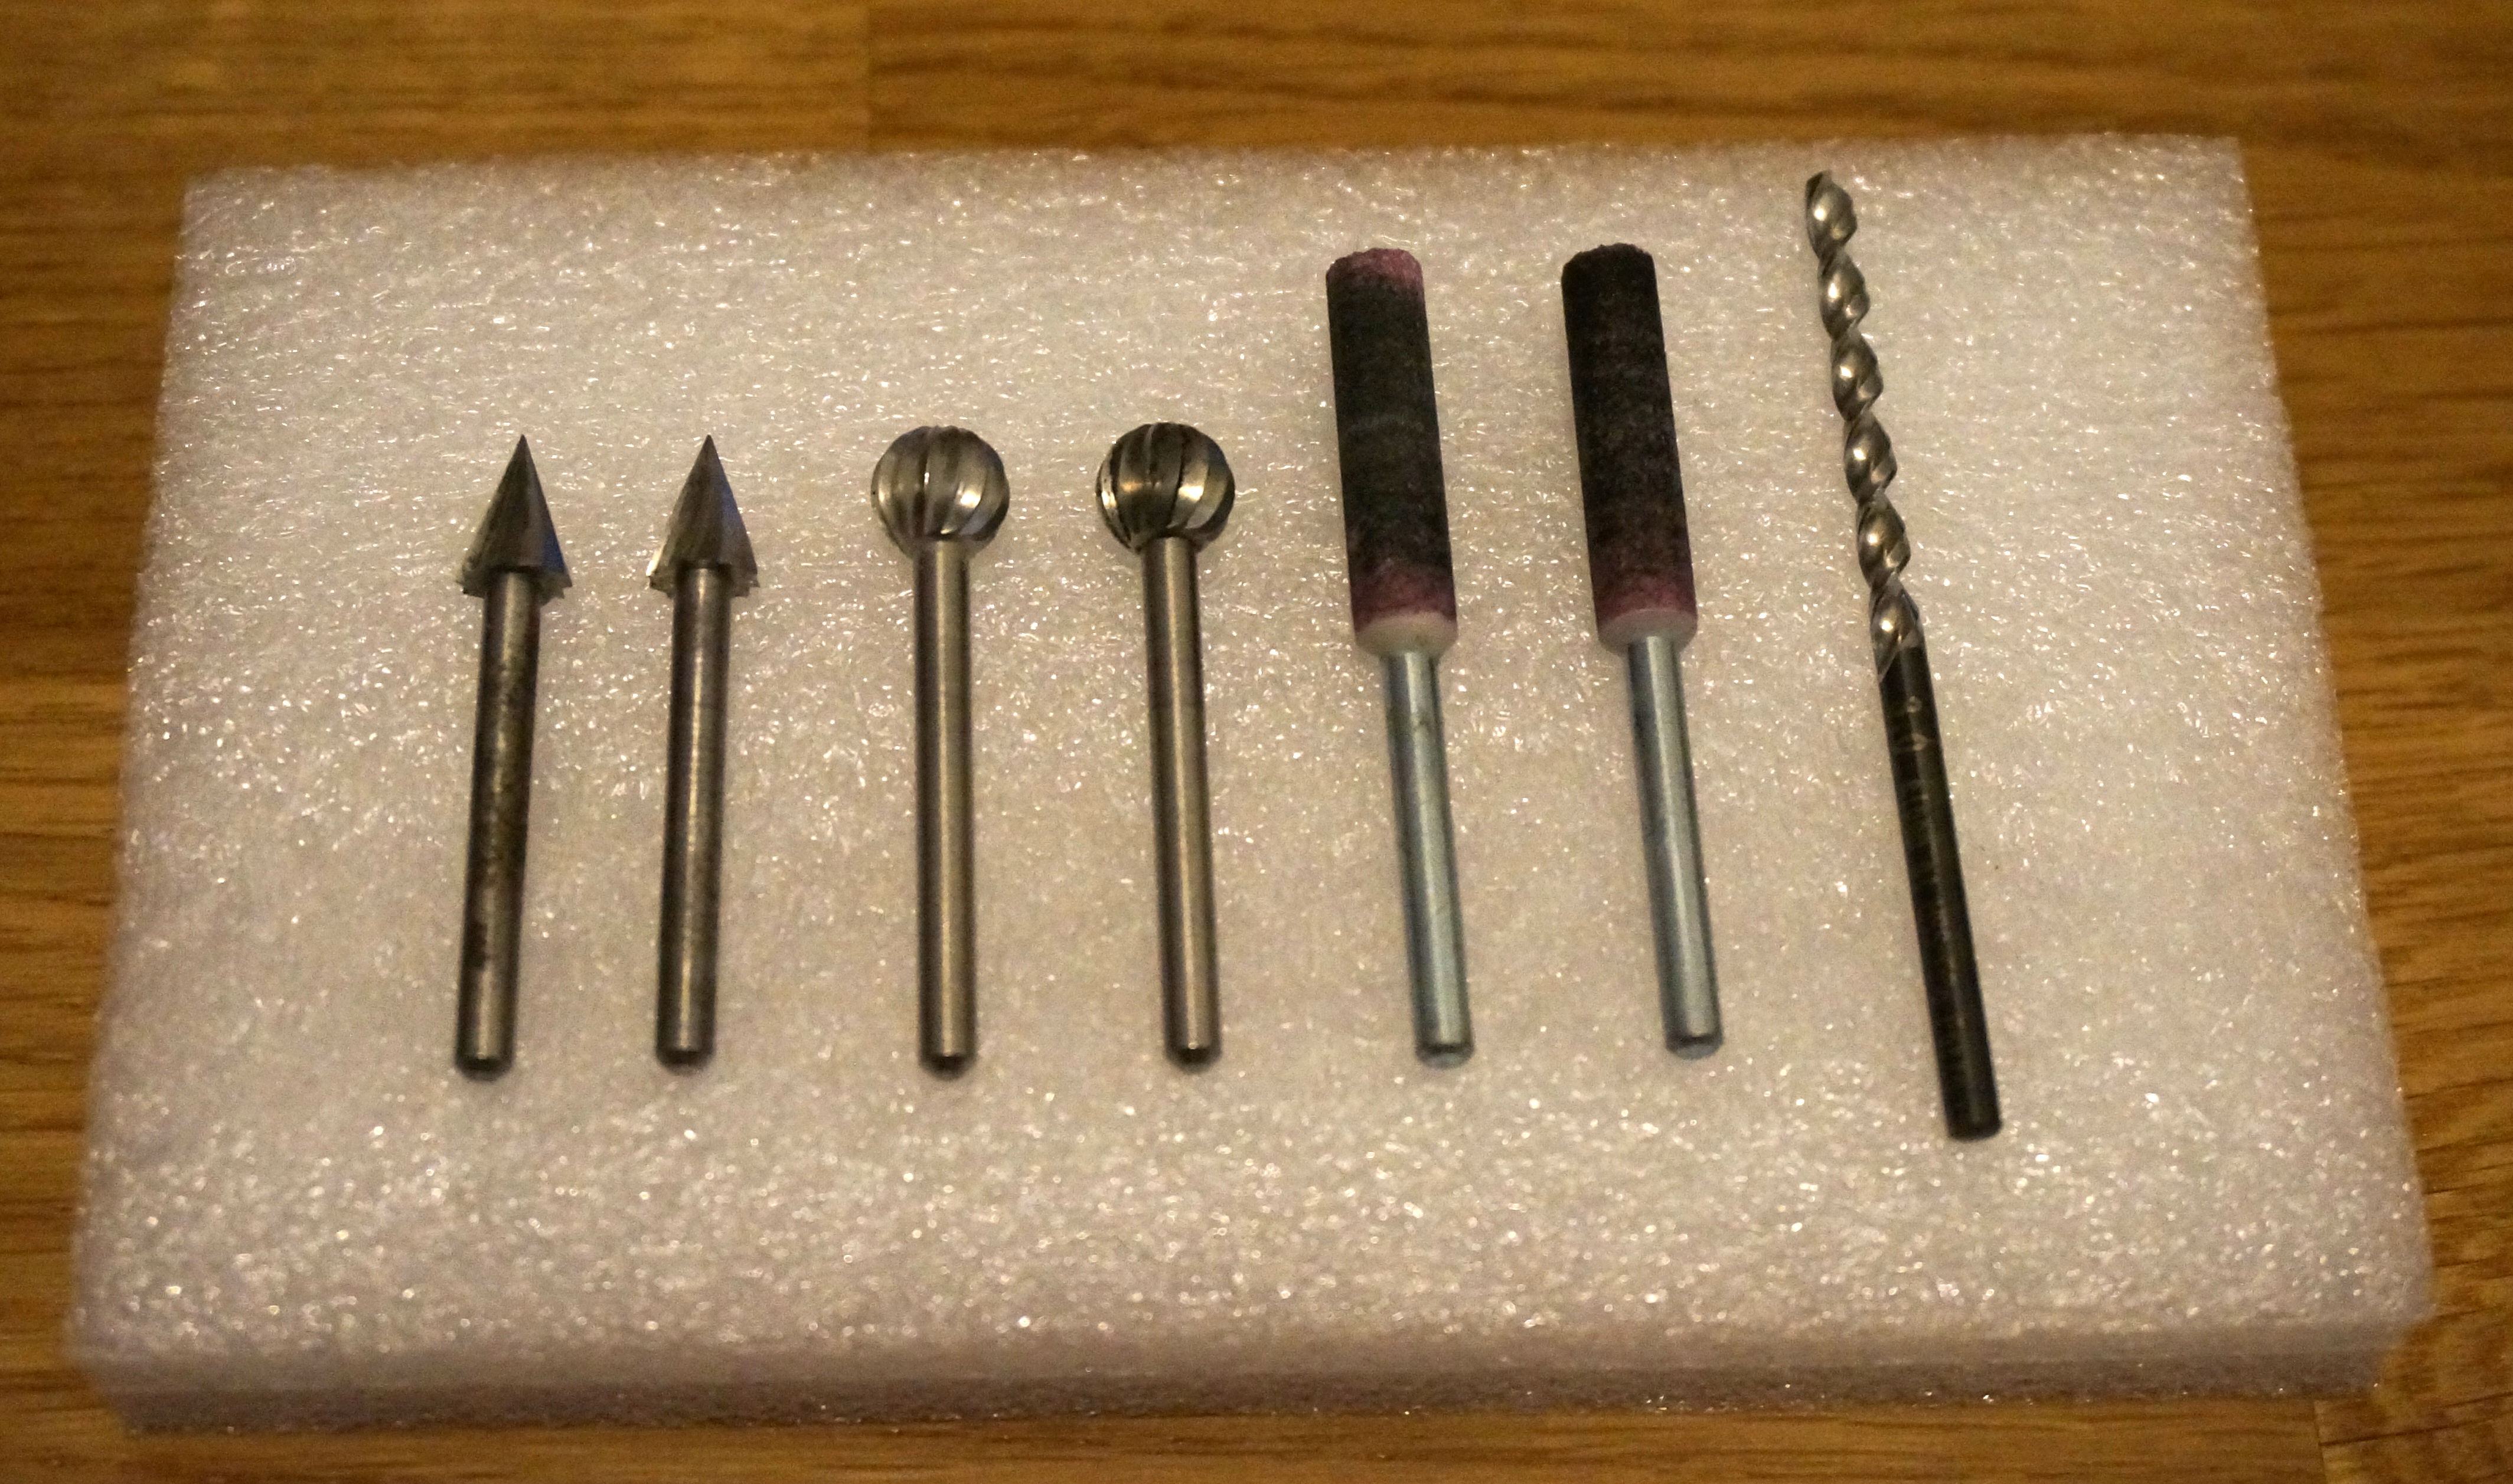
While the boring safety stuff has now been dealt with, it was time to get to work and build the thing. As making fixtures for my CNC mill would have been very difficult for this kind of a workpiece, I ended up using a small rotary tool for the task. I used small conical, sharp-headed bits to mark the holes which were then drilled using a 3 mm metal drill. Because I was worried about the de-laminating or chipping the fiber, I did not want to use larger drill bits for larger holes.
I used ball-headed multi-flute milling bits to enlarge the needed holes and then enlarged them to their final size using sanding tools which is why I wanted to wear a respirator. Even the miniature sanding tools managed to produce a good amount of rather irritating dust. It also required a very steady hand and a caliber to produce smooth, symmetric and precise holes but I found the process to be more controllable than using large, chipping drill bits. After the work was done, all the milling bits I used were worn out. Although they were made by a well-known brand, and recommended for carbon fiber, they were not sharp at all even after few holes.
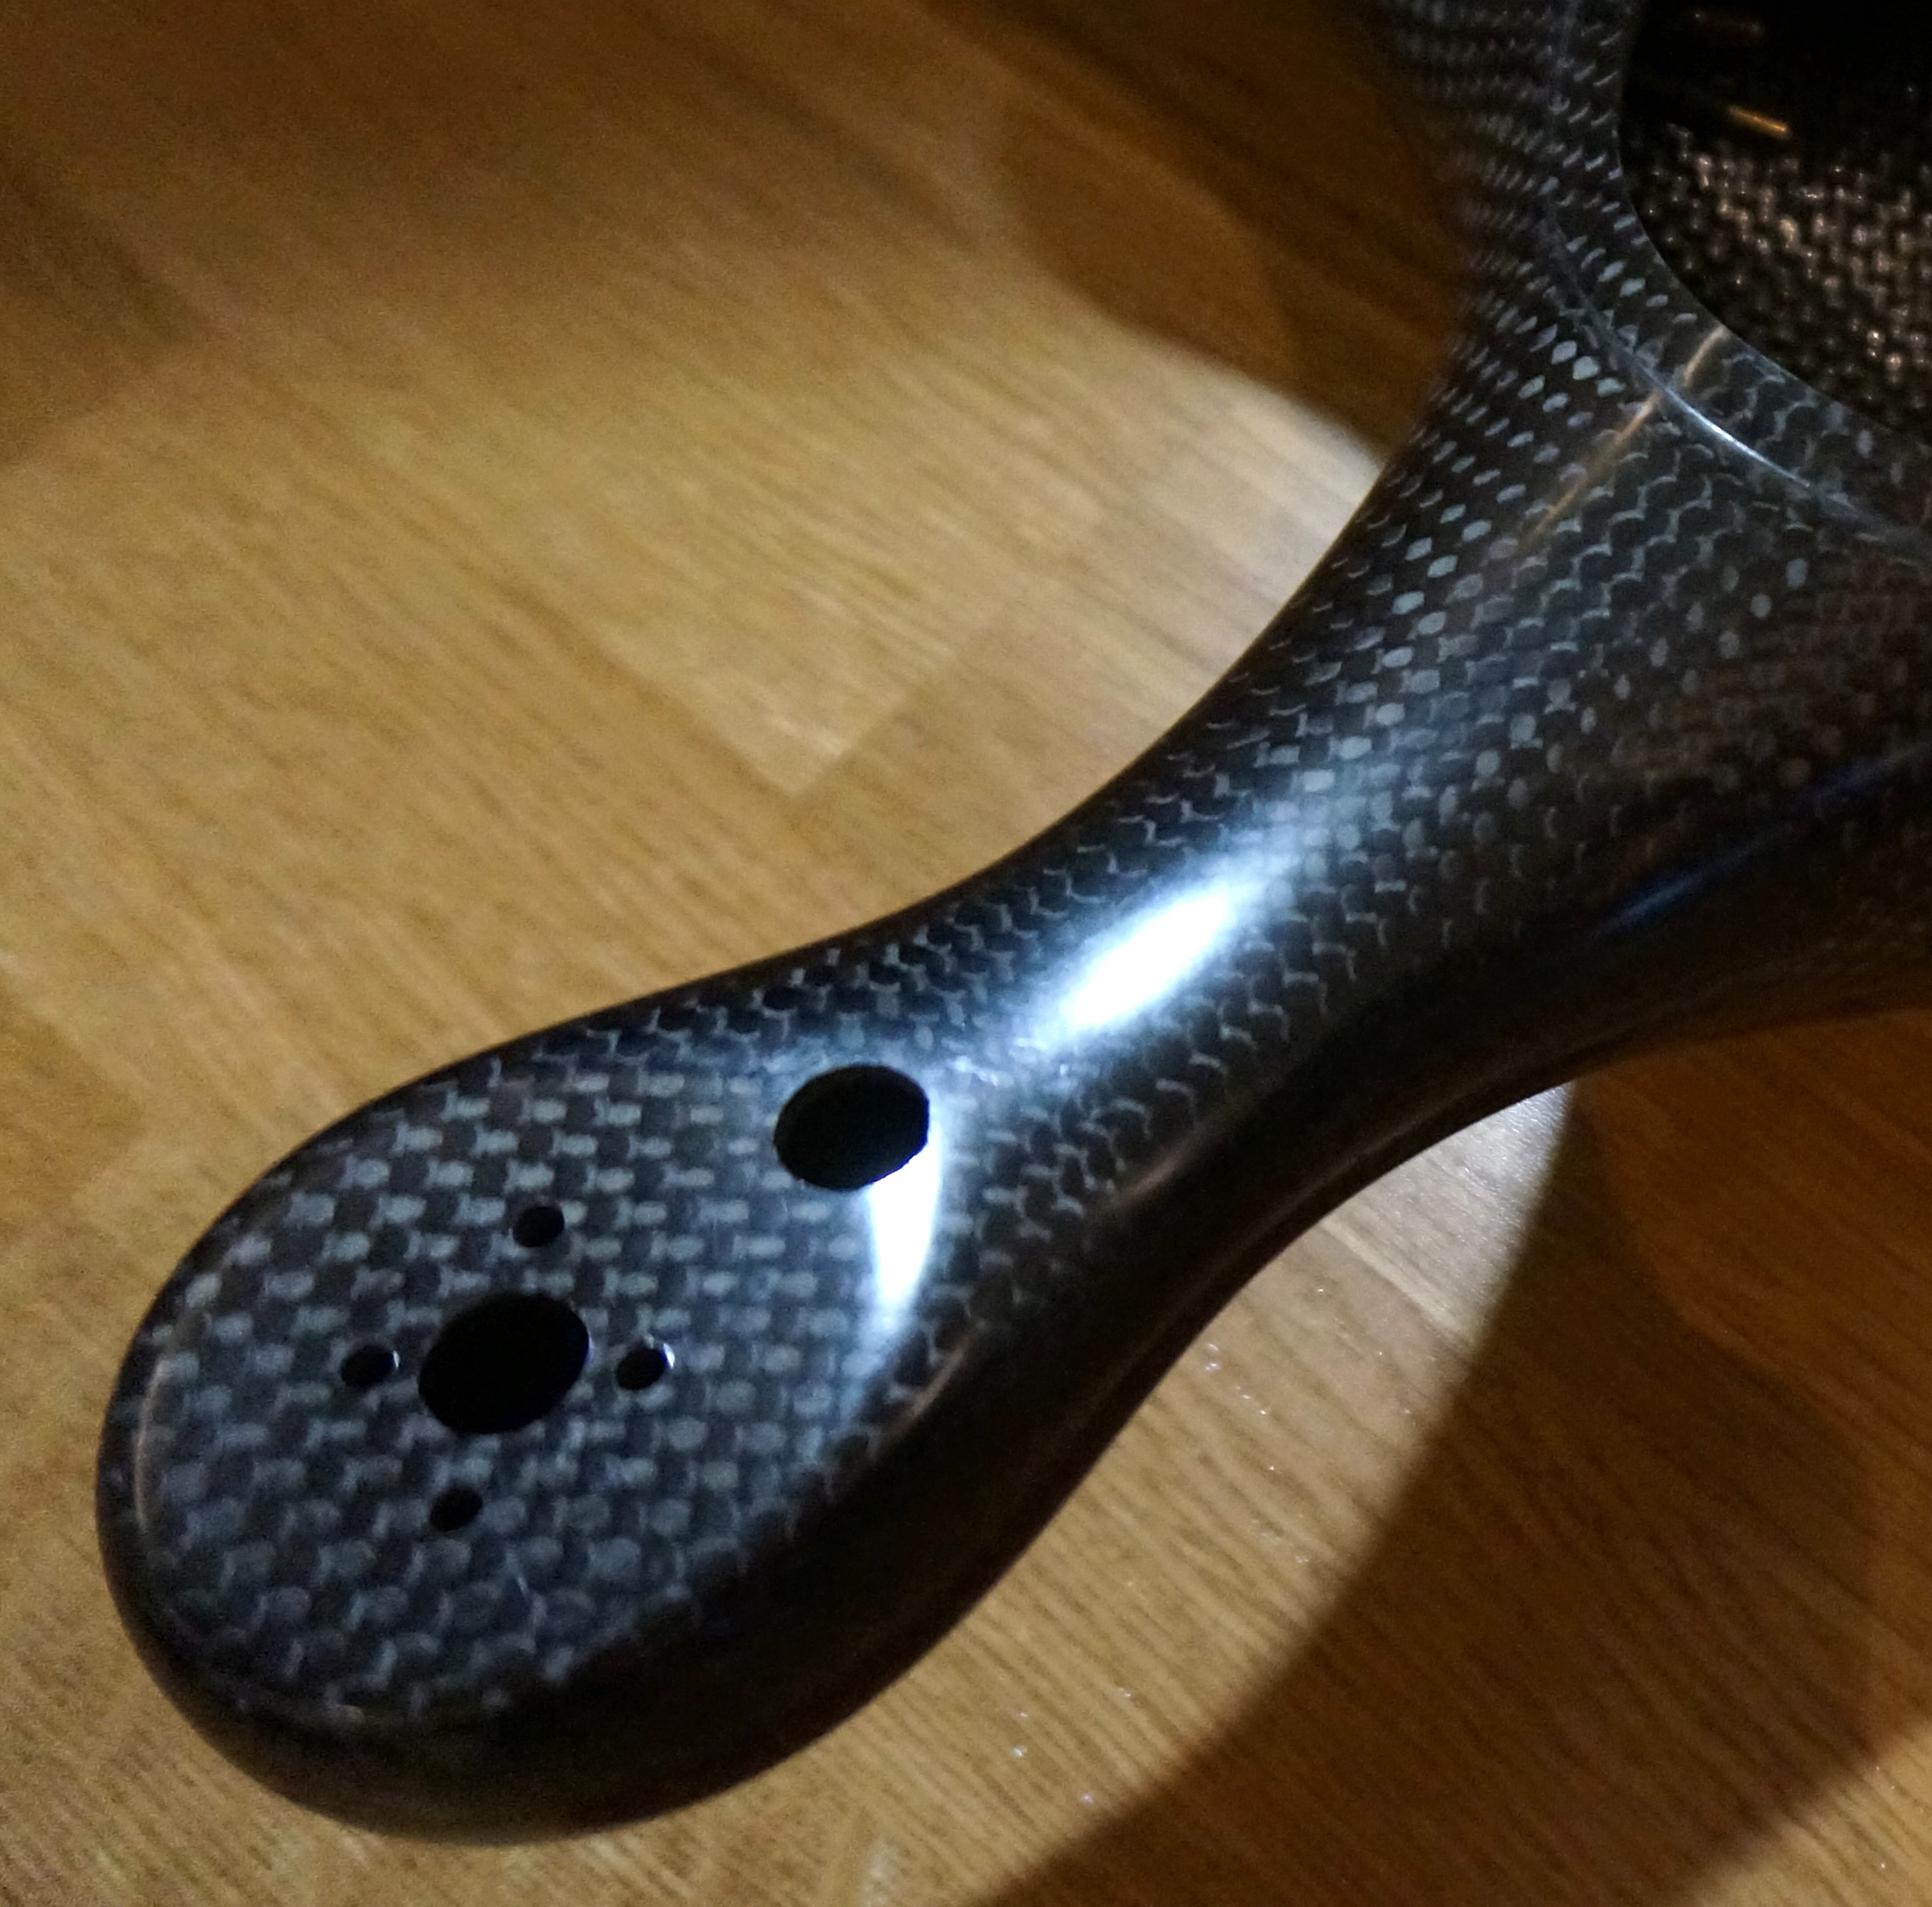
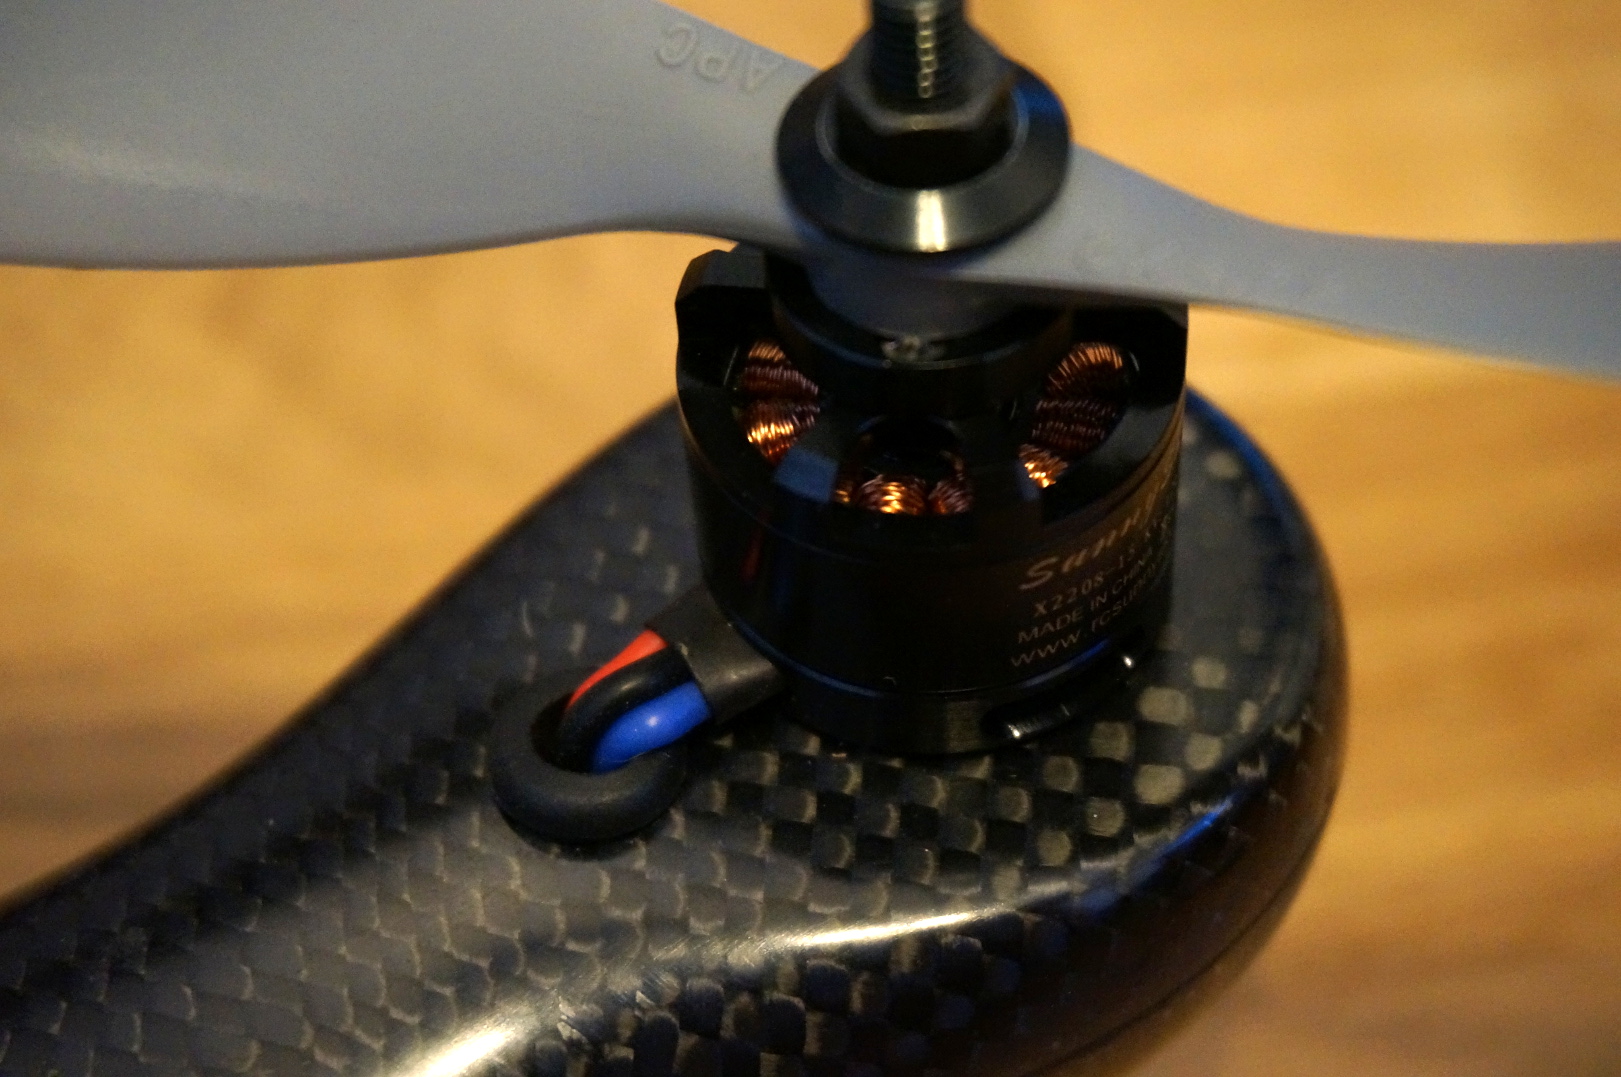
The motors are mounted to the frame using M3 hex machine screws. For the installation I drilled 9 mm holes under the arms, which I later closed with rubber caps. The caps which are not flush with the surface, also protect the arms when taking off or landing. Two more 9 mm holes were drilled; one for the motor shaft end and one for motor power wires. Rubber grommets were installed to prevent the silicone-insulated wires being damaged on the sharp edges.
Electronics
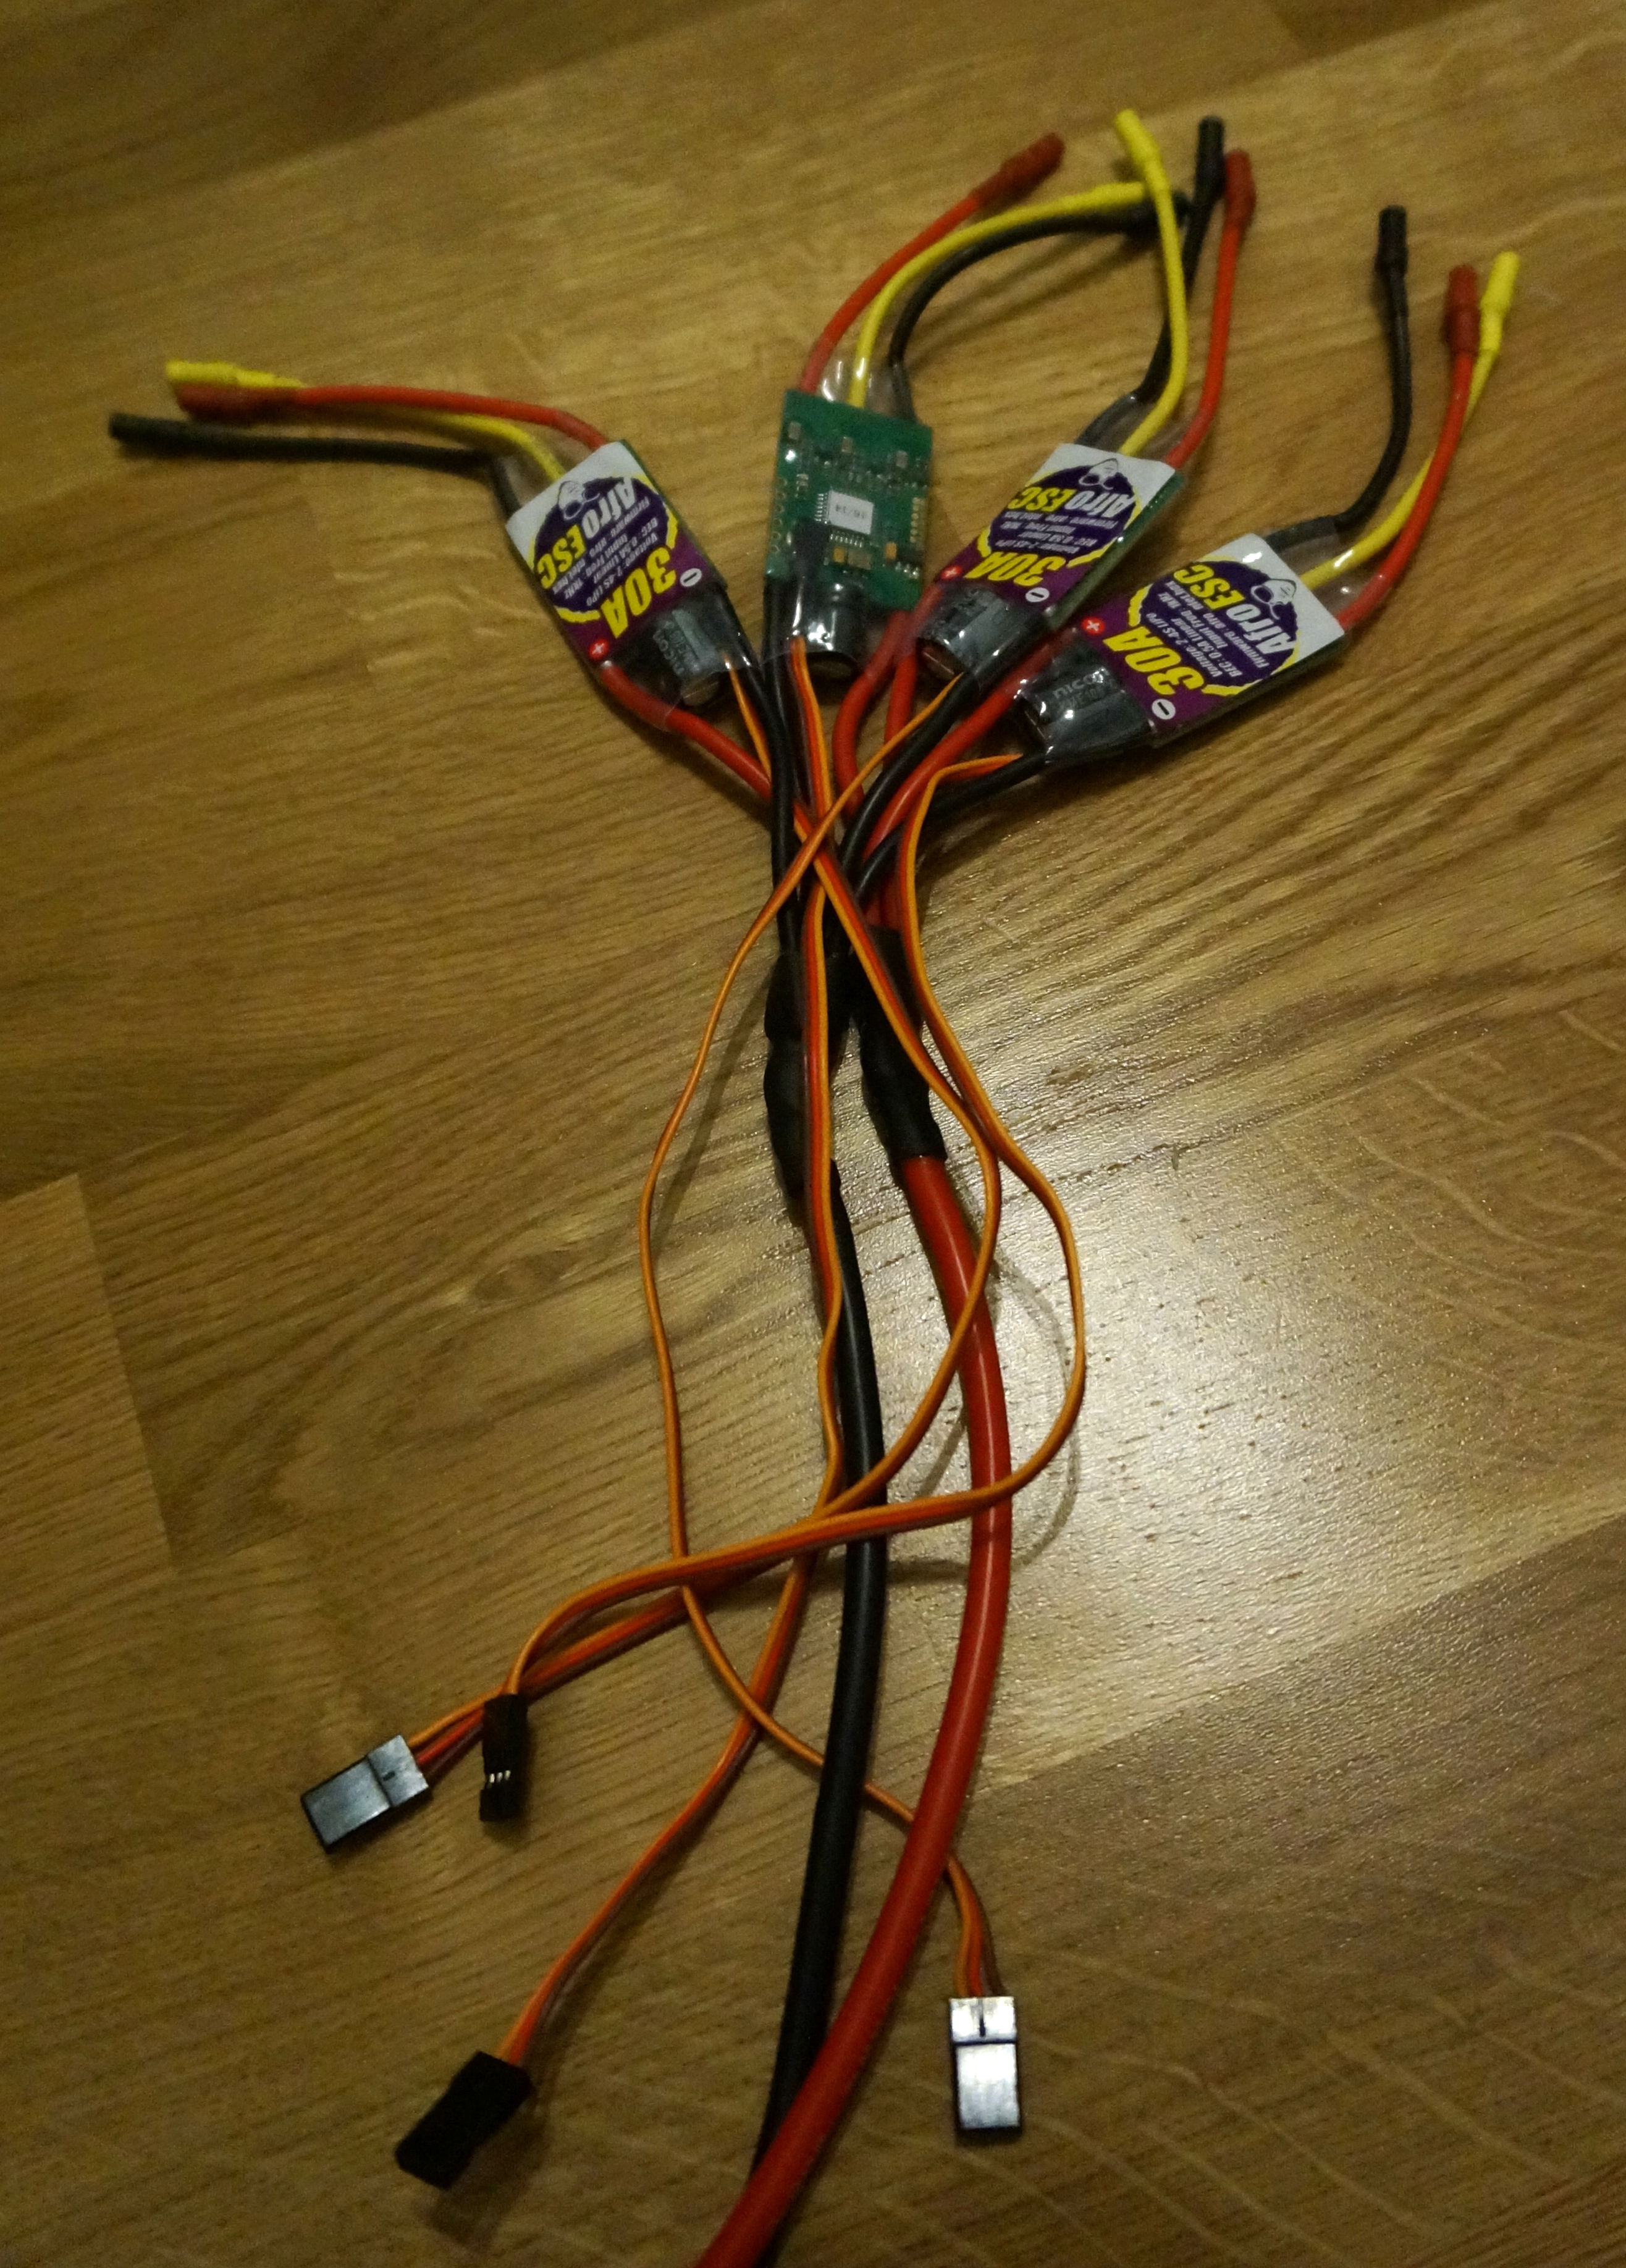
After building few radio-controlled aircraft using my traditional recipe, containing the 8-bit MultiWii, Turnigy F40A speed controllers and 35 MHz radios, I wanted to try something different. The 8-bit MultiWii was upgraded to Naze32, which is an implementation of the MultiWii on 32-bit ARM processor, made by a Japanese programmer Dongs. The ARM provides processing power that leaves the 8-bit 16 MHz AVR far behind, providing a way more stable multirotor with a very crisp control response. The speed controllers I selected were 30A Afro ESC’s. They are made from ground up to multicopters. Motors I selected were SunnySky X2208-1260KV brushless motors. From the Videodrone, I had good experiences of the SunnySky -branded motors and these ones were as good as my previous ones, too.
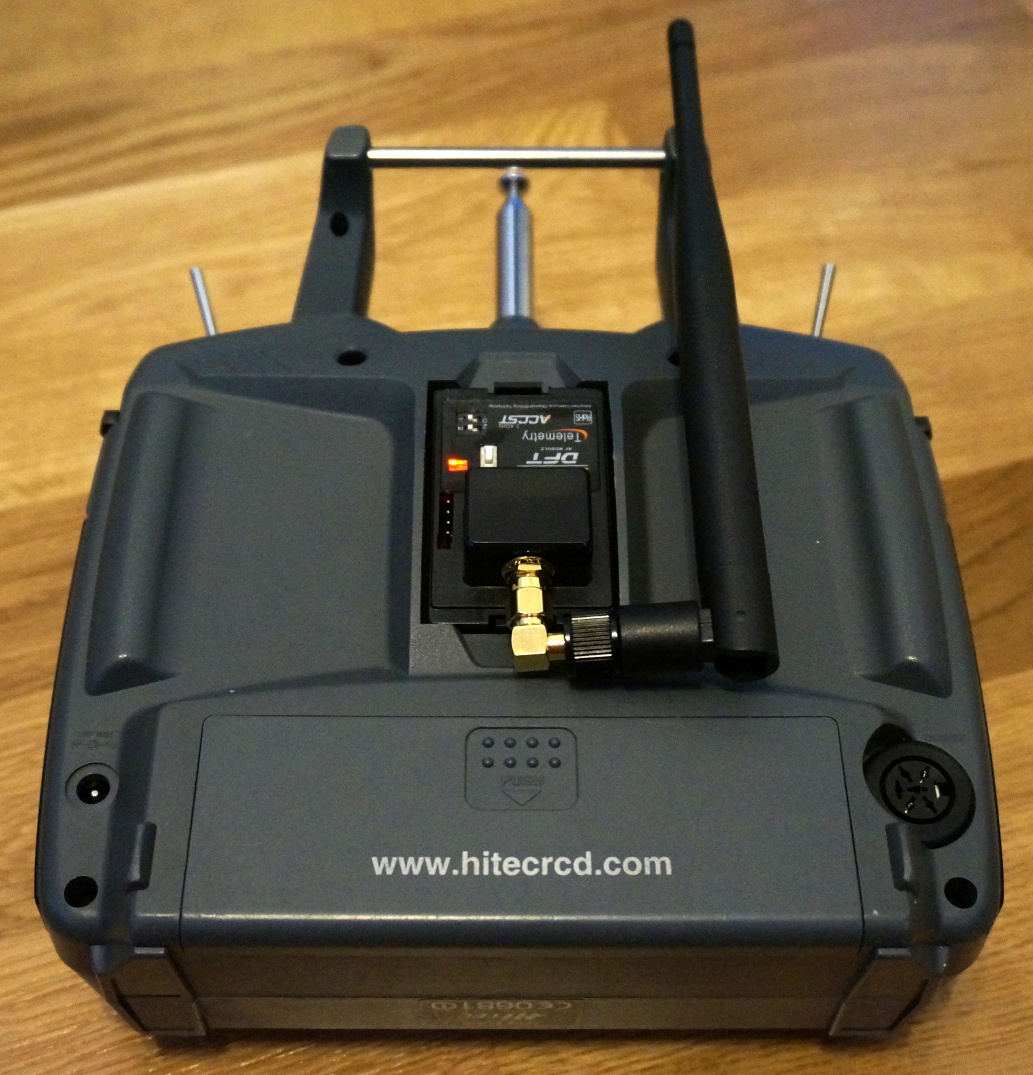
I had also to upgrade my radio controller. While I still fly my other multirotors, those that are fitted with a 2.4 GHz XBee telemetry link, with 35 MHz FM radios to avoid radio interference, I wanted to eliminate the long wire dipole antenna from this copter. As my intentions were to fly mild aerobatics with this one, I did not want to risk the antenna getting into the propellers ruining my day. I purchased a FrSky transmitter and receiver module for this project. My old Hitec Optic 6 radio which I like, looks quite weird with the 2.4 GHz module with its own antenna retrofitted.. 😉
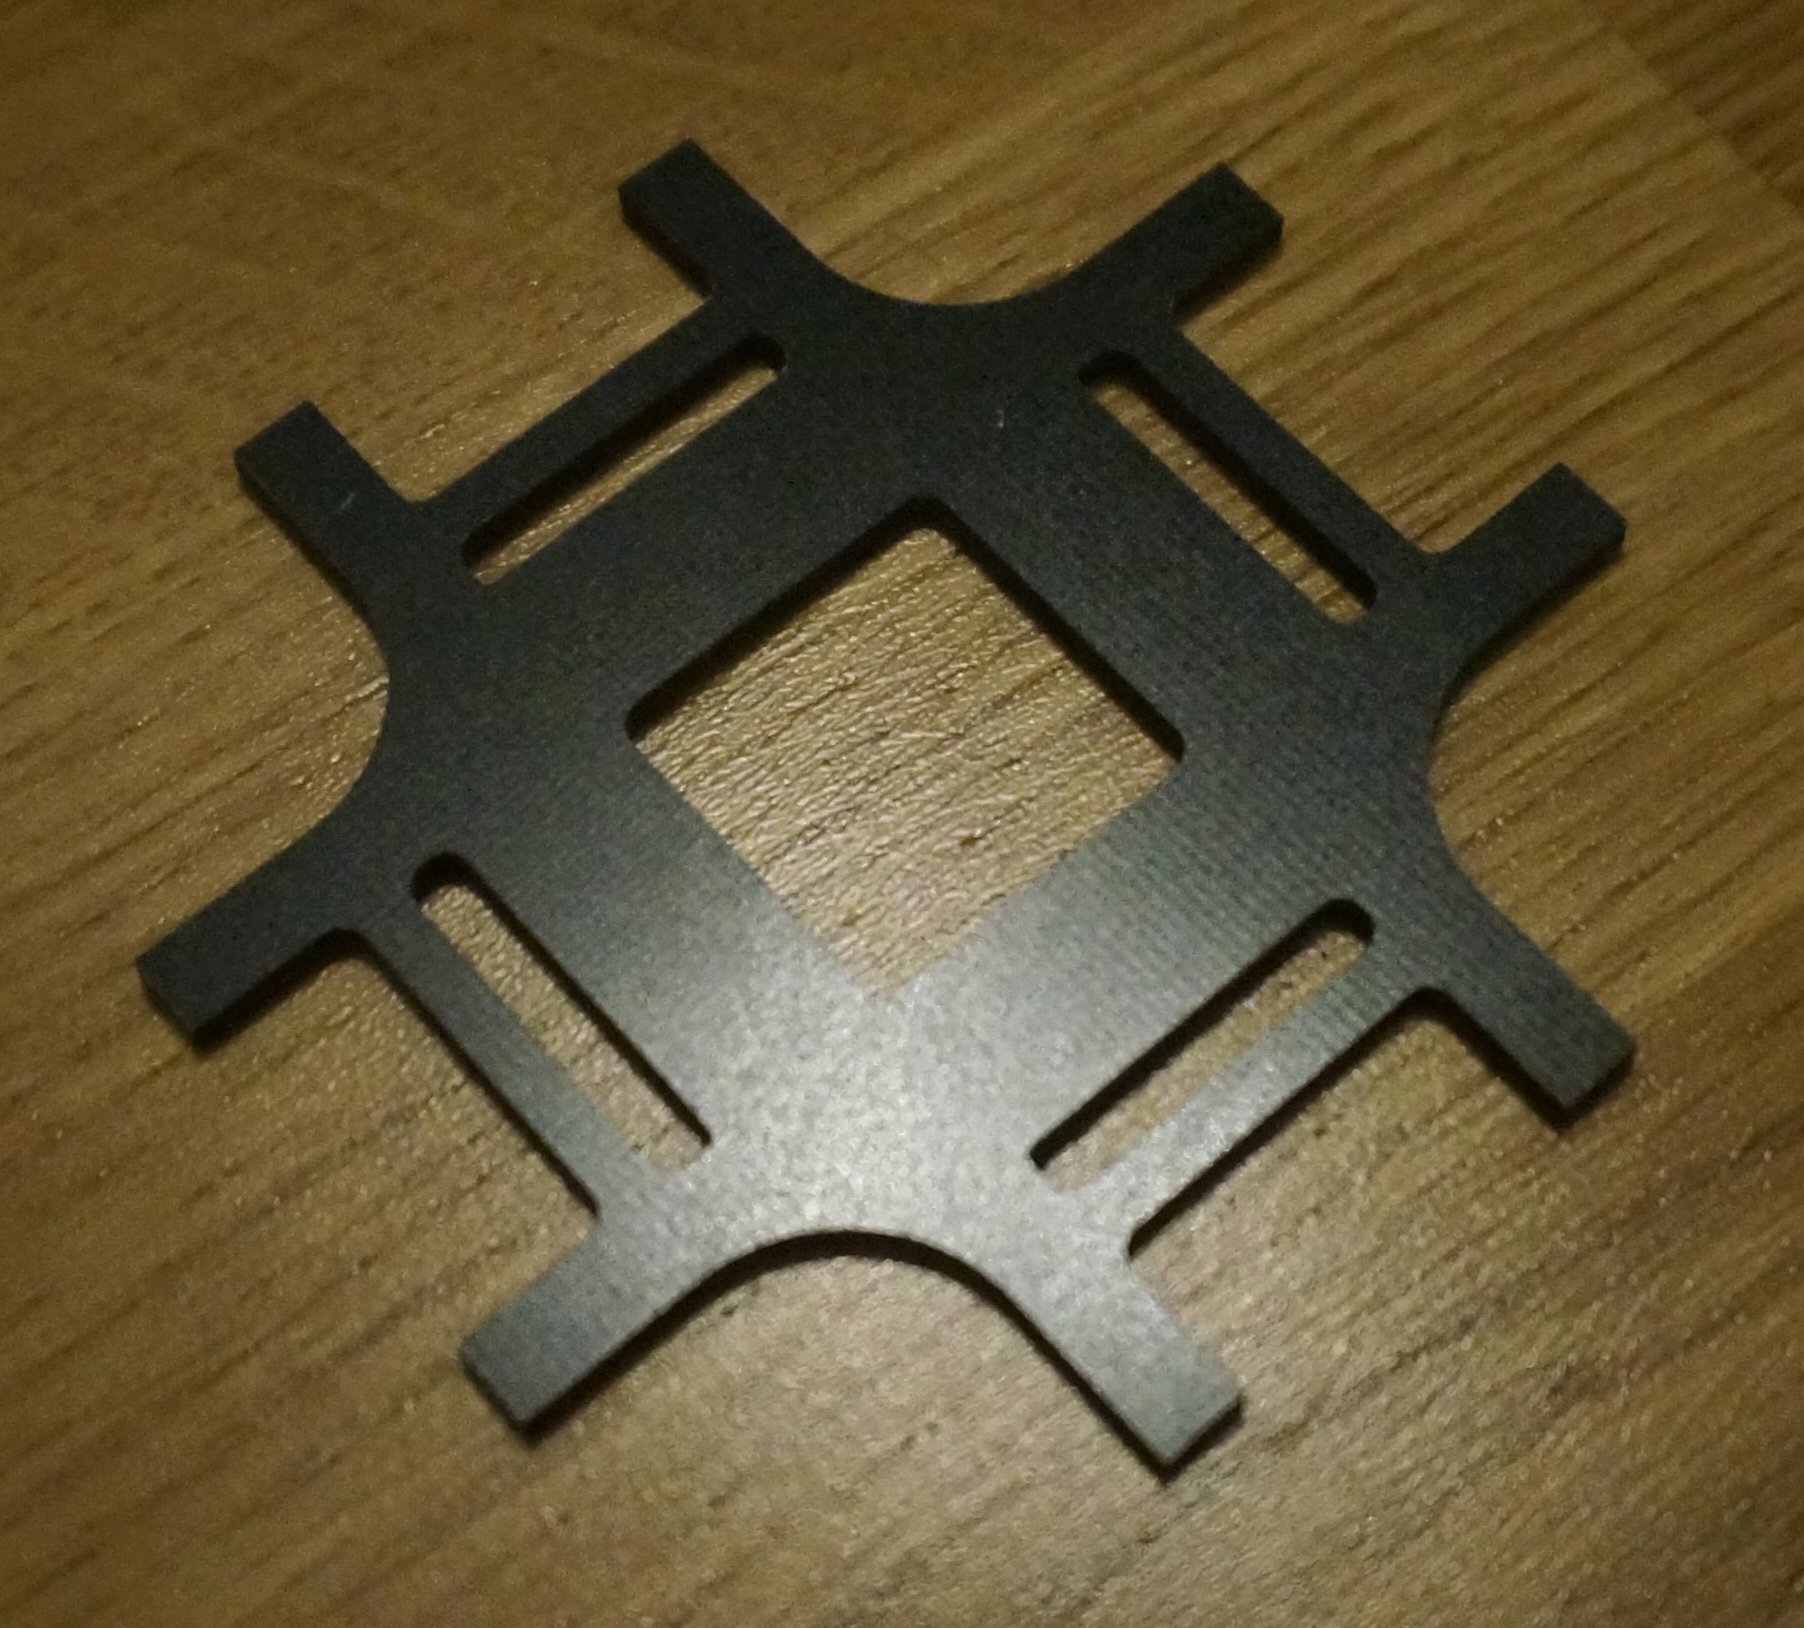
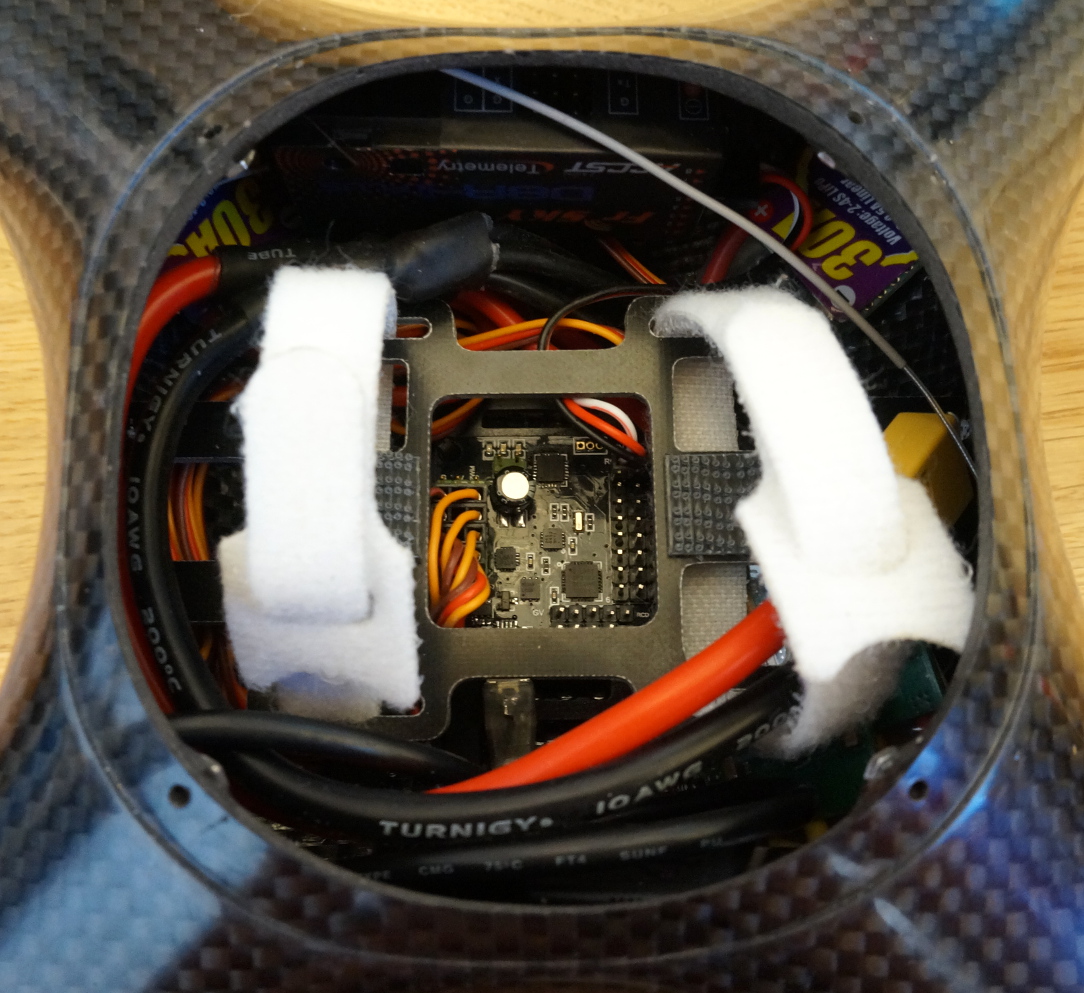
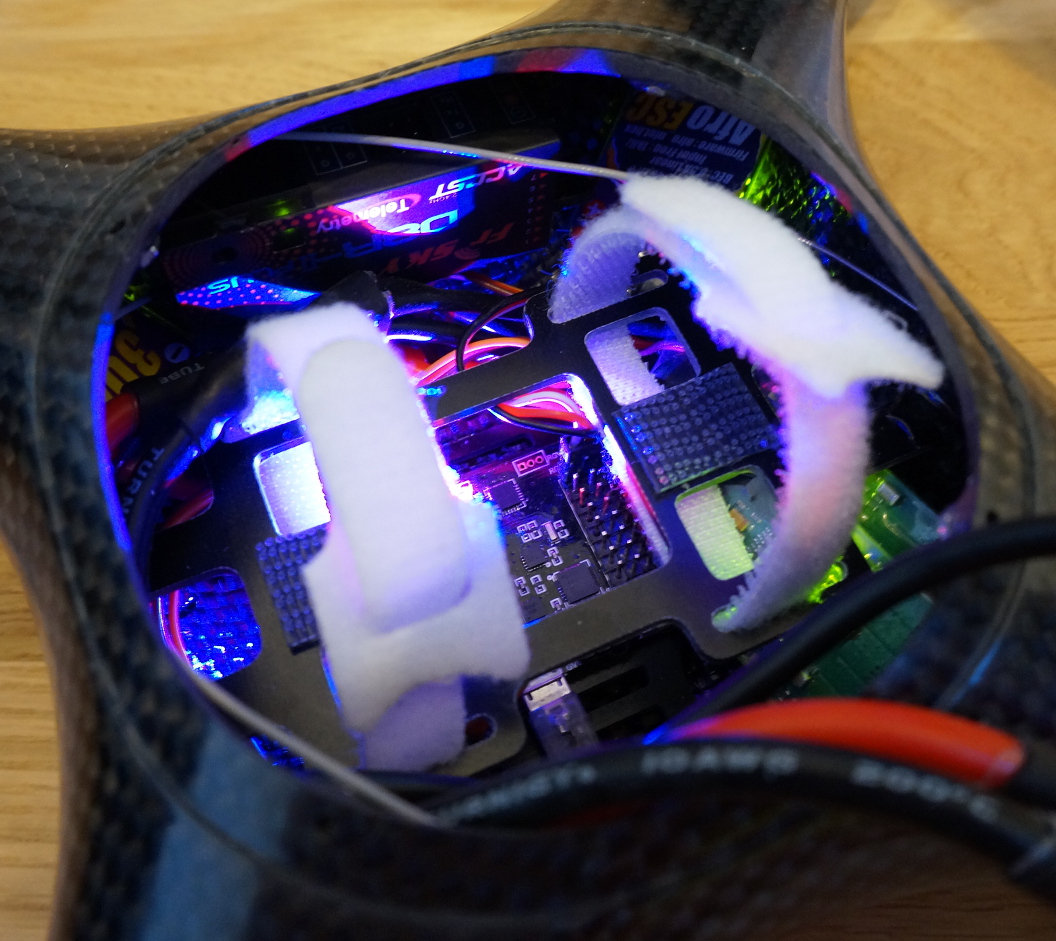
To mount the electronics inside, I made two glass fiber mounting plates. I designed the parts in the Alibre CAD and then machined them using my small CNC milling machine. I had to make them twice since I was not satisfied with the first versions. Measure once, cut twice. The Naze was installed using zip-ties in its corners to the lower plate as there was no possibility to tighten a nut under the plate. The upper plate is for the battery. Both of them are attached using epoxy glue. Two strips of 3M Dual Lock tape hold the battery in place while two velcro straps secure the installation. Other parts, such as motor speed controllers and the receiver are installed to the sides of the interior using a fiber-strengthened two-sided tape. The lid of the electronics compartment is installed using four M2 machine screws which have their nuts fixed inside the frame using epoxy. I spent few evenings drawing fancy latching mechanisms and even considered using magnets to hold the lid in place. But even the small magnets affected the magnetometer compass of the flight controller so much that this was not a possibility. So, the simplest, cleanest and lightest way was to use four screws. Yes, I have to unscrew and attach them every time I change the battery. But well, this time it is form over function! 😉
Finishing touches
As the orientation of this completely symmetrical frame is next to impossible to see while it was flying, a visit to my local car tuning supply store was next in order. Thanks to the recommendation of my friend, I used strips of silver-colored tape to mark the front arms for helping with the orientation. The round belly of the quad received a protective sheet of automotive anti-chipping tape, which prevents it getting scratched in landings. Although it is so easy to fly that I can always land on something soft. And I have yet to find some black machine screws to replace the bright metal ones for the looks but to be honest, I really am quite proud of this little thing. 😉
Flying
The very rigid carbon frame combined with 32-bit processing power, made the Hammer simply the best multirotor I have ever flown. The control response is very sharp and precise and its thrust-to-weight ratio is incredible. The copter hovers at 30-40% throttle, holds its position with ease but when floored, it really goes like hell, no matter what the direction. With plenty of power, it is easy and safe to fly, since it can be recovered with power from any situation. It is a rocket with four propellers. But even during full-throttle climbs and other high power maneuvers, it is very stable and does precisely everything that it is asked to do. It has endurance of ~10 minutes, which is pure enjoyment from the take-off to landing.
The carbon fiber frame attenuates the radio signal when the antennas are placed inside the frame. During the first test flight, even after a range test, the FrSky transmitter module emitted more than a few nasty beeps to indicate that I am soon going to be flying outside the transmitters range. After re-positioning the small antennas, the range improved vastly. I will post a video of the copter in operation when I have more time. Stay tuned! 😉
Special thanks for Denis for this fine frame and for his good advice regarding the electronics and motors! If someone else wants this quite unique frame too, they can be ordered by email from his website at dexmodels.com 😉